Aperture in Photography: A Complete Guide
Aperture can seem like one of the most challenging camera settings to fully understand, but once you understand it, your photography will improve immensely.
Table of Contents
What is Aperture?
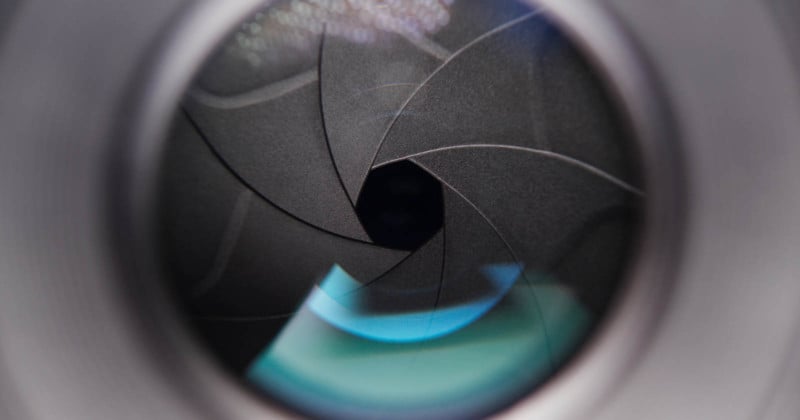
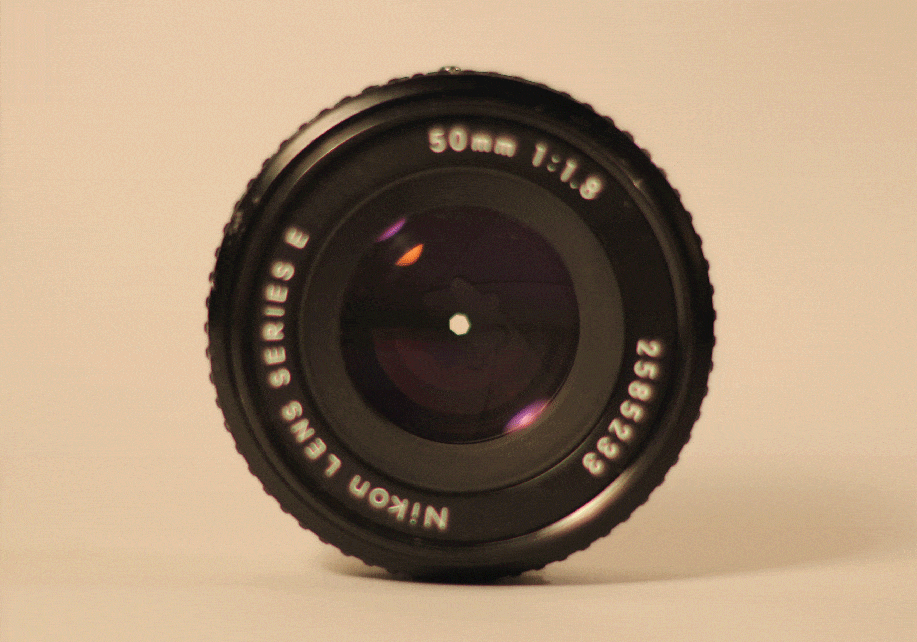
An aperture is an opening that light travels through. In the context of a camera lens, the aperture is an opening built into the lens that can be made larger or smaller by setting the aperture of a lens to different numbers, which are called f-stops (or f-numbers). Each lens has an aperture ring made up of blades that allow it to open and close easily, which gives aperture its distinct symbol.
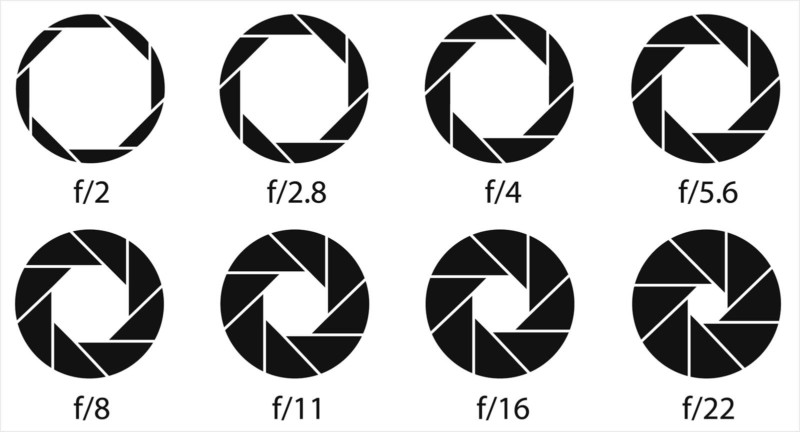
Here is what different aperture sizes look like in real lenses:
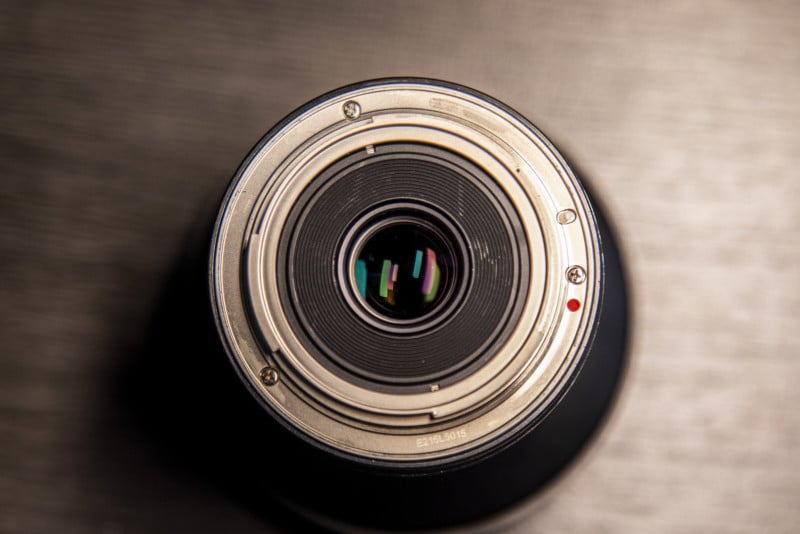
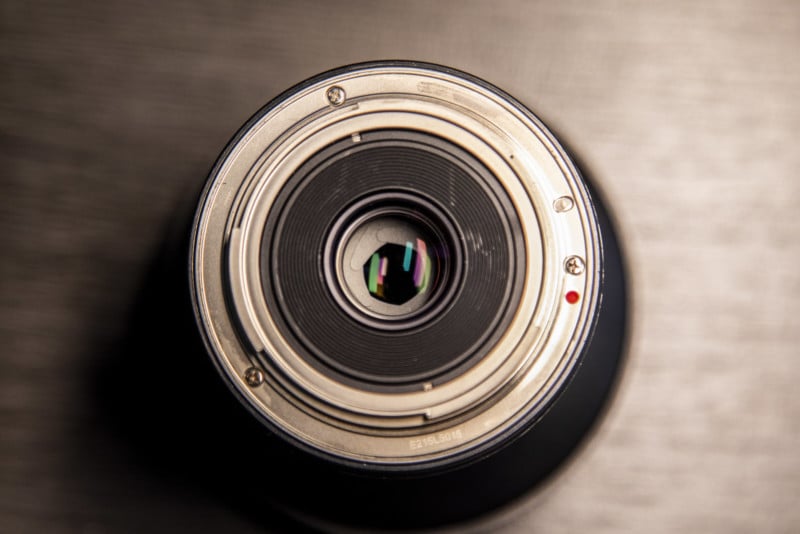
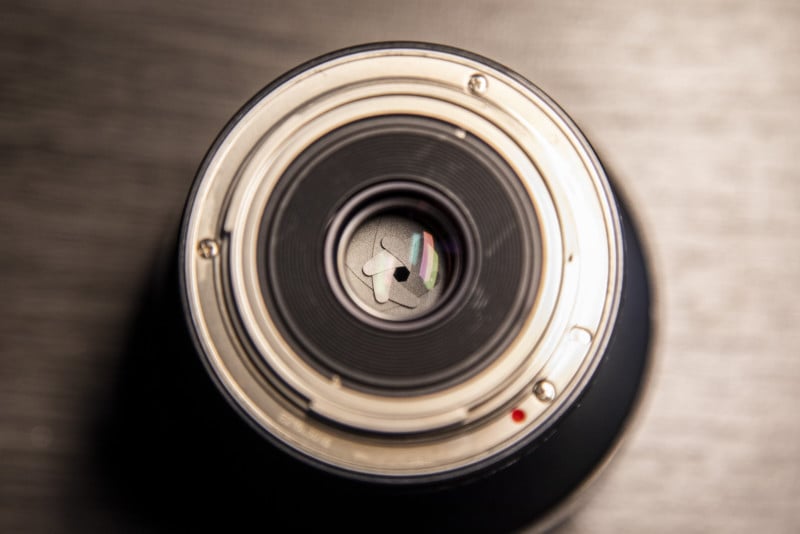
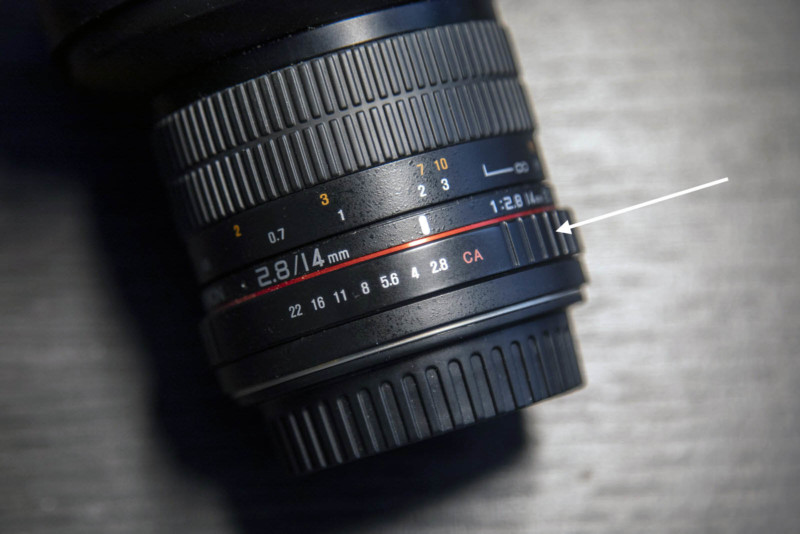
Aperture on modern cameras can typically be adjusted either in the camera’s settings and/or by manually turning a dedicated aperture ring on the lens body.
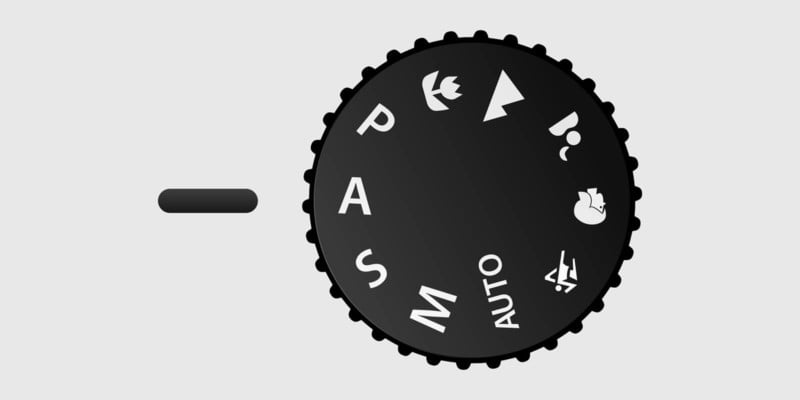
Cameras that offer autoexposure will typically have a mode dial with A or Av, indicating aperture priority mode. In this mode, the photographer chooses an aperture value and the camera adjusts the other variables to achieve what it considers to be an optimal exposure.
The two most noticeable variables that are controlled by aperture are the amount of light that passes through the lens (the exposure) and the depth of field of the resulting image.
How Aperture Affects Exposure
The first variable is pretty intuitive: a smaller opening will let a smaller amount of light through, resulting in a darker exposure. A larger opening will let a larger amount of light through, resulting in a brighter exposure.
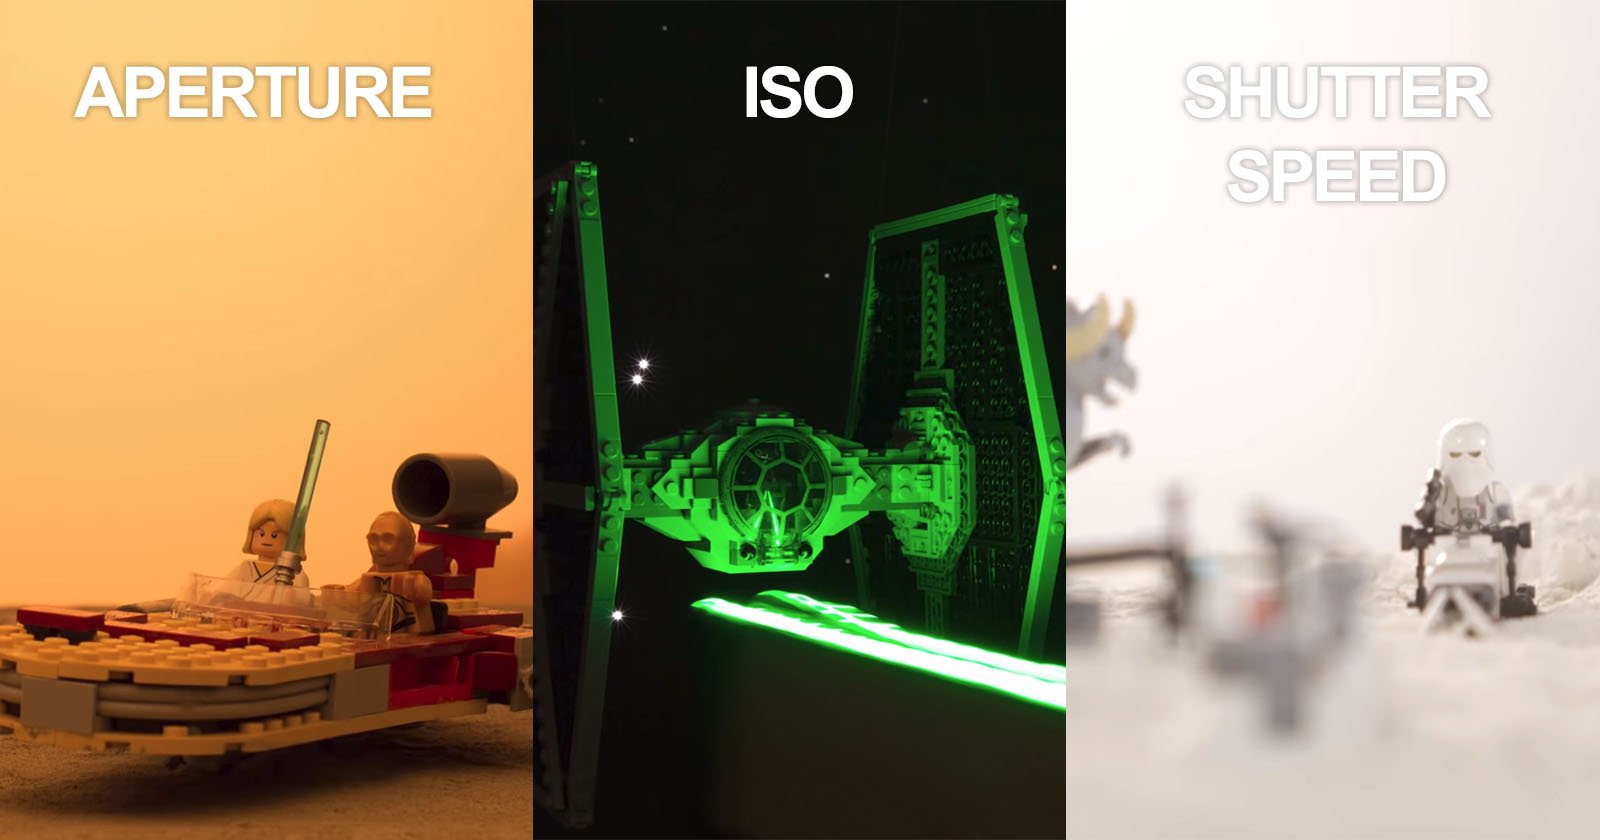
Aperture, along with shutter speed and ISO, is one of the three components of the exposure triangle, which is often used to teach the basics of exposure in photography.
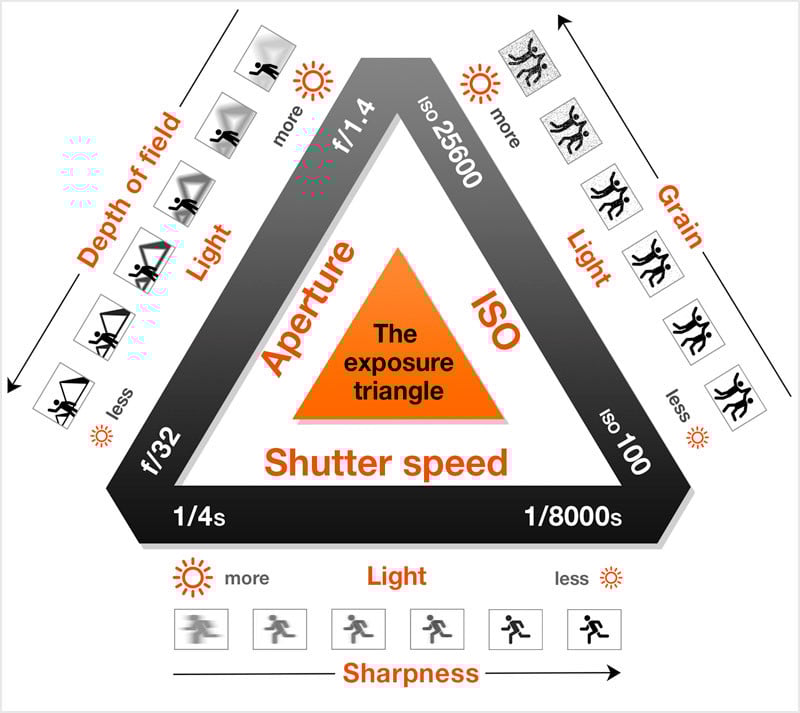
While all three components of the triangle can be adjusted for equivalent exposure values, each one has a different effect on the resulting image. While ISO affects noise/grain and shutter speed affects motion blur and camera shake, aperture is what affects the depth of field.
How Aperture Affects Depth of Field
The second variable is harder to understand but makes sense when you see it in action.
Depth of field is the distance between the nearest and furthest objects in an image that appears in focus.
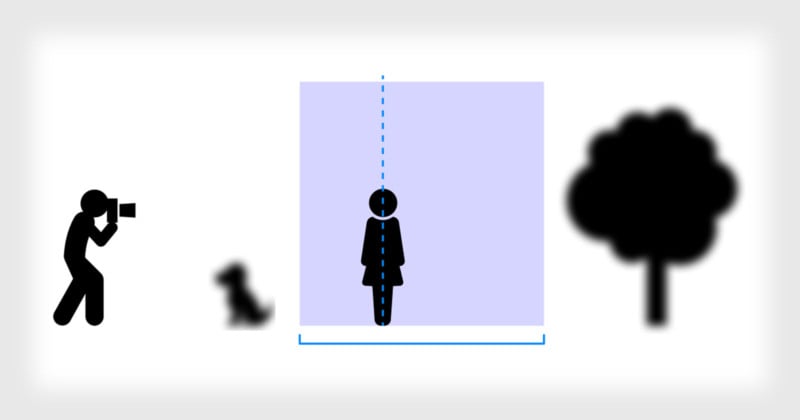
Essentially, depth of field describes how much of a scene could theoretically be in focus. Wider apertures produce a shallower depth of field than narrower apertures, meaning that a wider aperture can produce an image with a more blurry background (or foreground) than a narrow aperture. When talking about aperture, blurry effects in a foreground or background are usually referred to using the term “bokeh”.
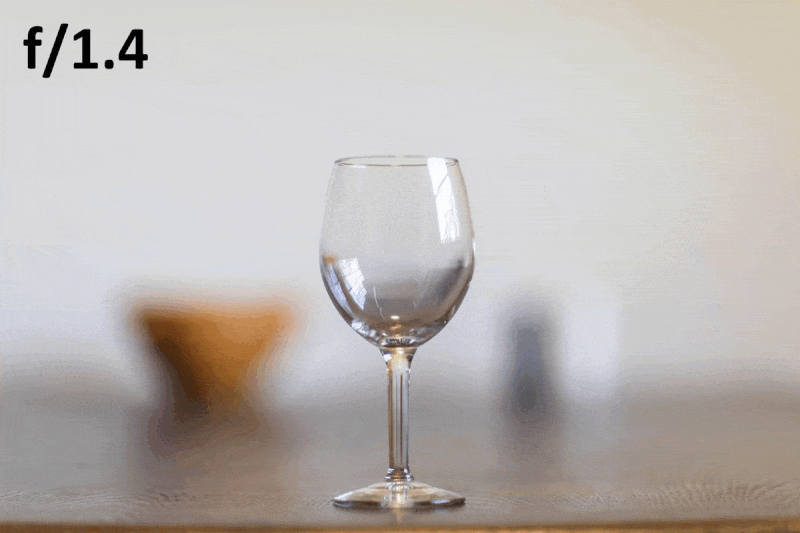
Here is a sequence of photos of the same scene and subject captured at apertures ranging from f/1.4 to f/16 — notice how shallow the depth of field is at low f-stops (as seen in the blurry background) and how deep it is at high f-numbers (as seen in sharper background objects).
A quick recap of what we’ve covered so far: Aperture is an opening in a lens that can change in size. This opening affects both the exposure and depth of field of an image, and we set the size of the opening using numbers called f-stops. Depth of field is the distance between the nearest and furthest objects in an image that appear in focus.
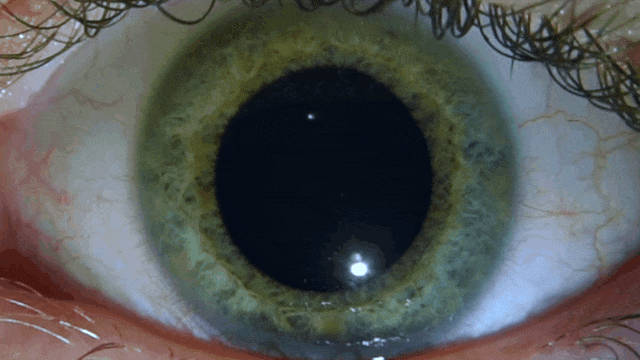
The Human Eye as an Analogy
Have you ever been to the eye doctor and gotten your eyes dilated? You probably got some cool shades to put on after that because your eyes were essentially stuck at “wide apertures” and everything appeared bright. That’s not exactly how it works, but you can think of your pupils dilating as a similar process to opening and closing the aperture in your lens.
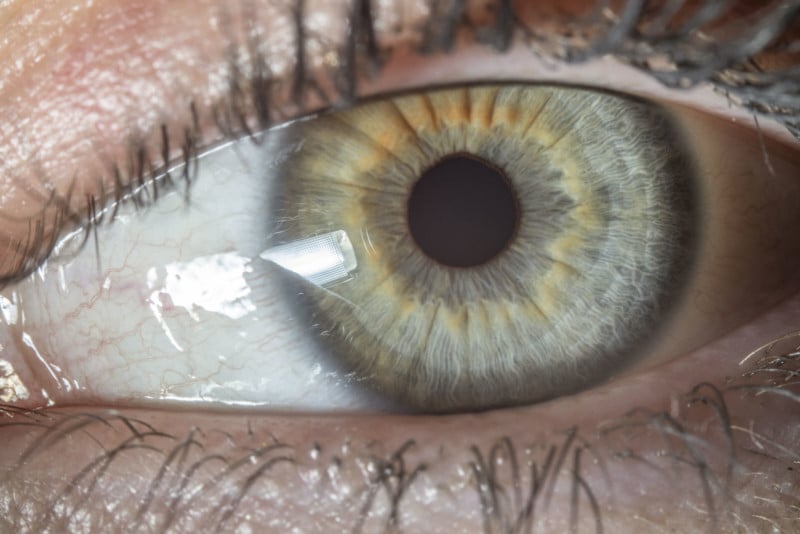
In bright scenarios, our pupils are usually small, letting in a smaller amount of light than when it is dark in the environment. In photography, bright environments usually call for smaller apertures to get a correct exposure.
Confusing Language Surrounding Aperture
Before we get into a detailed explanation of how to use aperture in photography, it’s important to clear up a few confusing (and often misunderstood) terms that relate to aperture.
First of all, the thing that trips everyone up when first learning about aperture is the seemingly-inverse relationship between f-stops and the actual size of the opening. Remember, f-stops are the scale that we use to make an aperture wider or narrower. Here’s what you need to know:
- The lower the f-stop number, the wider the actual opening is. For example, f/1.8 is wider than f/4.
- The higher the f-stop number, the narrower the actual opening is. For example, f/22 is narrower than f/7.1.
Technically, the f-number of an aperture is a fraction, so the relationship makes sense when you think of them this way. Just put a 1 on top of the f-stop, and then the smaller fractions (such as 1/22 or 1/16) will correspond with the smaller openings (and vice versa).
There is also the terminology of stopping up and down.
- Stopping down means increasing the f-stop number, which decreases the size of the opening.
- Stopping up means decreasing the f-stop number, which increases the size of the opening.
Also, be on the lookout for these terms in your aperture-knowledge quest:
- Narrow aperture: An aperture with a small opening.
- Wide aperture: An aperture with a large opening.
- Small aperture: Generally best not to use, because it’s unclear if you are referring to the opening itself or the actual f-stop (number to set the aperture). A small opening corresponds to a larger f-stop number, so using “small” can be confusing. However, this usually is referring to the opening itself, so a small aperture would mean the same thing as a narrow aperture.
- Large aperture: Generally best not to use, because it’s unclear if you are referring to the opening itself or the actual f-stop. A large opening corresponds to a smaller f-stop number, so using “large” can be confusing. However, this usually is referring to the opening itself, so a large aperture would mean the same thing as a wide aperture.
- Maximum aperture: Refers to the widest that an aperture will open to.
- Minimum aperture: Refers to the narrowest that an aperture will close to.
- Shooting “wide-open”: Used when you are shooting with your aperture all the way open, so at the maximum aperture of your lens.
Technical Elements of Aperture
If you aren’t already confused enough, there are a few technical aspects of aperture that are just too interesting to leave out of this article. They aren’t necessary for understanding how to use aperture, but they can be useful and provide explanations for questions that might come up.
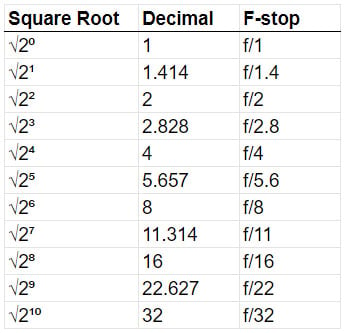
1. The Aperture Scale is a Geometric Sequence
Full f-stops go up in a pattern that may seem strange to beginners:
In reality, the progress of f-stops is a simple geometric sequence: the powers of the square root of two (or the square root of the powers of two). Here is the sequence laid out:
2. F-stops Are Ratios of Focal Length to Aperture
F-stop numbers are actually ratios of the focal length of the lens to the diameter of the opening. This is measured in millimeters, so a 100mm lens with an opening that is 25mm in diameter would have an aperture of 100/25=f/4.
3. Doubling and Halving the Amount of Light
When you step up to a higher f-stop (i.e. smaller hole), you halve the size of the aperture area and therefore halve the amount of light hitting the camera film or sensor. When you step down to a lower f-stop (i.e. larger hole), you double the size of the aperture area and therefore double the amount of light exposing the photo.
4. Narrow Apertures Suffer From Diffraction
Without getting too much into physics, diffraction can have negative effects on your image at narrow apertures. Put as simply as possible, the narrowest apertures (such as f/16, f/22, and narrower) give light a really tiny opening to pass through. This makes waves of light interfere with one another, which negatively affects the sharpness of the details in your image. There might be a greater depth of field, with more of the scene in focus, but the details won’t be as sharp.

5. Different Lenses, Different ‘Optimal Apertures’
Stemming from the last point, different lenses have different “optimal” apertures. They aren’t when the lens aperture is wide open, and they aren’t when the lens is fully stopped down (the aperture is closed as much as possible).
For most lenses, the sharpest results are produced when the aperture is somewhere between f/4 and f/8, but it varies between different lenses. Reading information or testing yourself can be the best way to determine the optimal aperture on a specific lens
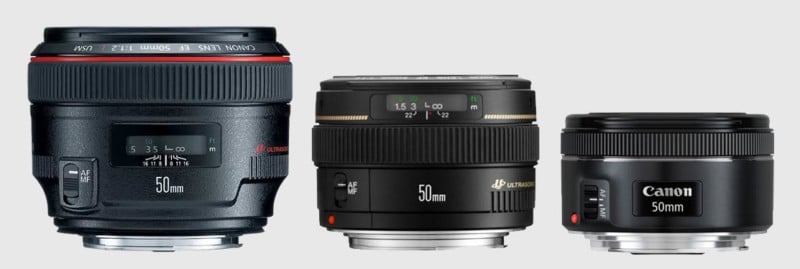
Choosing a Lens with Aperture in Mind
Along with focal length, the aperture of a camera lens is one of the main attributes that describes its characteristics and abilities — after all, every camera lens is generally referred to as “[focal length/range] f/[maximum/variable aperture]”. For example, the Canon 50mm f/1.8, the Nikon 24-70mm f/2.8, or the Sony 16-50mm f/3.5-5.6.
Variable Aperture
Prime lenses (i.e. those with a single fixed focal length) and most high-end zoom lenses have one maximum aperture that can be used across the entire focal range. Most lower-end zoom lenses (and certain high-end ones) feature what is known as variable aperture.
For example, Sony’s 16-50mm f/3.5-5.6 lens allows the user to select a maximum aperture of f/3.5 when shooting at its widest focal length of 16mm, but when you zoom in to the other end of the range and shoot at 50mm, you are limited to a maximum aperture of f/5.6.
“Fast” Lenses
A large maximum aperture is often one of the main features of higher-end, professional-grade camera lenses. The larger the maximum aperture, the more versatile a lens is in low-light situations and the shallower the depth of field it can capture.
Lenses with large maximum apertures are popularly referred to as “fast” lenses. The wider the maximum aperture, the faster the lens. For example, an 50mm f/1.2 lens is faster than a 50mm f/1.4, which is in turn faster than a 50mm f/1.8.
Price, Quality, and Portability
Generally speaking, faster lenses will be more expensive, better in image quality, larger, and heavier than their equivalent slower counterparts.
While there are strong benefits to purchasing a faster lens, there are also downsides that one needs to factor into the purchasing decision.
Faster lenses can be significantly more expensive than a slower equivalent. For example, the Canon EF 50mm f/1.2L USM lens costs $1,399 while the
Canon EF 50mm f/1.4 costs $399 and the Canon EF 50mm f/1.8 STM costs just $125. For the price of one 50mm f/1.2, a photographer could buy about 11 copies of the 50mm f/1.8.
The 50mm f/1.2 is also significantly larger and weighs 1.28 pounds (580g) while the 50mm f/1.8 weighs just 0.36 pounds (161.59g).
And unless you often shoot at f/1.2 or f/1.4, you can likely achieve satisfactory image quality with most modern lenses at smaller apertures closer to the lens’s aperture “sweet spot.”
So the question is: are you willing to pay significantly more money for a significantly larger and heavier lens in order to shoot in very low-light situations and/or at very shallow depths of field? And do you need the absolute best in image quality?
Unless your answer is an emphatic yes (or unless you have extremely deep pockets and money is no object to you), you may want to consider going with a slightly slower lens that could be enough for your needs in the vast majority of situations.
How to Use Aperture in Different Scenarios
Every situation in photography requires some sort of adaptation. However, it’s good to be able to have a general base aperture for different scenarios, and then you can adjust from there. Here are a few different scenarios and thought processes that you should practice going through to choose the right aperture.
Landscape Photography During the Day
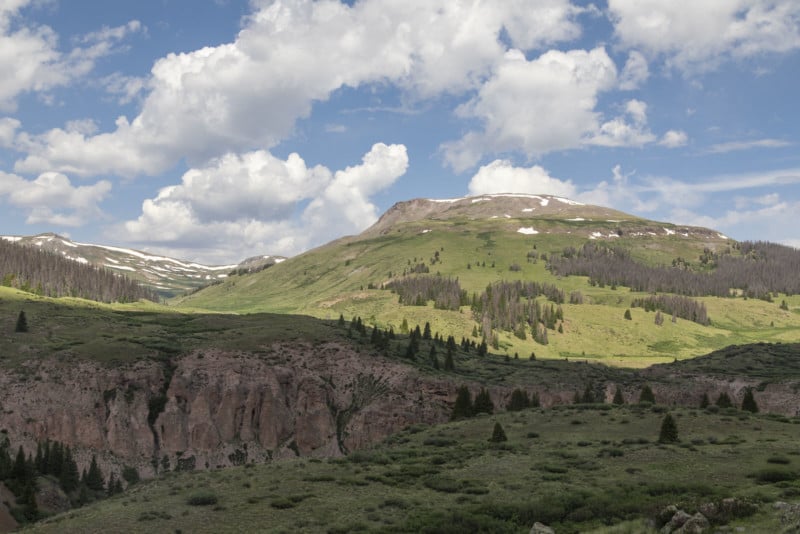
When shooting landscape photography, it’s probably bright outside, or at least acceptably bright, so you don’t need to use a wide aperture. For most landscapes, you’re probably trying to get a large area in focus. Whether it’s a mountain, seascape, or field of flowers, landscapes are big, which calls for a narrow aperture.
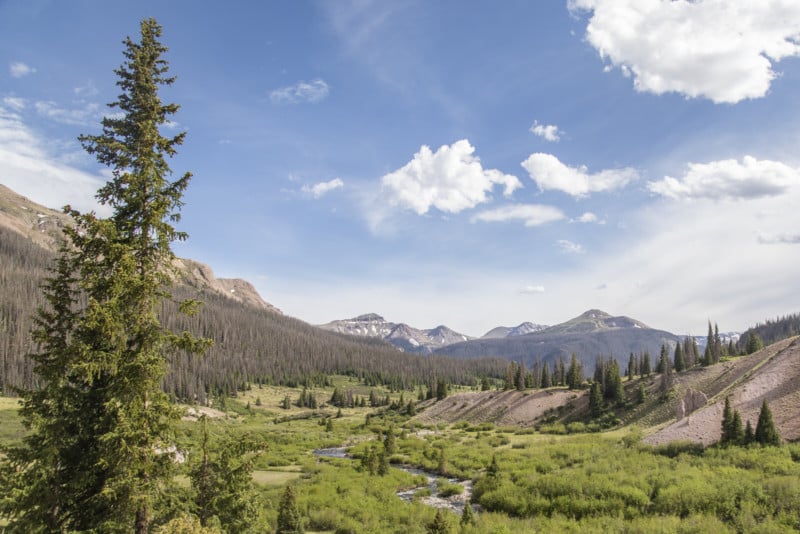
This will give your image a larger depth of field, and more of your image will be in focus. Start with something like f/8 and see how that goes. Remember, you could make your aperture more narrow to get more in focus, but diffraction (explained in the technical section above) will make details less sharp at very narrow apertures. This is where you have to balance depth of field with sharpness and decide what matters most to you.
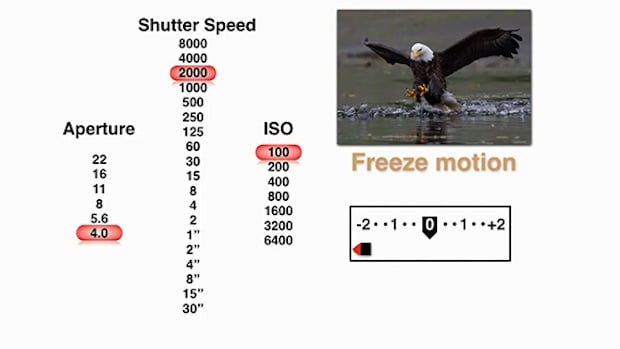
Sports Photography, Night or Day

One of the biggest considerations in sports photography is how you are going to freeze your subject and avoid motion blur. This is accomplished by using a very fast shutter speed, usually something like 1/500, 1/1000, or faster. In order to accomplish your goal, you probably need to set your aperture as wide as it will go (we call this shooting wide-open). This will give your exposure maximum light in terms of aperture, so then you can use faster shutter speeds. There is a danger in your shutter speed being too slow, but if you’re trying to freeze motion, you can’t really make it too fast. Keep in mind that shooting wide-open will give you a shallow depth of field, so your focus will need to be more accurate in order to get your subject in focus.
Portrait Photography
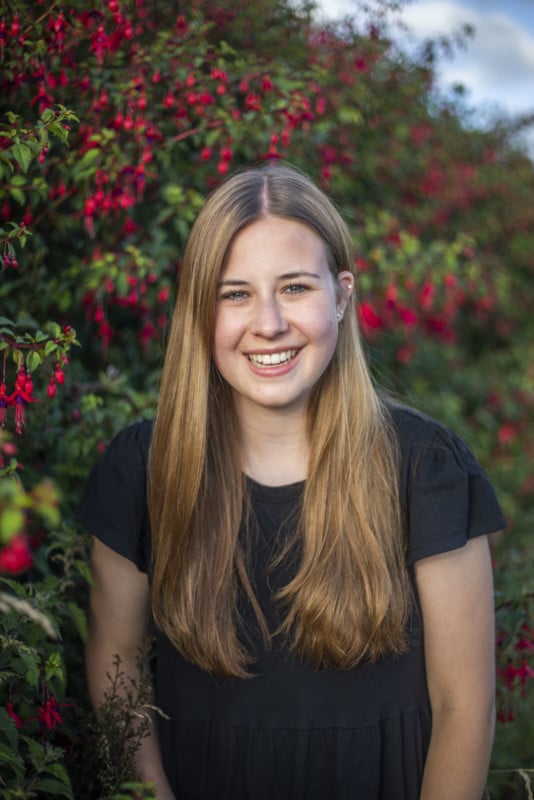
For most portraits, the blurred background effect is desirable, and wide apertures are used. Lenses that have maximum apertures of f/1.8, f/1.4, or even f/1.2 are often referred to as “portrait lenses” because they are used at their maximum apertures to get nice blurry backgrounds in portraits. One thing to consider is that it’s fairly simple to get one person’s eyes in focus, so you can shoot an individual at a very wide aperture with great success. However, with group portraits, people tend to be in slightly different planes, and can easily leave your focal plane if you have a really shallow depth of field. It’s possible to photograph a group at a very wide aperture, but if you’re trying to work efficiently, you’d be best stopping down to something like f/4 or f/5.6 so you don’t risk people’s eyes being out of focus. You might have a less blurry background, but it should still look nice.
Macro Photography

In macro photography, the distances you’re working at usually produce very shallow depths of field. This means that you may want to stop down more than you’d think so that you get more of your subject in focus with a larger depth of field. However, this may not be possible to some extent, because macro photography also requires light that can be blocked when you’re so close to your subject. This is where you have to make the call and decide whether lighting or depth of field is your main priority, and learn how to deal with the consequence of the one that you don’t pick to be a priority.
Still-Life or Product Photography
For most still-life and product photography, the answer is simple: you want it to be in focus and it’s not moving, so you can use a narrow aperture. If your still-life is large in scale, you may need to go to something like f/14, but again, beware of diffraction. If it’s not that large and you want to be mindful of detail sharpness, you can experiment to find the optimal aperture of your lens.
Still-life is a good place to experiment with aperture because you can really use any aperture with minimal consequences and see the effects of each one.
Photography of a Musical Production

This example is included because it’s one of the examples where it might feel like there’s no right answer. You probably want to get a fairly large depth of field, but it depends on what kind of shot you want. The biggest issue with most musical productions is that there will be very little light. Even though the stage might appear to be well-lit, chances are good your camera will disagree. You’ll likely have to shoot wide-open or somewhere near there, and just get creative to make sure you get shots with more than one person in focus. Wide shots and shots with people right next to each other will work just fine when shooting wide-open. In scenarios that are as dark as these, you usually just have to use your maximum aperture and then deal with the consequences.
The Sunburst Effect Using Aperture
Here’s a fun thing to play around with. Have you ever wondered how the sunburst/starburst effects are created in images of the sun setting or amongst a bunch of trees? Stop down to something like f/14 or f/16 and make sure the sun isn’t shining directly into the camera. If it’s partially blocked by the horizon or another object, then the sun should appear to have rays coming out of it in a sunburst effect.
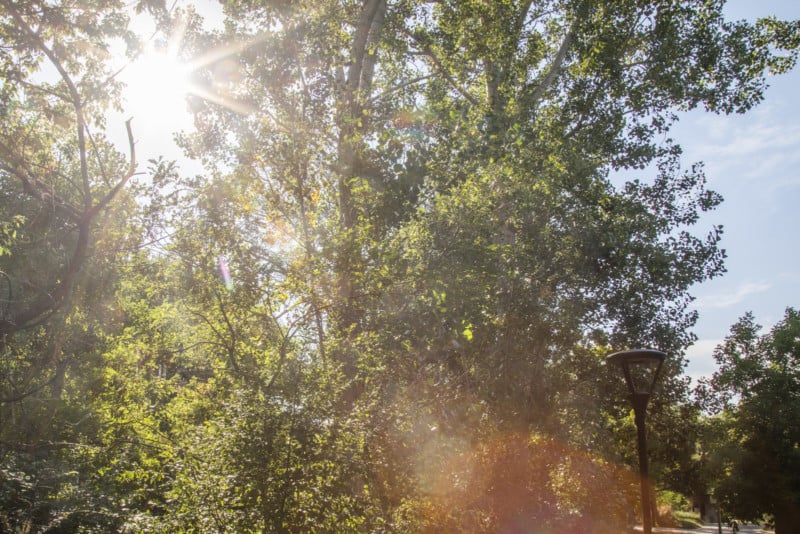
The number of rays actually depends on the number of blades that make up your aperture ring. There will always be an even number of rays, and if you have an odd number of aperture blades, the number of rays will simply double to make an even number. If you have an even number of aperture blades, then the number of rays equals the number of blades.
A Printable Aperture Cheat Sheet
Here’s a handy infographic guide to aperture in photography that you can print out and carry around with you as a cheat sheet if you are just starting out as a photographer:
Conclusion
What are you waiting for? Find out how to control aperture on your camera (or it may even be on your lens) and go explore. Aperture is one aspect of photography that you’ll only master if you practice. Give yourself the challenge of photographing the same scene at every aperture that your lens will allow. Try to ask yourself why the image is getting brighter or darker, and also try to notice the effect of changing the aperture on the depth of field.
Learning aperture is essential to becoming a great photographer, and it’ll open a door to many new possibilities within photography.
Image credits: Header photo licensed from Depositphotos. All other photos, unless otherwise noted, by Justin Hein.