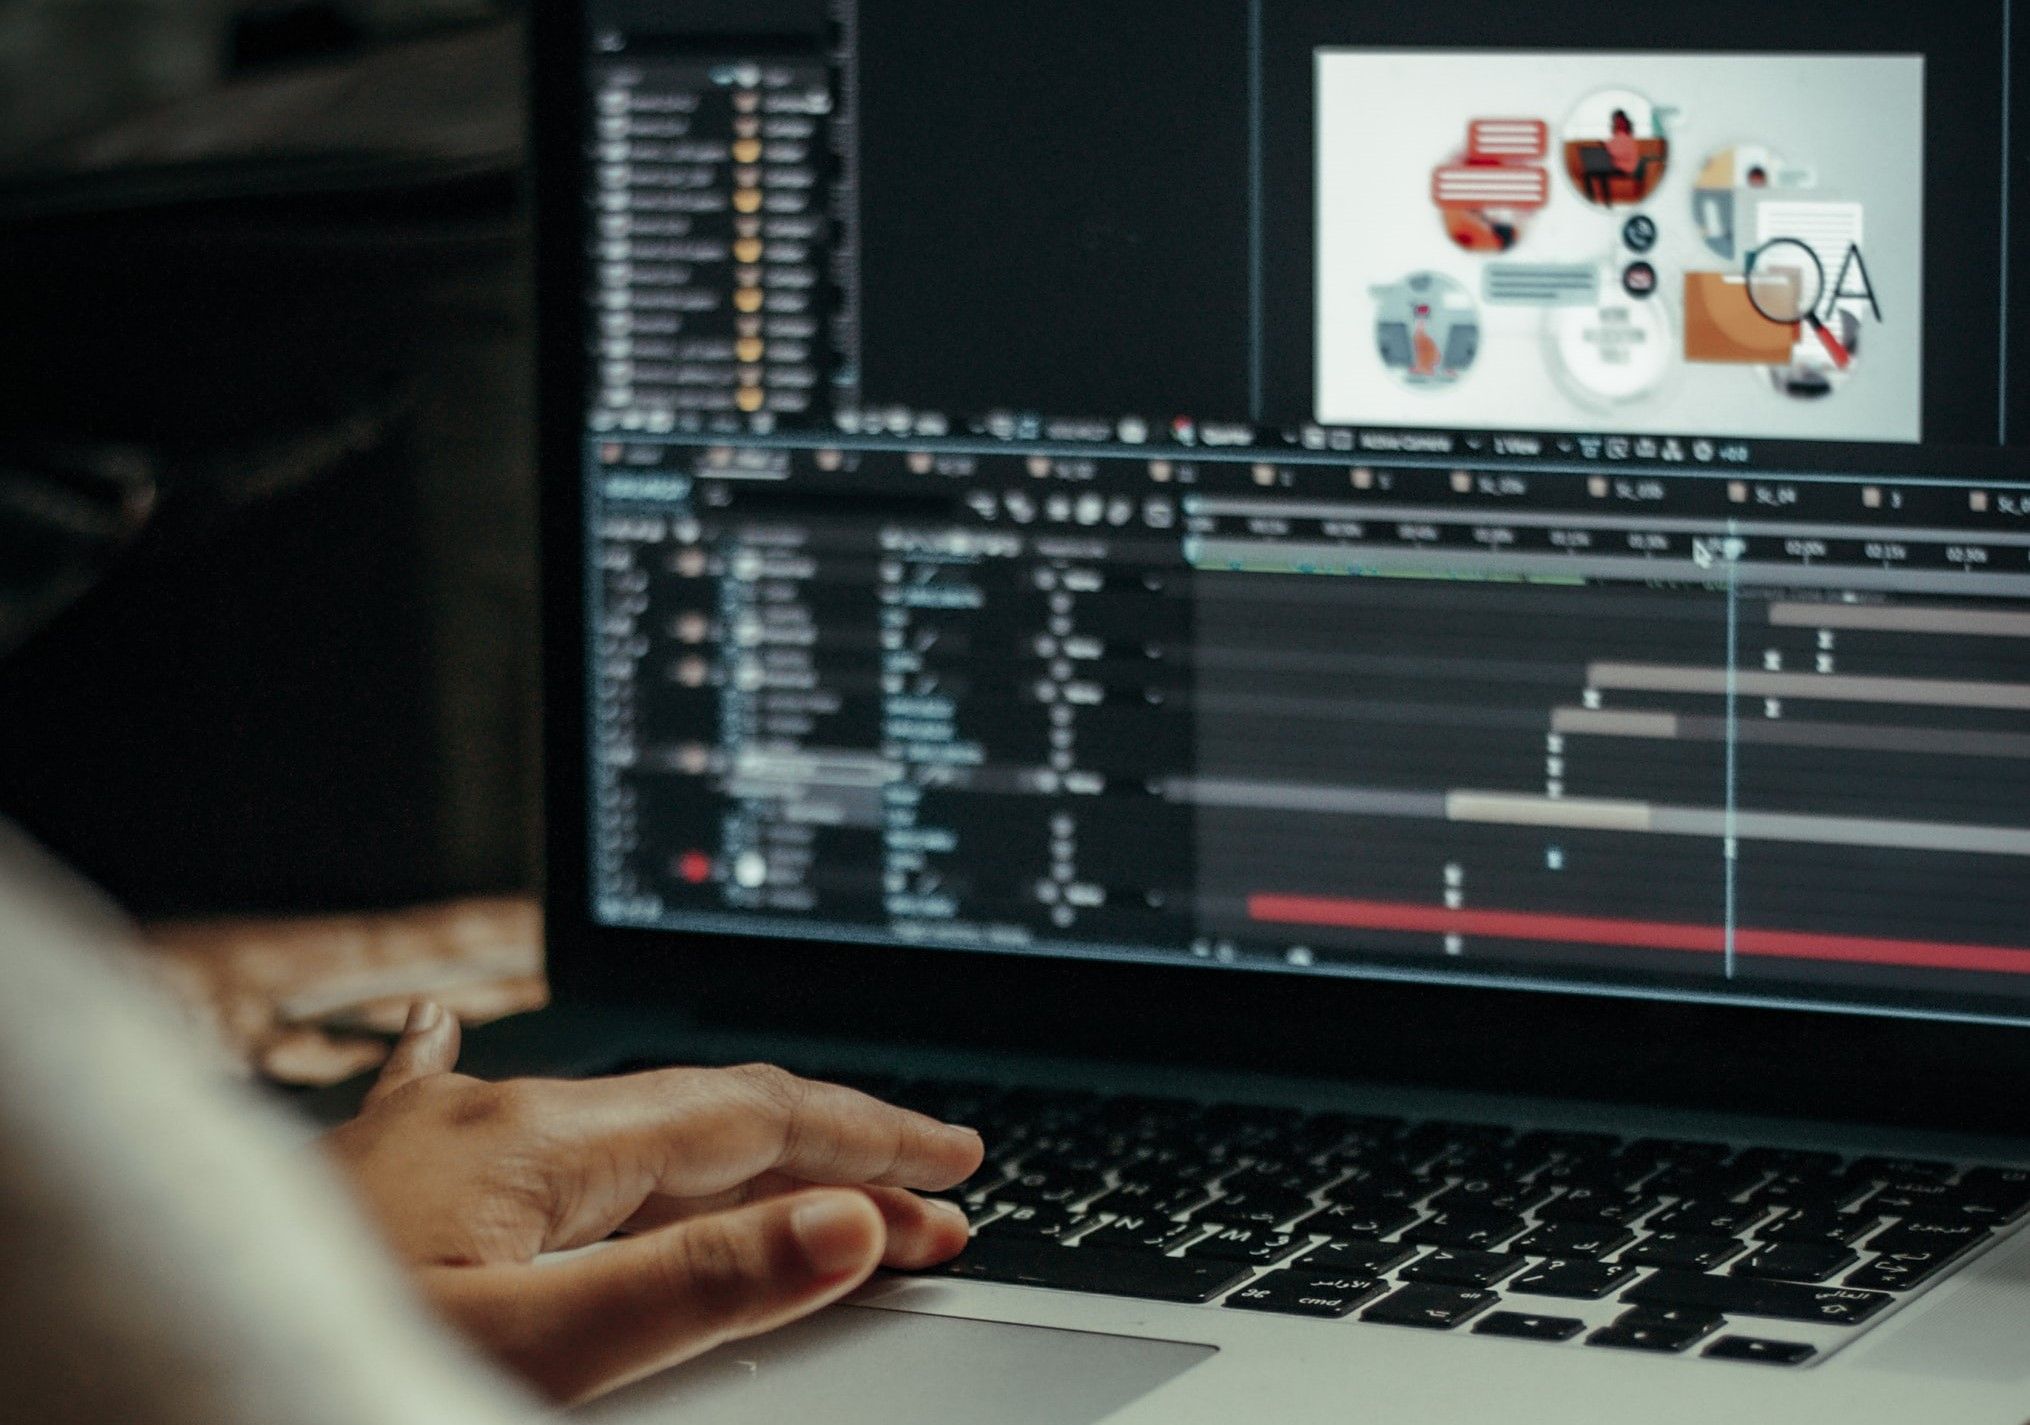
Everyone is a video editor these days; seriously, this form of content creation is taking over social media. Log into your Instagram or TikTok account right now, and you'll eventually come across a post of someone who tried their darn best to create an aesthetic video edit.
If you've been trying your hand at editing but keep getting stuck, you're in the right place. We're going to discuss all the fundamentals you need to know.
1. Use an Editor You're Comfortable With
First things first: if you want to make great edits, you're going to have to be comfortable with the program you're using to create them and understand how to use all (or at least most) of its features. Trust us, if you don't know how to manipulate the program, it's going to translate into your edits, plus, the rest of these tips will be pointless to you.
And don't make the mistake of thinking computer software is superior, so don't force yourself to learn a complex program just for the sake of it. Mobile video editing apps are rolling out more and more advanced features as we speak; this level of accessibility is one reason why so many have taken up video editing in the first place.
For those who want to stick to computer software, you can never go wrong with After Effects or Sony Vegas. If you're more comfortable editing on your phone, Video Star, Alight Motion, and CapCut are the best of the best. There are tons of editing tutorials for all of these programs—definitely watch them, it will help you learn the program in no time.
2. Use High-Quality Clips and Images
This one is a no-brainer. Every good edit has a strong foundation, and this consists of high-quality clips and images. Even if you're going for a vintage aesthetic, you can always add a filter that gives the illusion of lower-quality footage in the editing stage.
Most editors source their clips from YouTube or other mainstream social media platforms. You can download them or use a high-quality screen recorder. And if you can't get your hands on a good quality version of that clip or image that you just have to have, look for a sharpness feature in your editor and turn up the values.
3. Keep It Moving
Never allow your clips to become stagnant; you want every part of an edit to have some degree of movement. There are three things you can do to achieve this, and we recommend using all of them together.
Panning
Panning makes everything look more captivating. This can be achieved by changing the position of or rotating the clip in any direction, as well as zooming in and out (combine these actions for the best results). As long as it flows smoothly into the adjacent clips.
Effects With Movement
For a truly dynamic edit, add an effect that exhibits movement. For example, the Wiggle and Shake effects in After Effects, and Sprocket Jitter in Video Star are great ways to keep things in a constant moving state.
Transition Shakes
We recommend adding shakes to your transitions; it will make one clip move into the next with a bang. A transition shake follows a similar editing structure as panning an entire clip, except, you're adding that movement only to the beginning of the clip, and it's a little more hardcore.
4. Use Bezier (Ease) Interpolation
If you're still new to video editing and don't understand what keyframes are and how interpolation works, check out this article laying out all those details. In simple terms, Bezier interpolation is a lot more flexible and lets you customize whatever happens between two or more keyframes. This is something you can't go without when editing clips that move around.
You want to make your edit look natural and avoid it from looking like a PowerPoint presentation at all times. How do you do this? Avoid linear interpolation, which moves at a mechanical-looking fixed pace, and opt for Bezier interpolation so that there can be variation in the rate of movement, like how things move in the natural world.
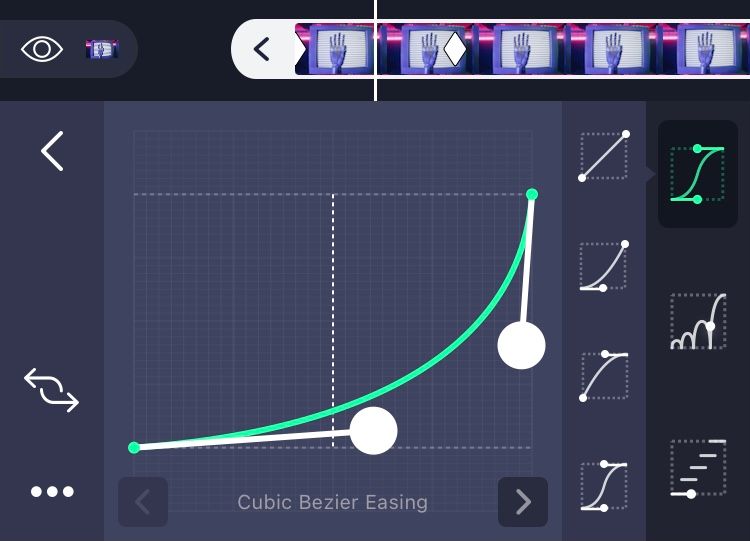
Below is a Bezier keyframe curve in Alight Motion. The effect: a simple zoom-in. During playback, the clip will slowly start zooming in, and that movement will get exponentially faster until it reaches the end. Linear interpolation would have given you a straight line, and the zoom-in effect would have moved at a fixed velocity—boring and unnatural.
5. Add Motion Blur
If you're editing with movement, adding motion blur is non-negotiable. Without it, your clips will look like they're moving like robots; natural-looking movement always has some blur. There are different types of motions blur, including RSMB, and sometimes it'll have a different name, such as "tracking blur".
6. Everything Looks Better in Slow Motion
Unless the original state of a video clip is quintessential to a story you're telling, make it slow motion. We've all watched a movie where the producers slowed down a car crash, or when the main character does that slo-mo walk after getting a makeover, hair blowing in the wind and all—it just looks awesome.
Remember, if you're going to slow down a clip, you want to avoid it looking choppy (this will happen when you "stretch out" its frames). Depending on the editor you're using, enable either optical flow or motion blur to smooth out that stutter in the playback; it will auto-guess and fill in the missing frames.
7. Color Correct Before You Color Grade
Yes, there's a difference between color correcting and color grading. The only thing they have in common is the fact that you'll be manipulating the colors, hues, brightness, contrast, shadows, and exposure for both.
Color correction is the process of making everything look as natural to the human eye as possible, as well as achieving a consistent visual balance across multiple clips. This will also make color grading much easier.
After you've neutralized everything, it's time to get creative. This is where color grading comes in. You can do whatever you want in this step. Want your whole edit to look like a purple haven? Nothing's stopping you.
8. Customize Presets
Every beginner video editor will rely on presets, and there's nothing wrong with this. Even more advanced editors will use a preset here and there, or perhaps they'll export their own settings as a preset in order to use it later on.
The issue with presets: there's no one-size-fits-all. After you apply a preset, fine-tune the graphs and values so the effect suits and compliments your clip. This is also a great way for a beginner to better learn the program they're using and discover new techniques.
9. Use a Beat Detector
A video edit without audio is pretty much non-existent. This means you're going to need to work with audio in your video editor. Audio is a vital element of edits with movement; the beat of the audio usually determines when and how a transition happens.
Look at how this editor places marks on the timeline in Sony Vegas so that the beat will line up with the video transitions:
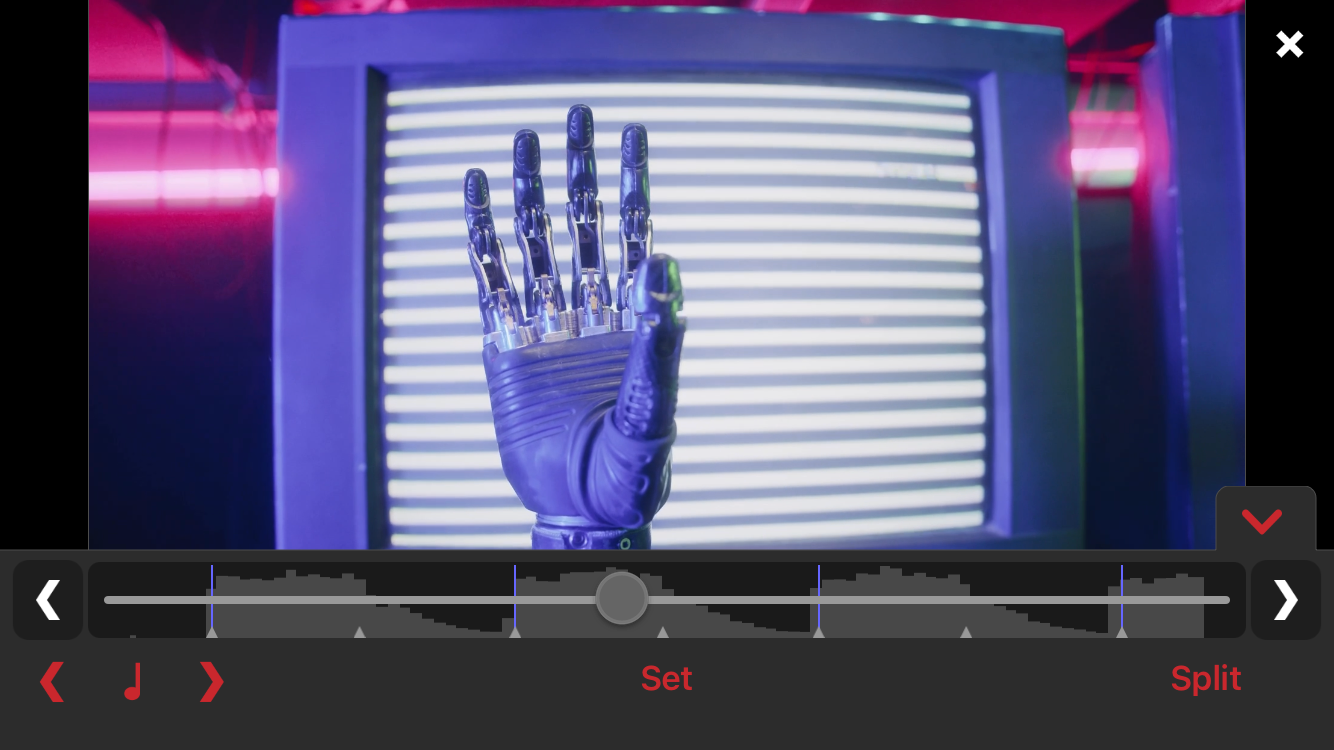
A beat detector will make your life easier, however. It will let you know exactly where to cut your video into clips or when to apply a certain effect, and this will make the visuals sync up with the audio in no time. Below is the beat detector in Video Star; those little spikes are lifesavers.
10. Mirror the Edges
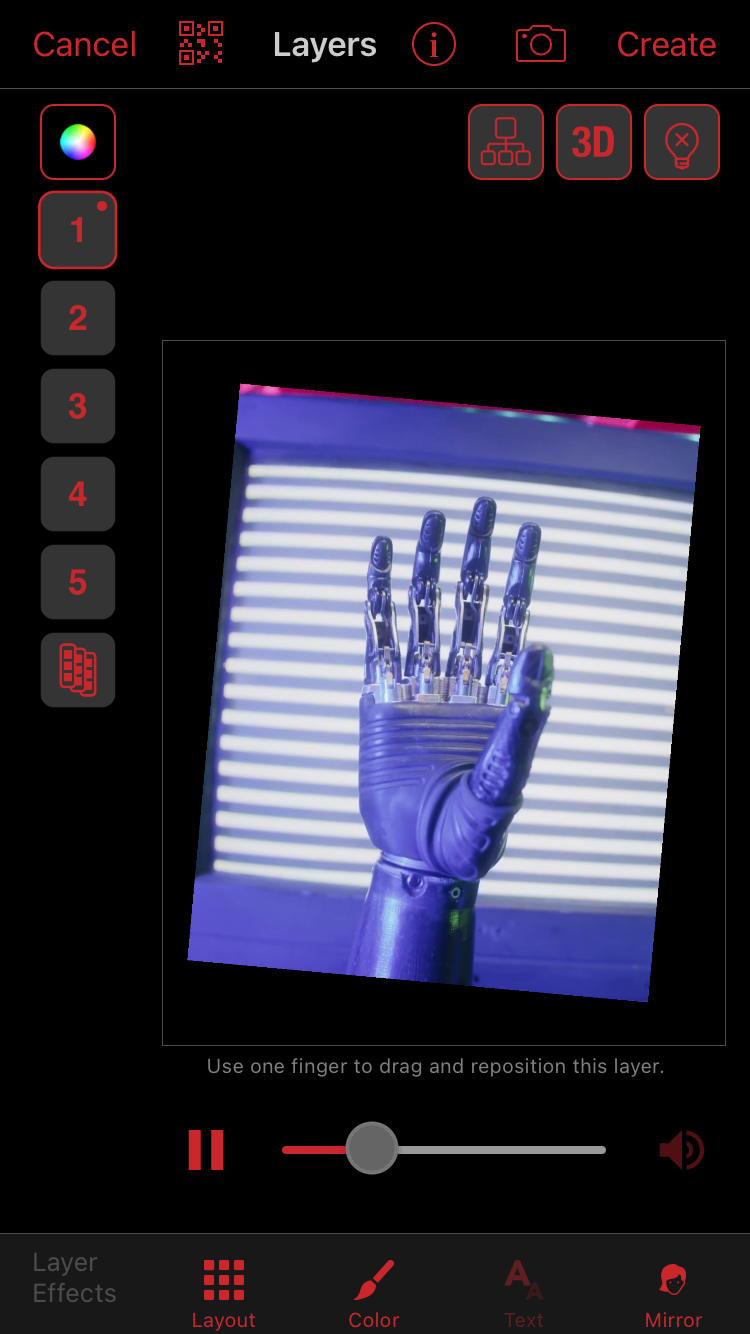
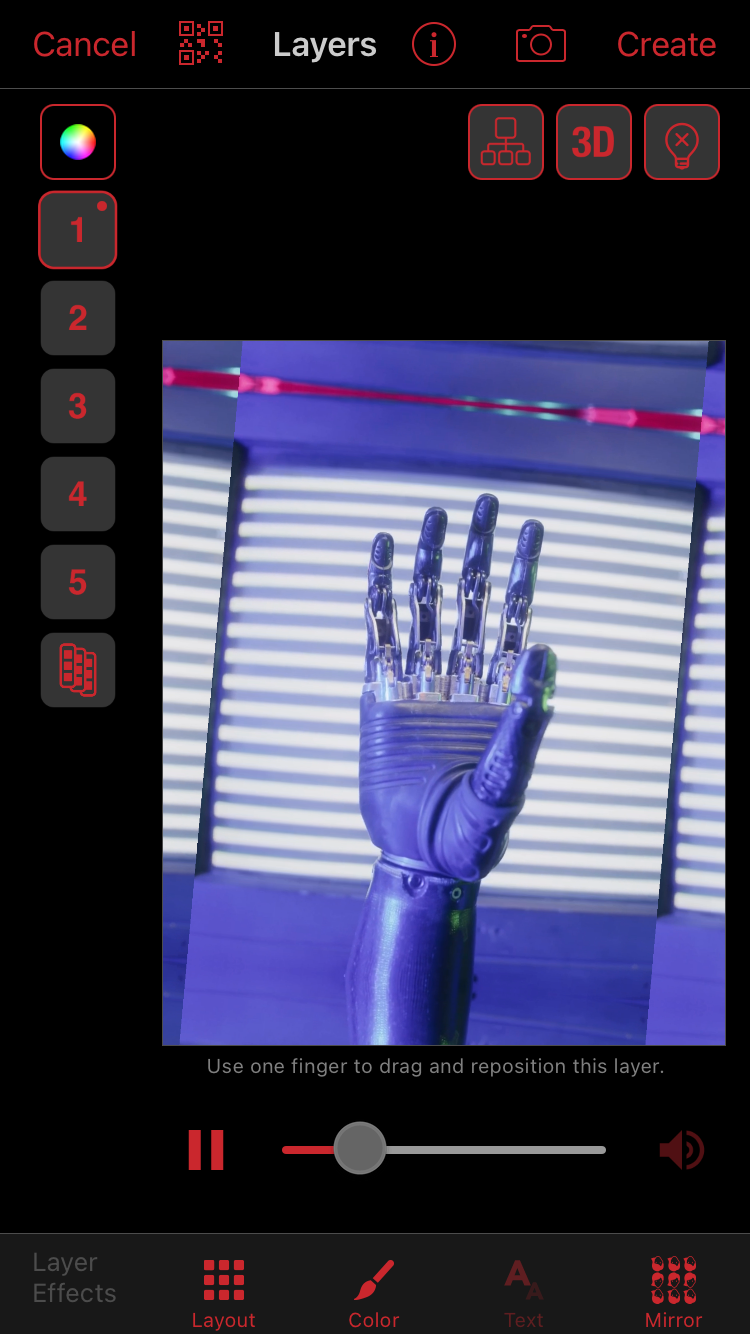
If you're going to make your clips move around in the frame, you need to mirror their edges; this effect is typically called Motion Tile. If you don't do this, the background of the editing screen (which is usually black by default) will reveal itself around the edges of your clip as it moves.
Below is a comparison of no mirrored edges vs. mirrored edges in Video Star. The mirrored edges might look a little funny now, but once the clip is in action, and assuming you've applied motion blur, those offset patterns won't be noticeable and will look completely natural—you will definitely notice when they're not there, however.
Start Making Awesome Video Edits
Once you've got these fundamentals down, it becomes second nature, and then you'll be able to shift your focus to the details and find your own aesthetic. What are you waiting for? Load up your editing program, refer back to this article, and get cracking!


