
Last Updated on 12/24/2020 by Chris Gampat
We’re streaming daily on Apple Podcasts, Google Podcasts, Stitcher, Pocket Casts, and Spotify!
I’d like to preface with a truly important point: Your editing software is the one true constant in your photography workflow. We often use different cameras, from different brands, lenses, filters, lights and so on, but your software touches every photograph you make, and your images deserve the best. This is just part of the reason why we use Capture One.
Editor’s Note: This blog post is presented by Capture One. As a note, we also do all of our camera testing in Capture One, and we have for over three years.
It might surprise you to learn how common the choice of what software a photographer uses is made simply because it’s what they’ve heard of, or are familiar with. Usually that means they picked something at the start of their journey because they heard of it, and as they progress it’s just easier to stick with what’s familiar. But a lot has changed in the last 5 years or so, making it easier and more compelling to switch, and sticking with what you started with could mean you’re letting the best pass you by…
Capture One is generally regarded as the gold-standard for raw processing, but it got pigeonholed by many as only for top-notch studio-shooters because it was associated with Phase One medium format cameras whose files it was originally built to handle. But that was a long time ago (Capture One is older than Lightroom), and Capture One is really for everyone who cares about their images and just happens to be the choice of the most discerning.
Here are just a few reasons Capture One should be your choice in 2021:
Table of Contents
Image Quality (IQ):
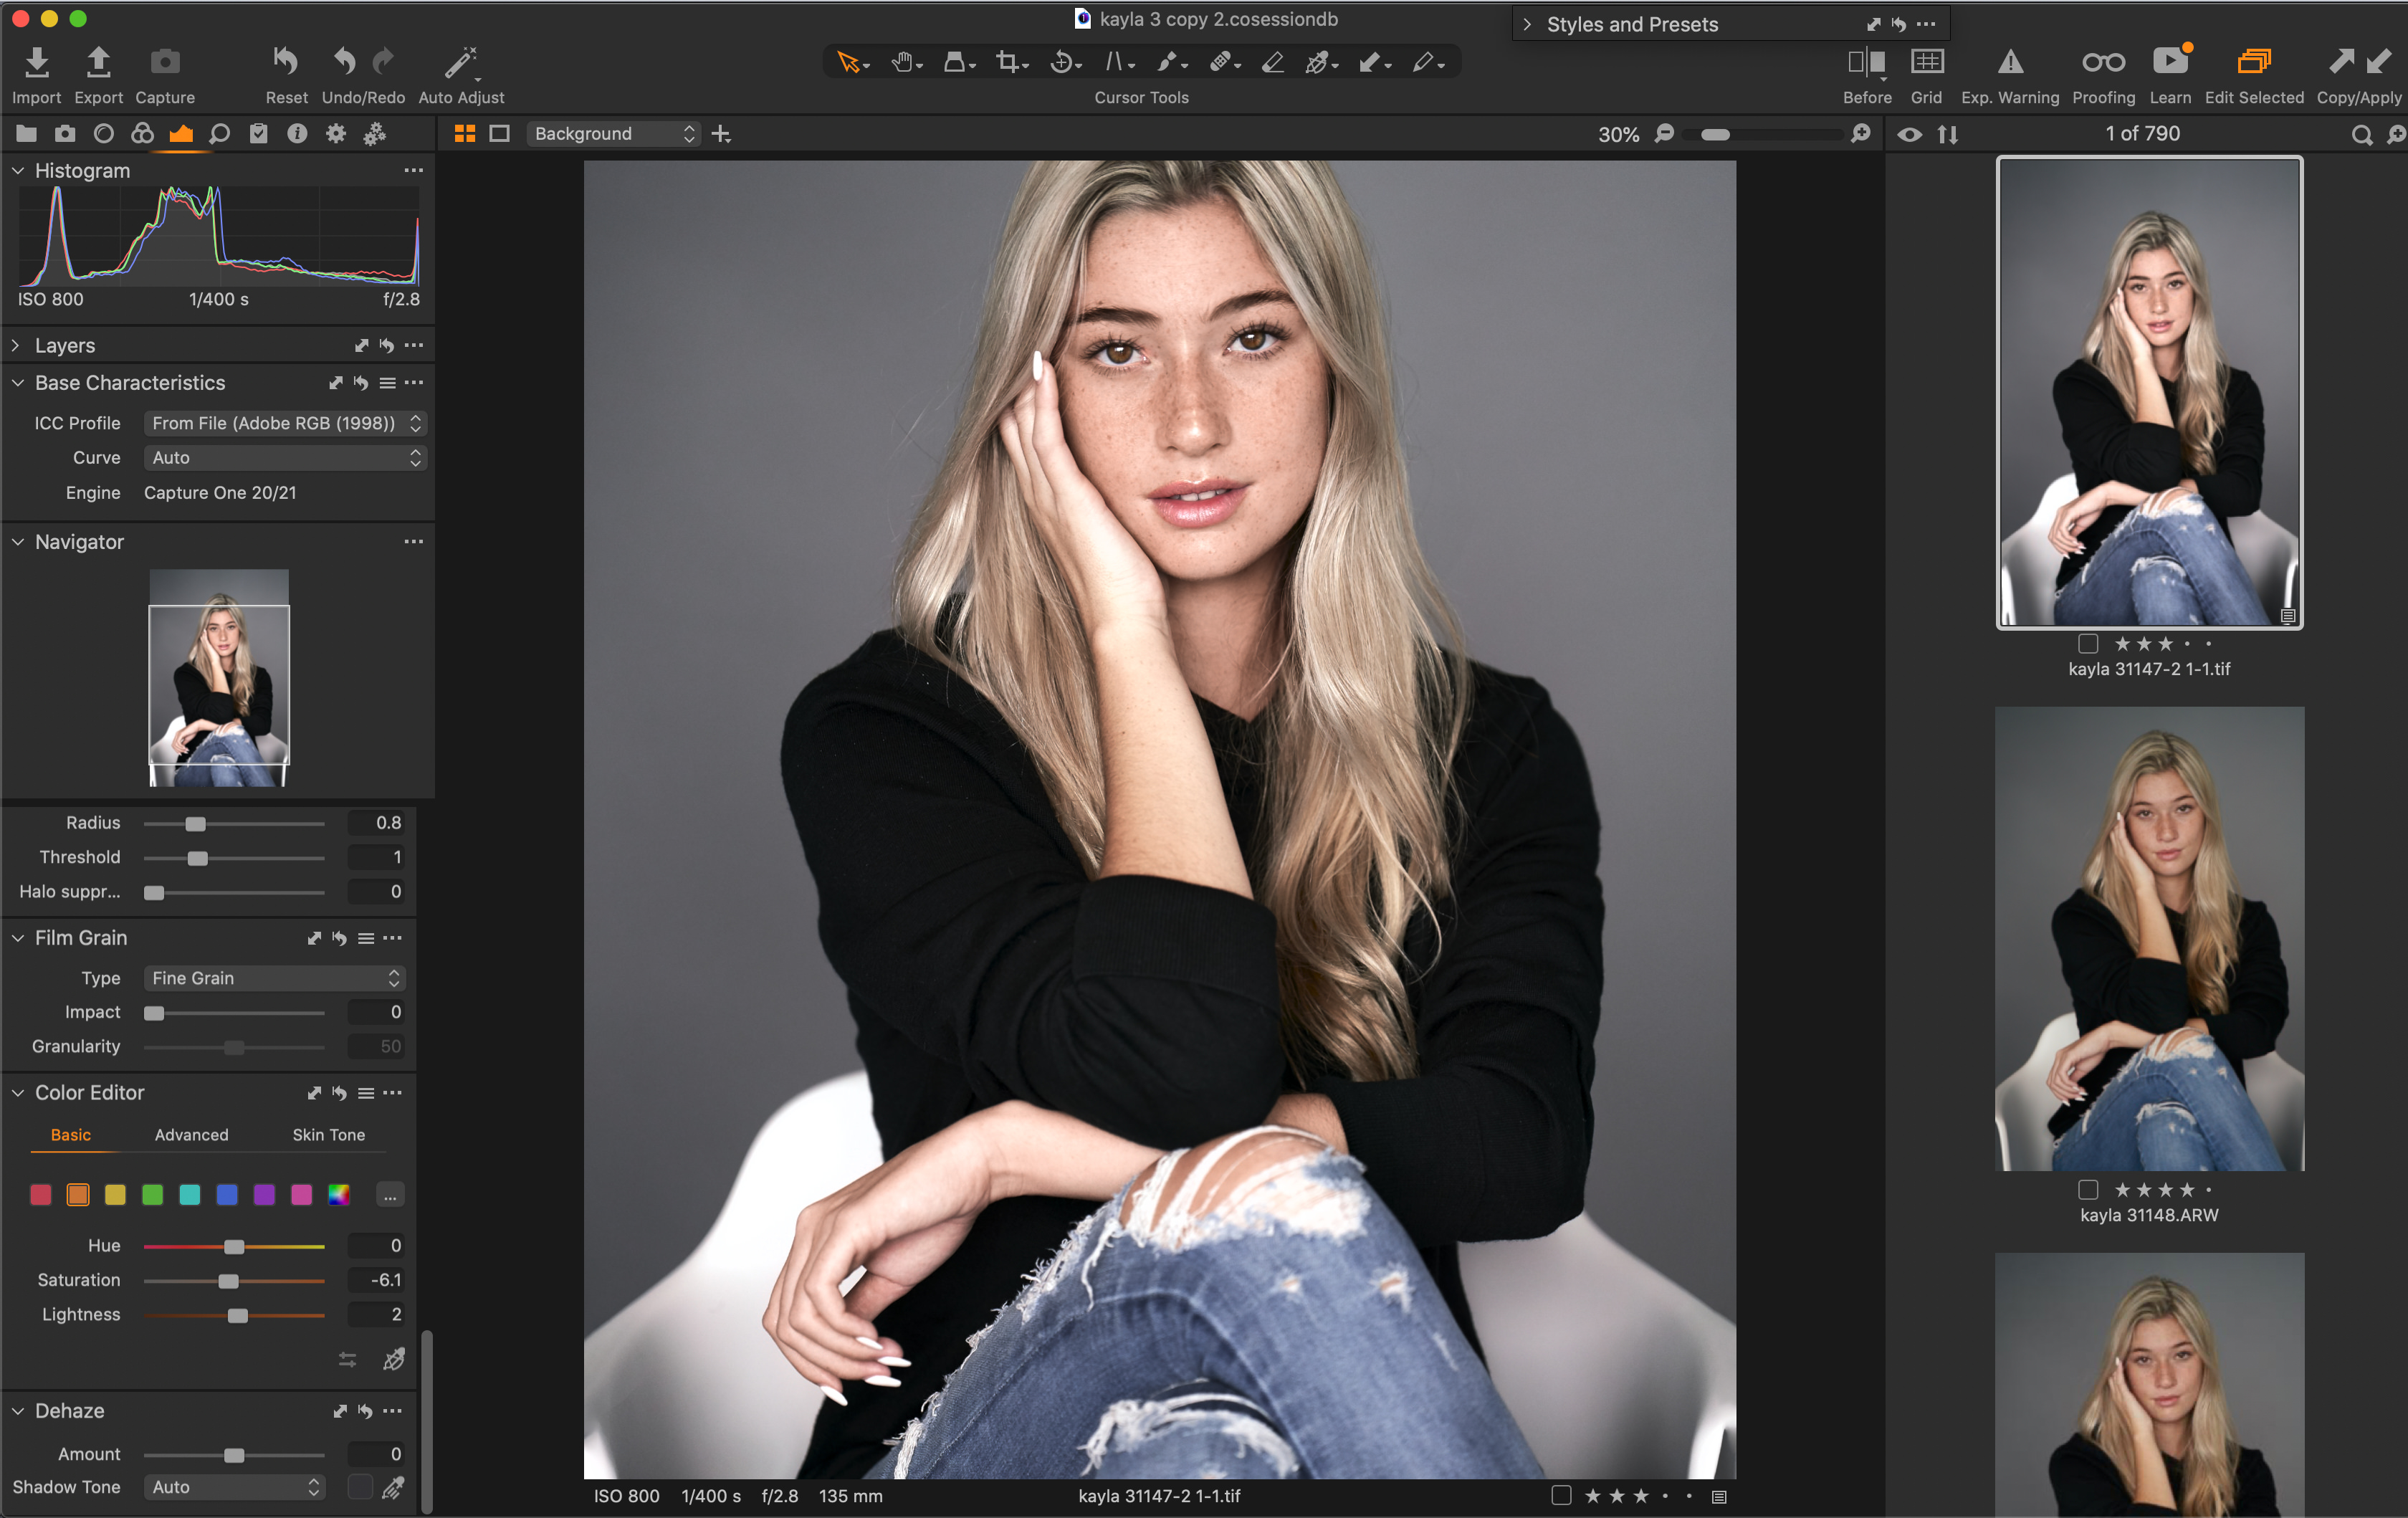
At the end of the day, this is what it’s all about; materializing the true potential of your images. One of the greatest joys is to take old images that might have been used in Lightroom or something else, drop them in Capture one and let it breathe new life into them and see just how good they can look.
How could the same file look different, you ask? For one, all raw formats are interpreted differently by different processors so the output is different. It can help to think of the raw file as a basket of ingredients, and if you give the same ingredients to two different chefs your final dish will turn out differently.
Beyond that, camera support in CO isn’t like anything else. Supporting a camera in Capture One is a laborious process that does not depend on just a few supplied raw files; rather, the dev team tests the software in various photographic scenarios with the specific camera actually in-hand. This ‘real world’ system ensures the software will handle files from that camera in any situation to bring out its best, and the new ProStandard Profiles are even further meticulous for those who need the utmost accuracy and consistency for things like product photography.
Speed Edit: The Fastest Way to Your Best Edits
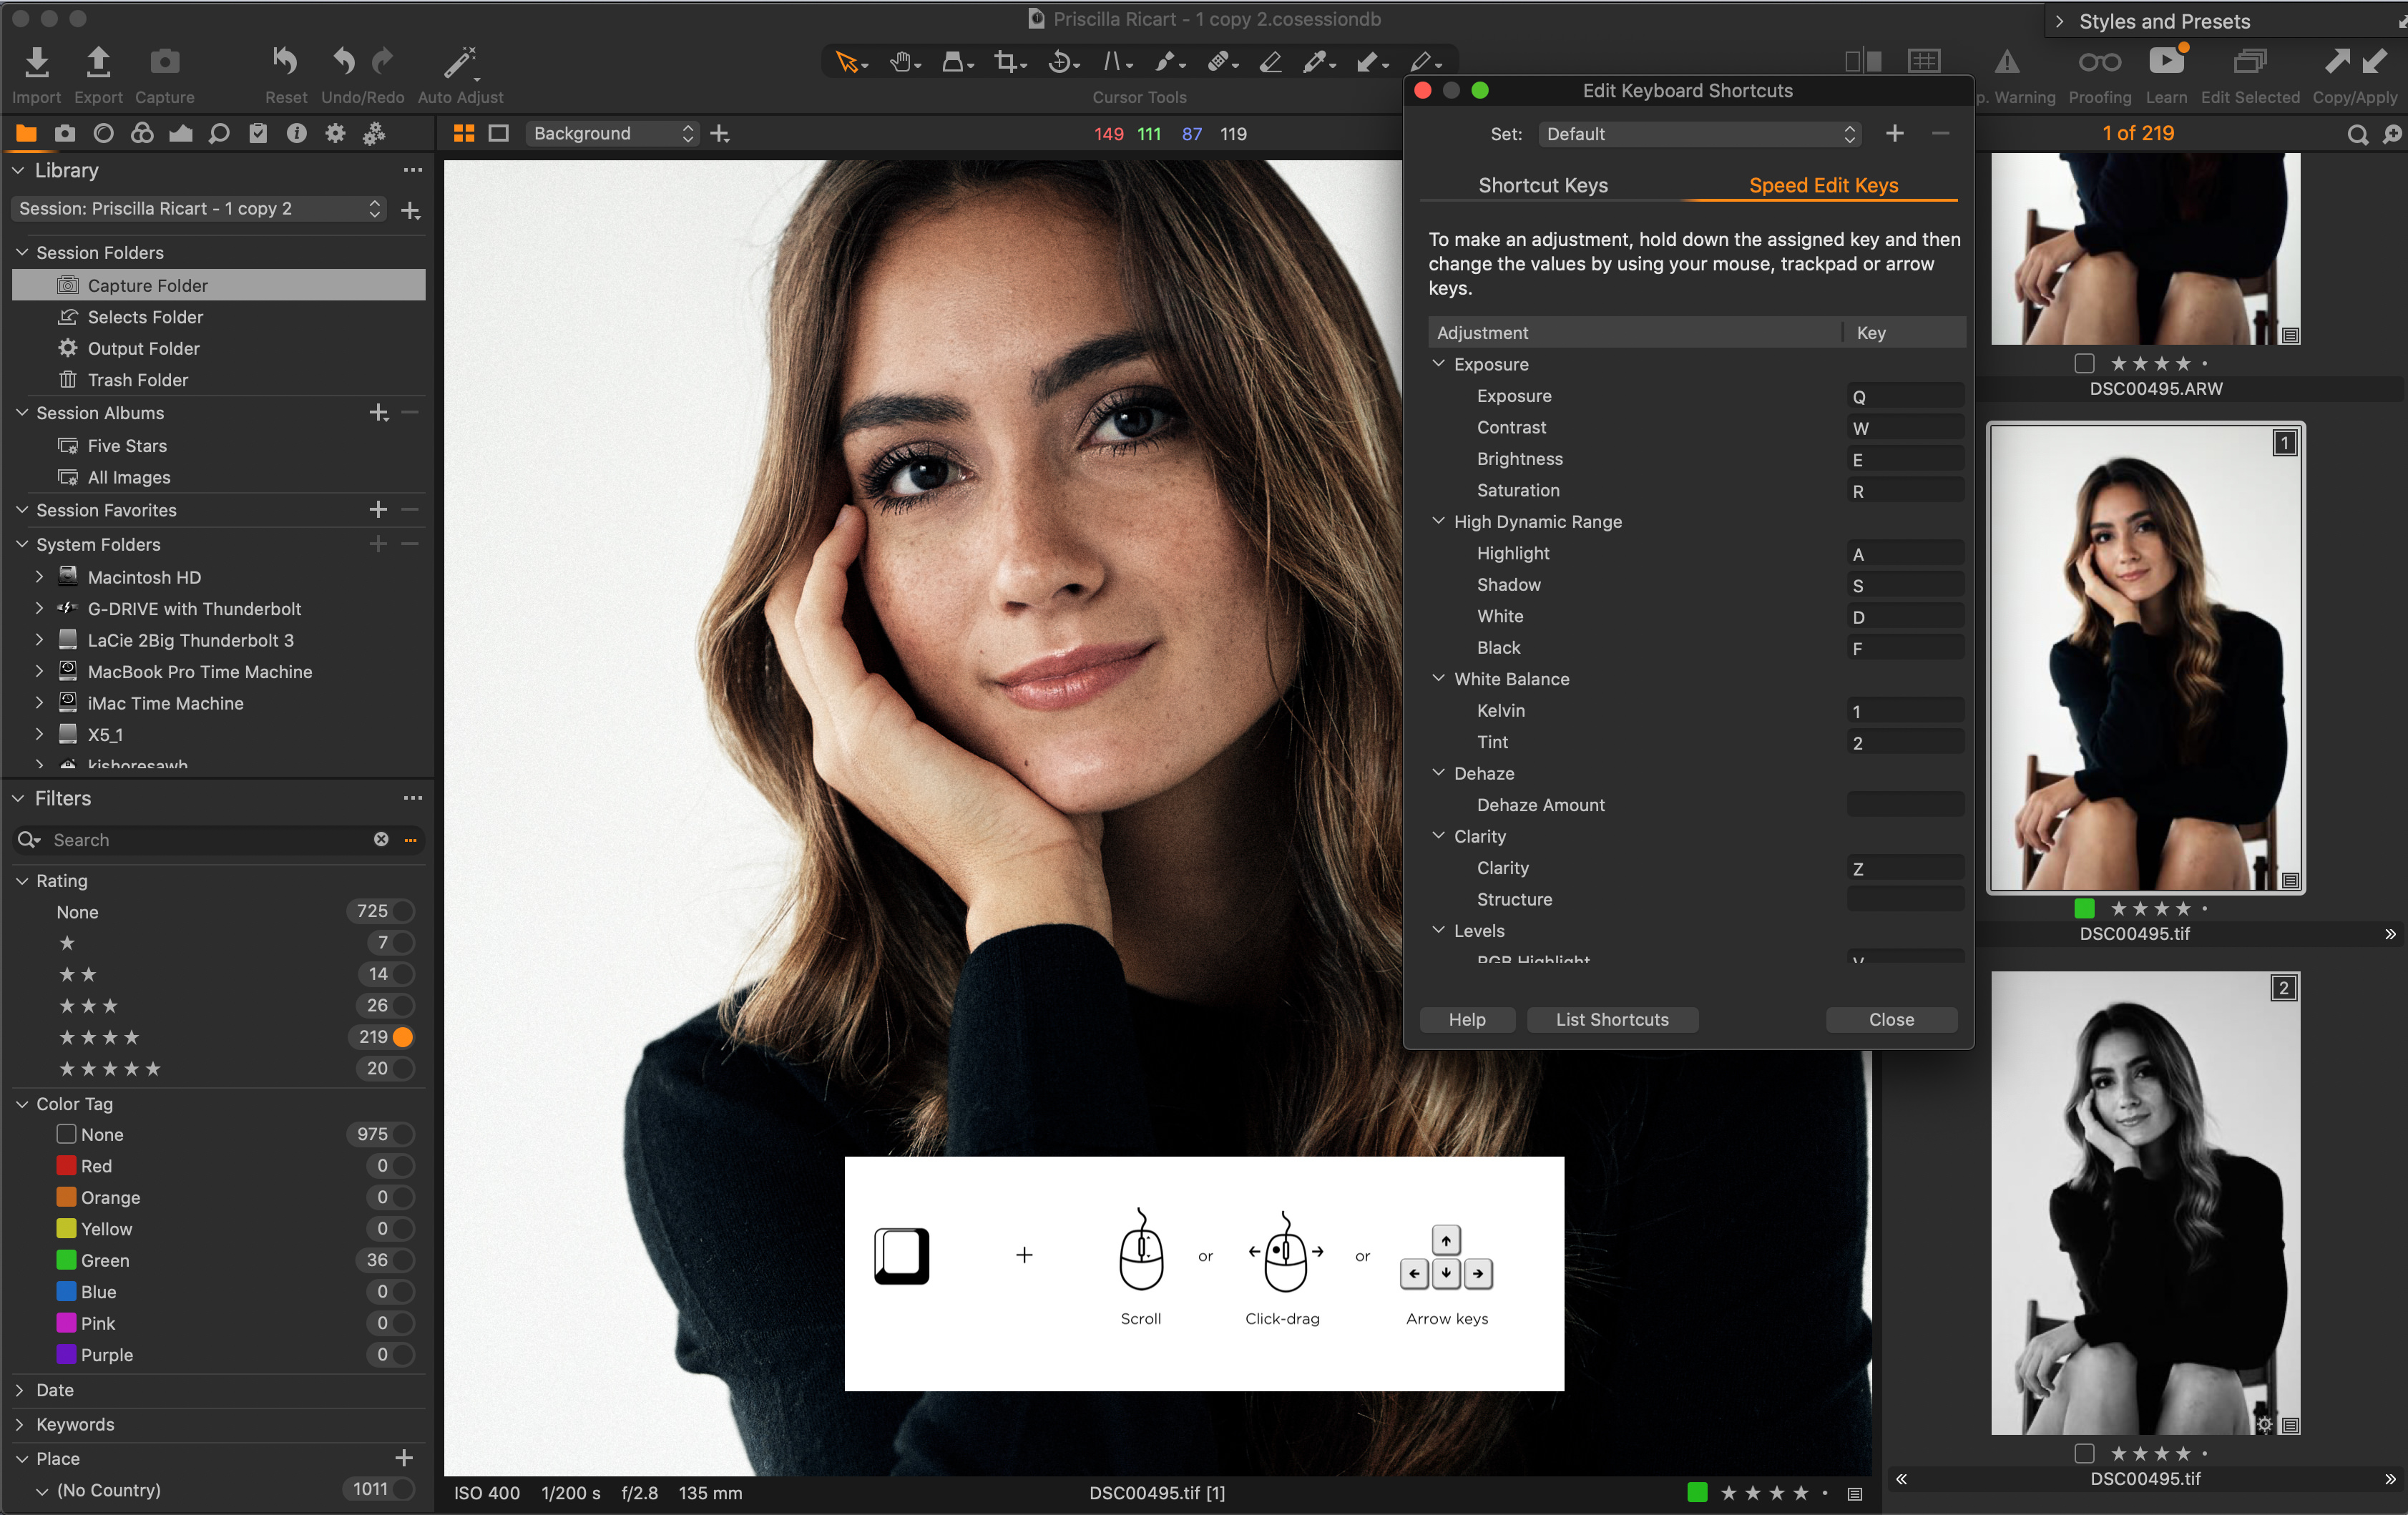
Unique to Capture One, this features allows you to edit images without the need to navigate to any editing tools. You simply hold down a hotkey that’s mapped to an adjustment tool, then scroll with your mouse, trackpad, or other input like arrow keys and the changes are made! This means you can edit in full screen with no distractions, without ever removing your eyes from the image to search for a slider. It’s a truly immersive experience and allows for true precision and speed, without the need of an external device like Loupedeck.
Side-by-Side Editing and Editing Multiple Images Simultaneously
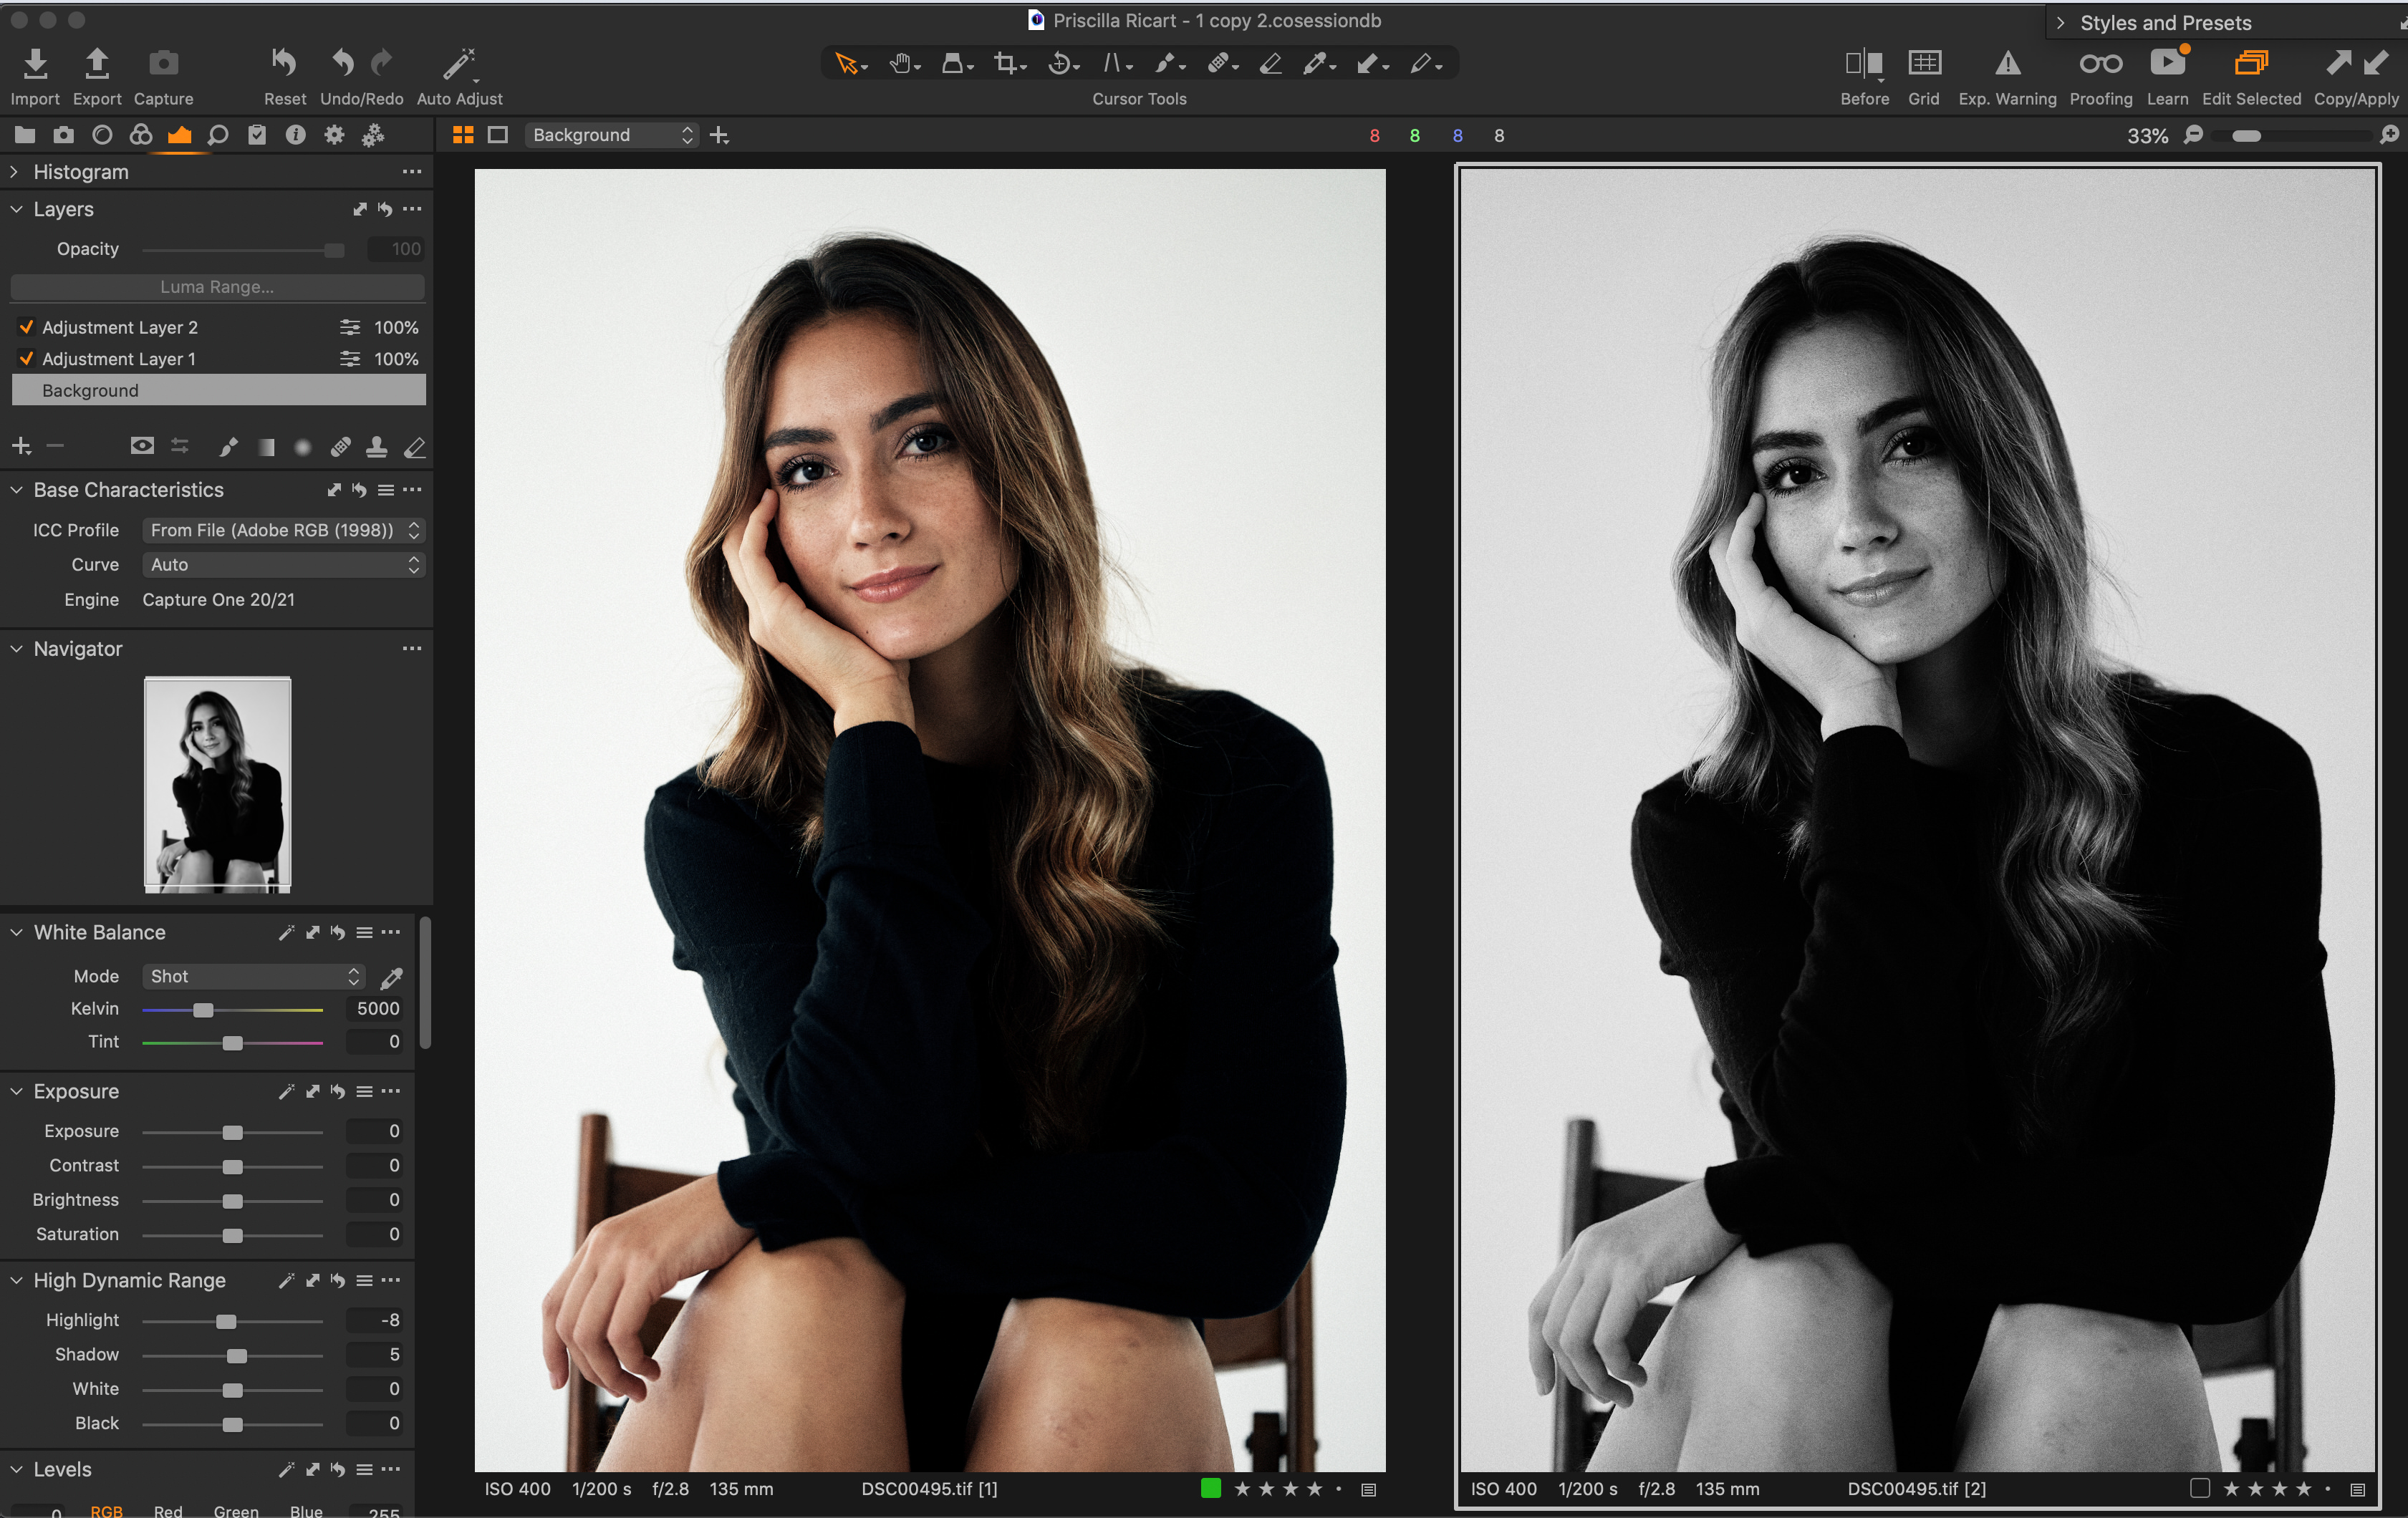
Most shoots require some level of consistency in the final aesthetic, and we often will edit one image, love it, decide it’s the base/reference image, then edit others in the set accordingly. But in order to match them in Lightroom you set a reference image, and you can then pull up another image in the Develop Module as the one you’re working on. But while you have it as a visual reference you don’t have it as a technical reference because you can’t see the settings of the base image. To see that you have to switch it and that’s tedious.
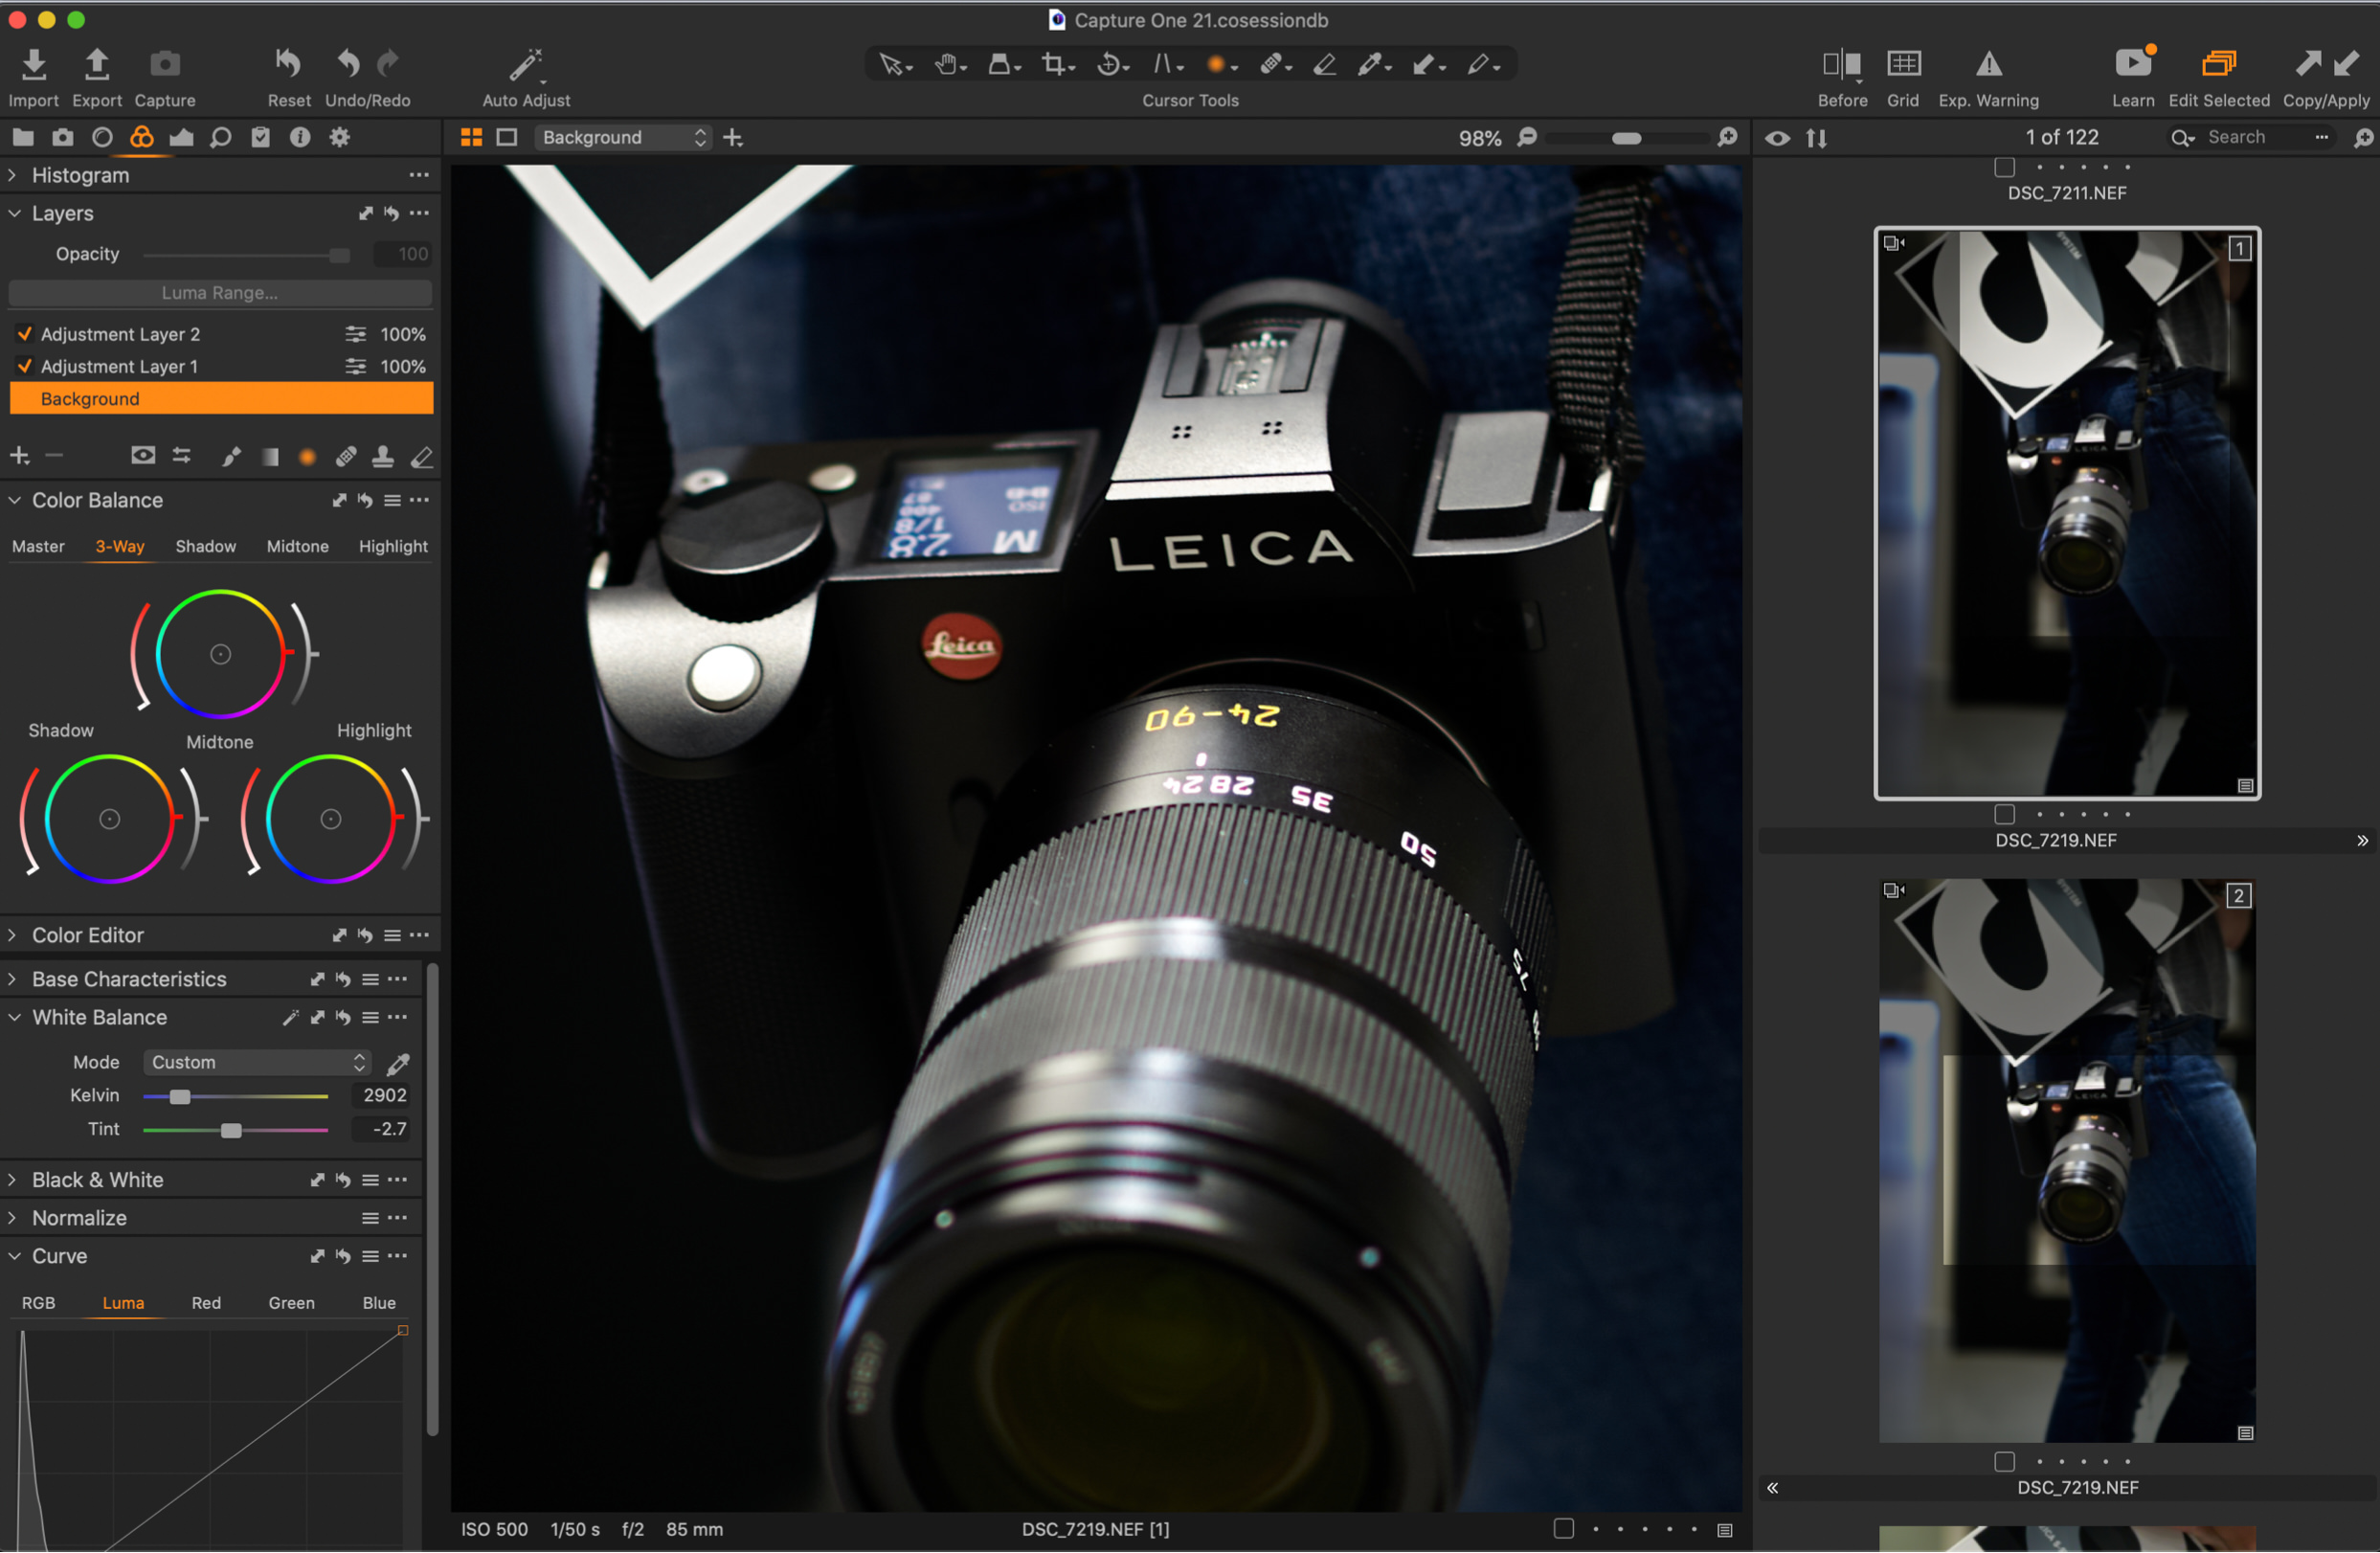
In Capture One you can select multiple images in one window, and as you click on each image you see its settings reflected and you can work on that shot while the rest are in view. This means faster and more accurate edits, and also is a God-send for hybrid shooters who are looking to match their film shots to their digital files.
Dehaze – Capture One Style
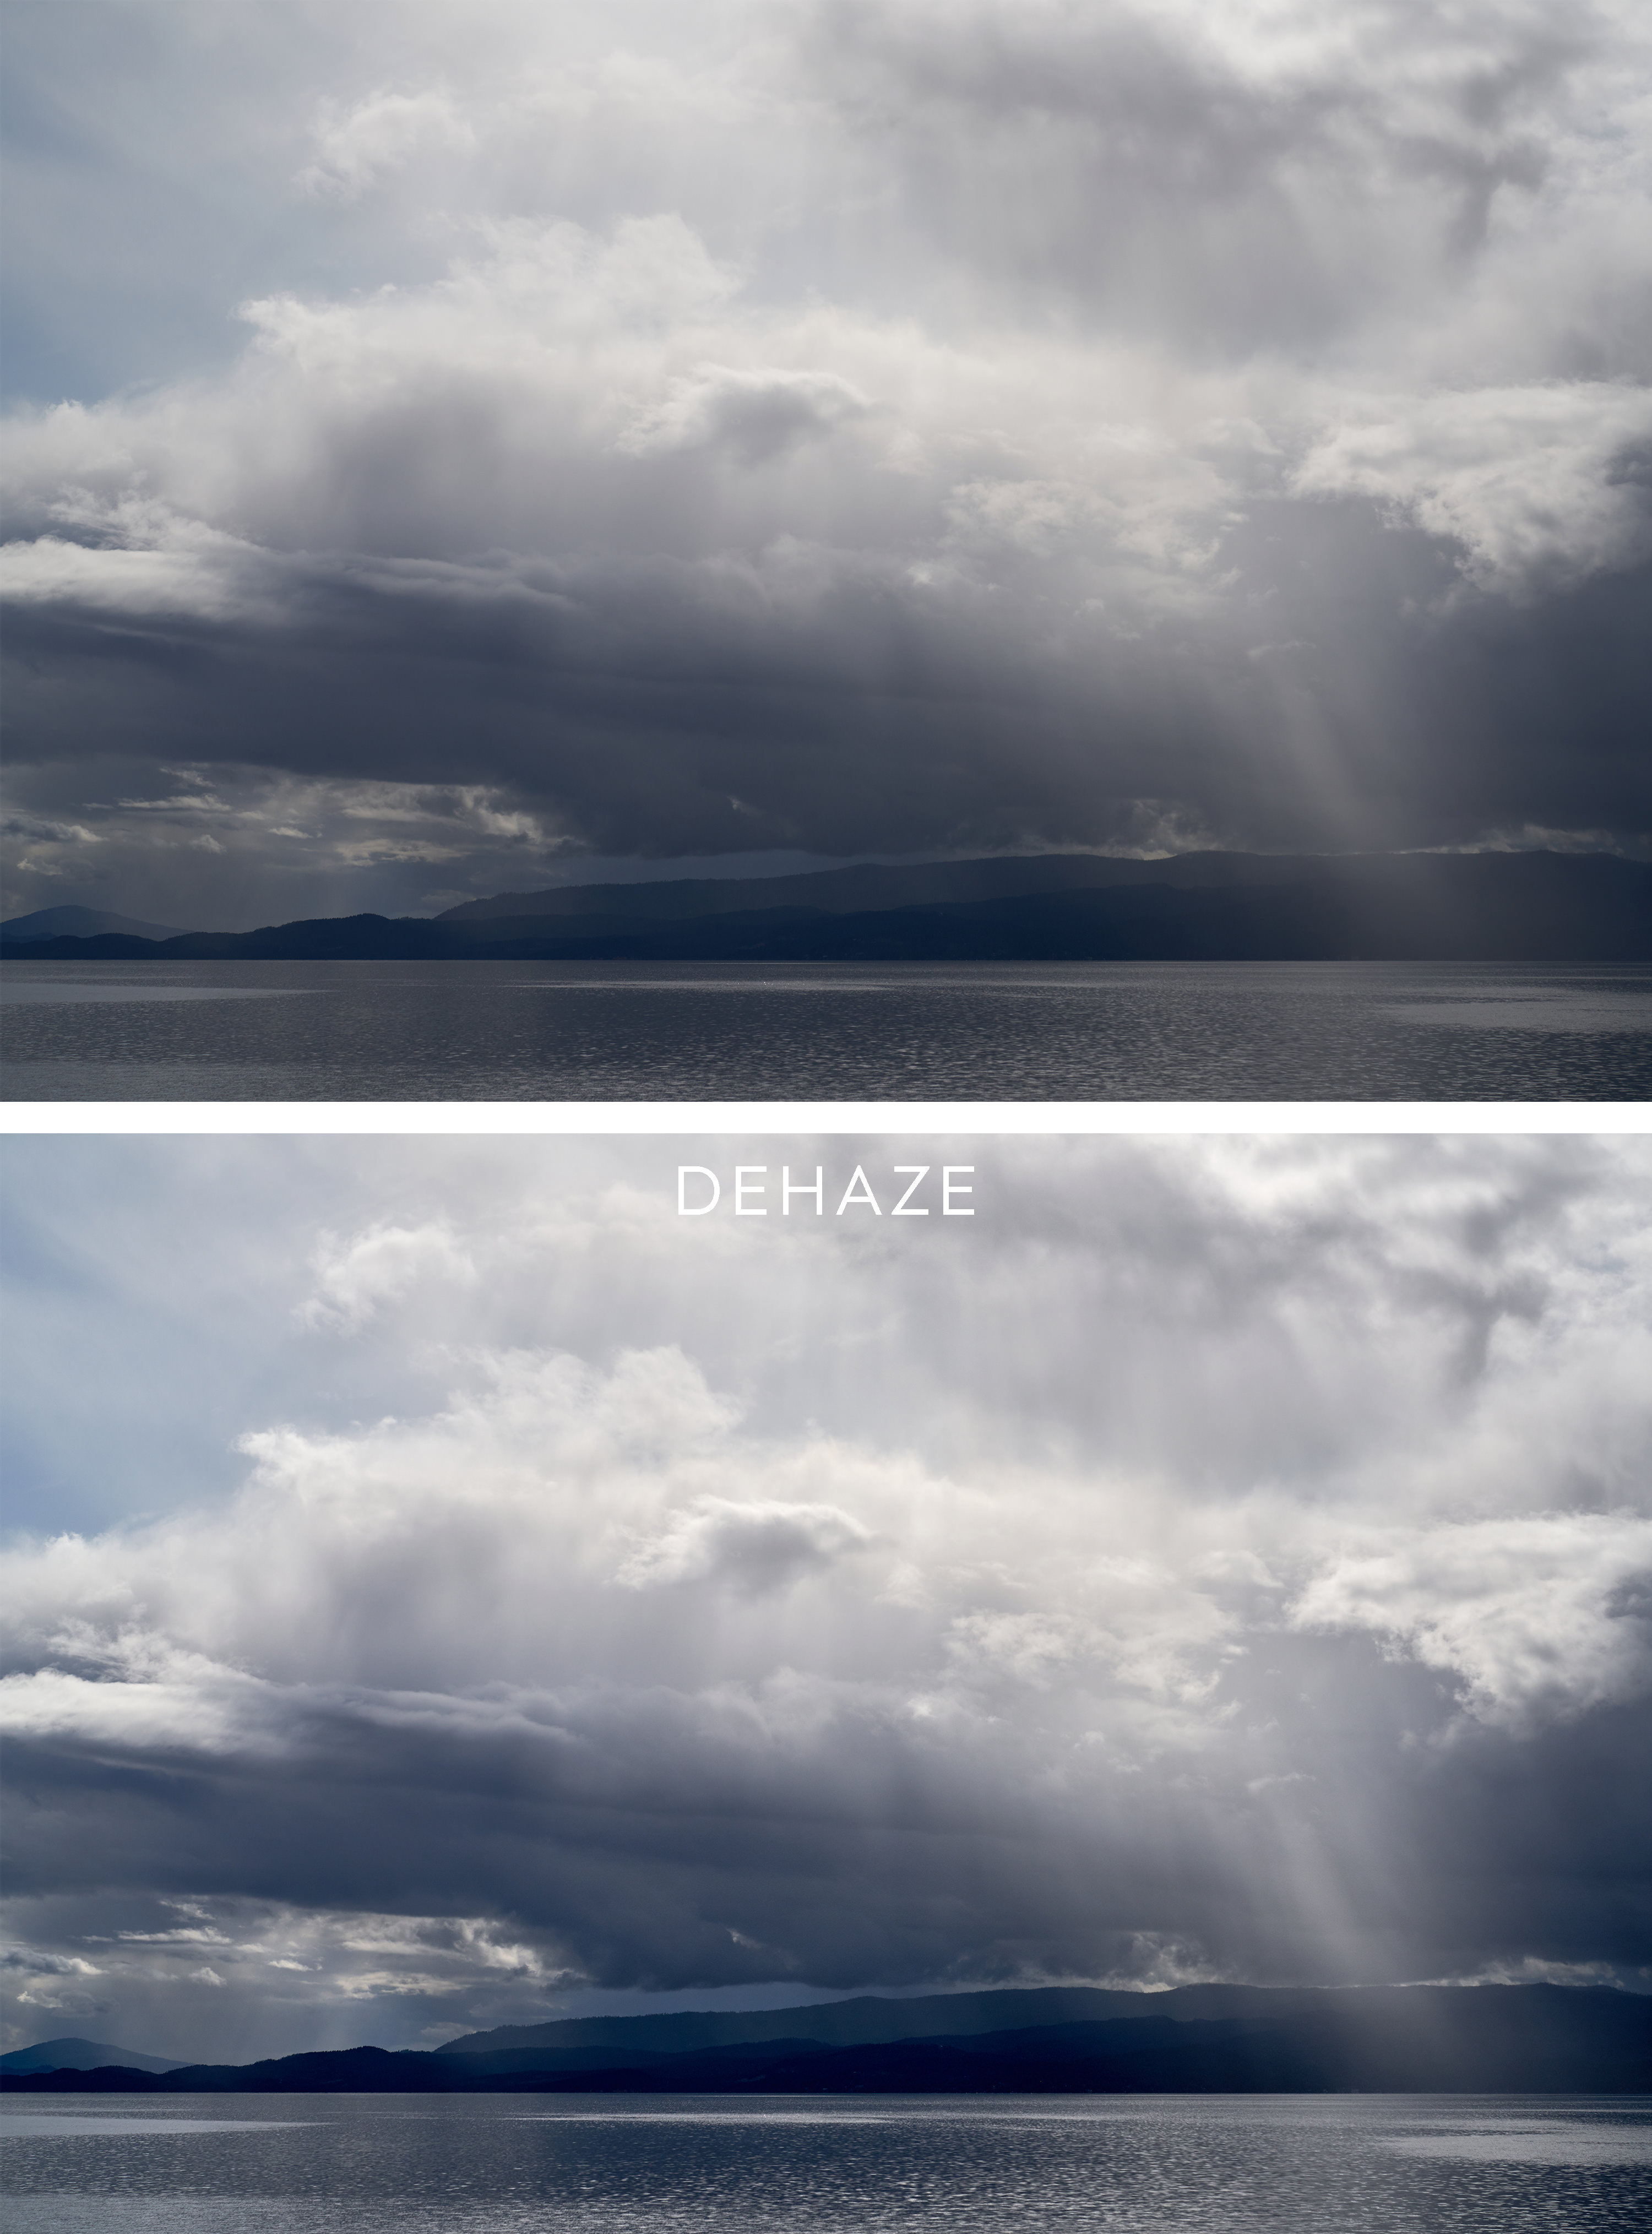
Dehaze as a concept has been around for some time, but it has not been executed quite like this before. The goal with a Dehaze tool is to eliminate haze and improve saturation in flat-contrast images. The new Dehaze tool will automatically analyze the image and detect a shadow tone (where haze is most obvious), then decide where contrast and saturation are needed and apply changes. But in Capture One you can also go a bit rogue and use the picker to choose the shadow tone if you want a specific look, ensuring you get the best results you were after with the most ease.
Easy to Switch from Lightroom and Roudtrips With Photoshop
You might think that moving from Lightroom to Capture One is an annoying and protracted process; that you’ll have to start your organization from scratch, re-edit, re-rate, and create totally new locations for your files etc., but it’s not the case. In fact, you can import your Lightroom catalogs right into Capture One with ease, and all the while retaining exposure values, ratings, and so on.
It also warrants saying that doing so will not affect your Lightroom catalog. You can continue to use just the same with Lightroom, and the location of your image files can remain exactly where they were.
And of course, Capture One works extremely well with Photoshop, allowing for quick and organized round-trip file management. A sample process would be to process an image in Capture One, open it as a TIFF or PSD in Photoshop, do your pixel-bending, then save it back to Capture One and even with layers intact.
Truly Customizable

You can bend Capture One to your will in a way you simply cannot with Lightroom and other raw processors. In Lightroom you can flip panels and hide them when needed, but in Capture One you can add as many tools as you want to a workspace, enlarge tools, pin the ones you use most often, move the tools to another monitor if you have the set-up, and can even make Capture One look just like Lightroom for those who are transitioning, with the simple click of a button. You can see that below and achieve it by simply going to Window > Workspace > Migration.
Unmatched Tethering
There’s another reason that you’ll see Capture One in the studios of Peter Lindbergh (RIP), Greg Williams, Russel James and the likes, and as well as in the enterprise world of Nordstrom, Amazon, and so on – and that’s tethering. When you need to tether there is simply no substitute.
Capture One is the most seamless, capable, stable, and feature-rich tethering solution on the market. It has advantages in review, organization, image-to-image editing on the fly, overlays, and even a mobile app that allows you to stream the shoot to a client in the room, or even over a server on their computer. That functionality has recently been extended to Fujifilm GFX cameras as even more recently to Leica cameras!
Layers
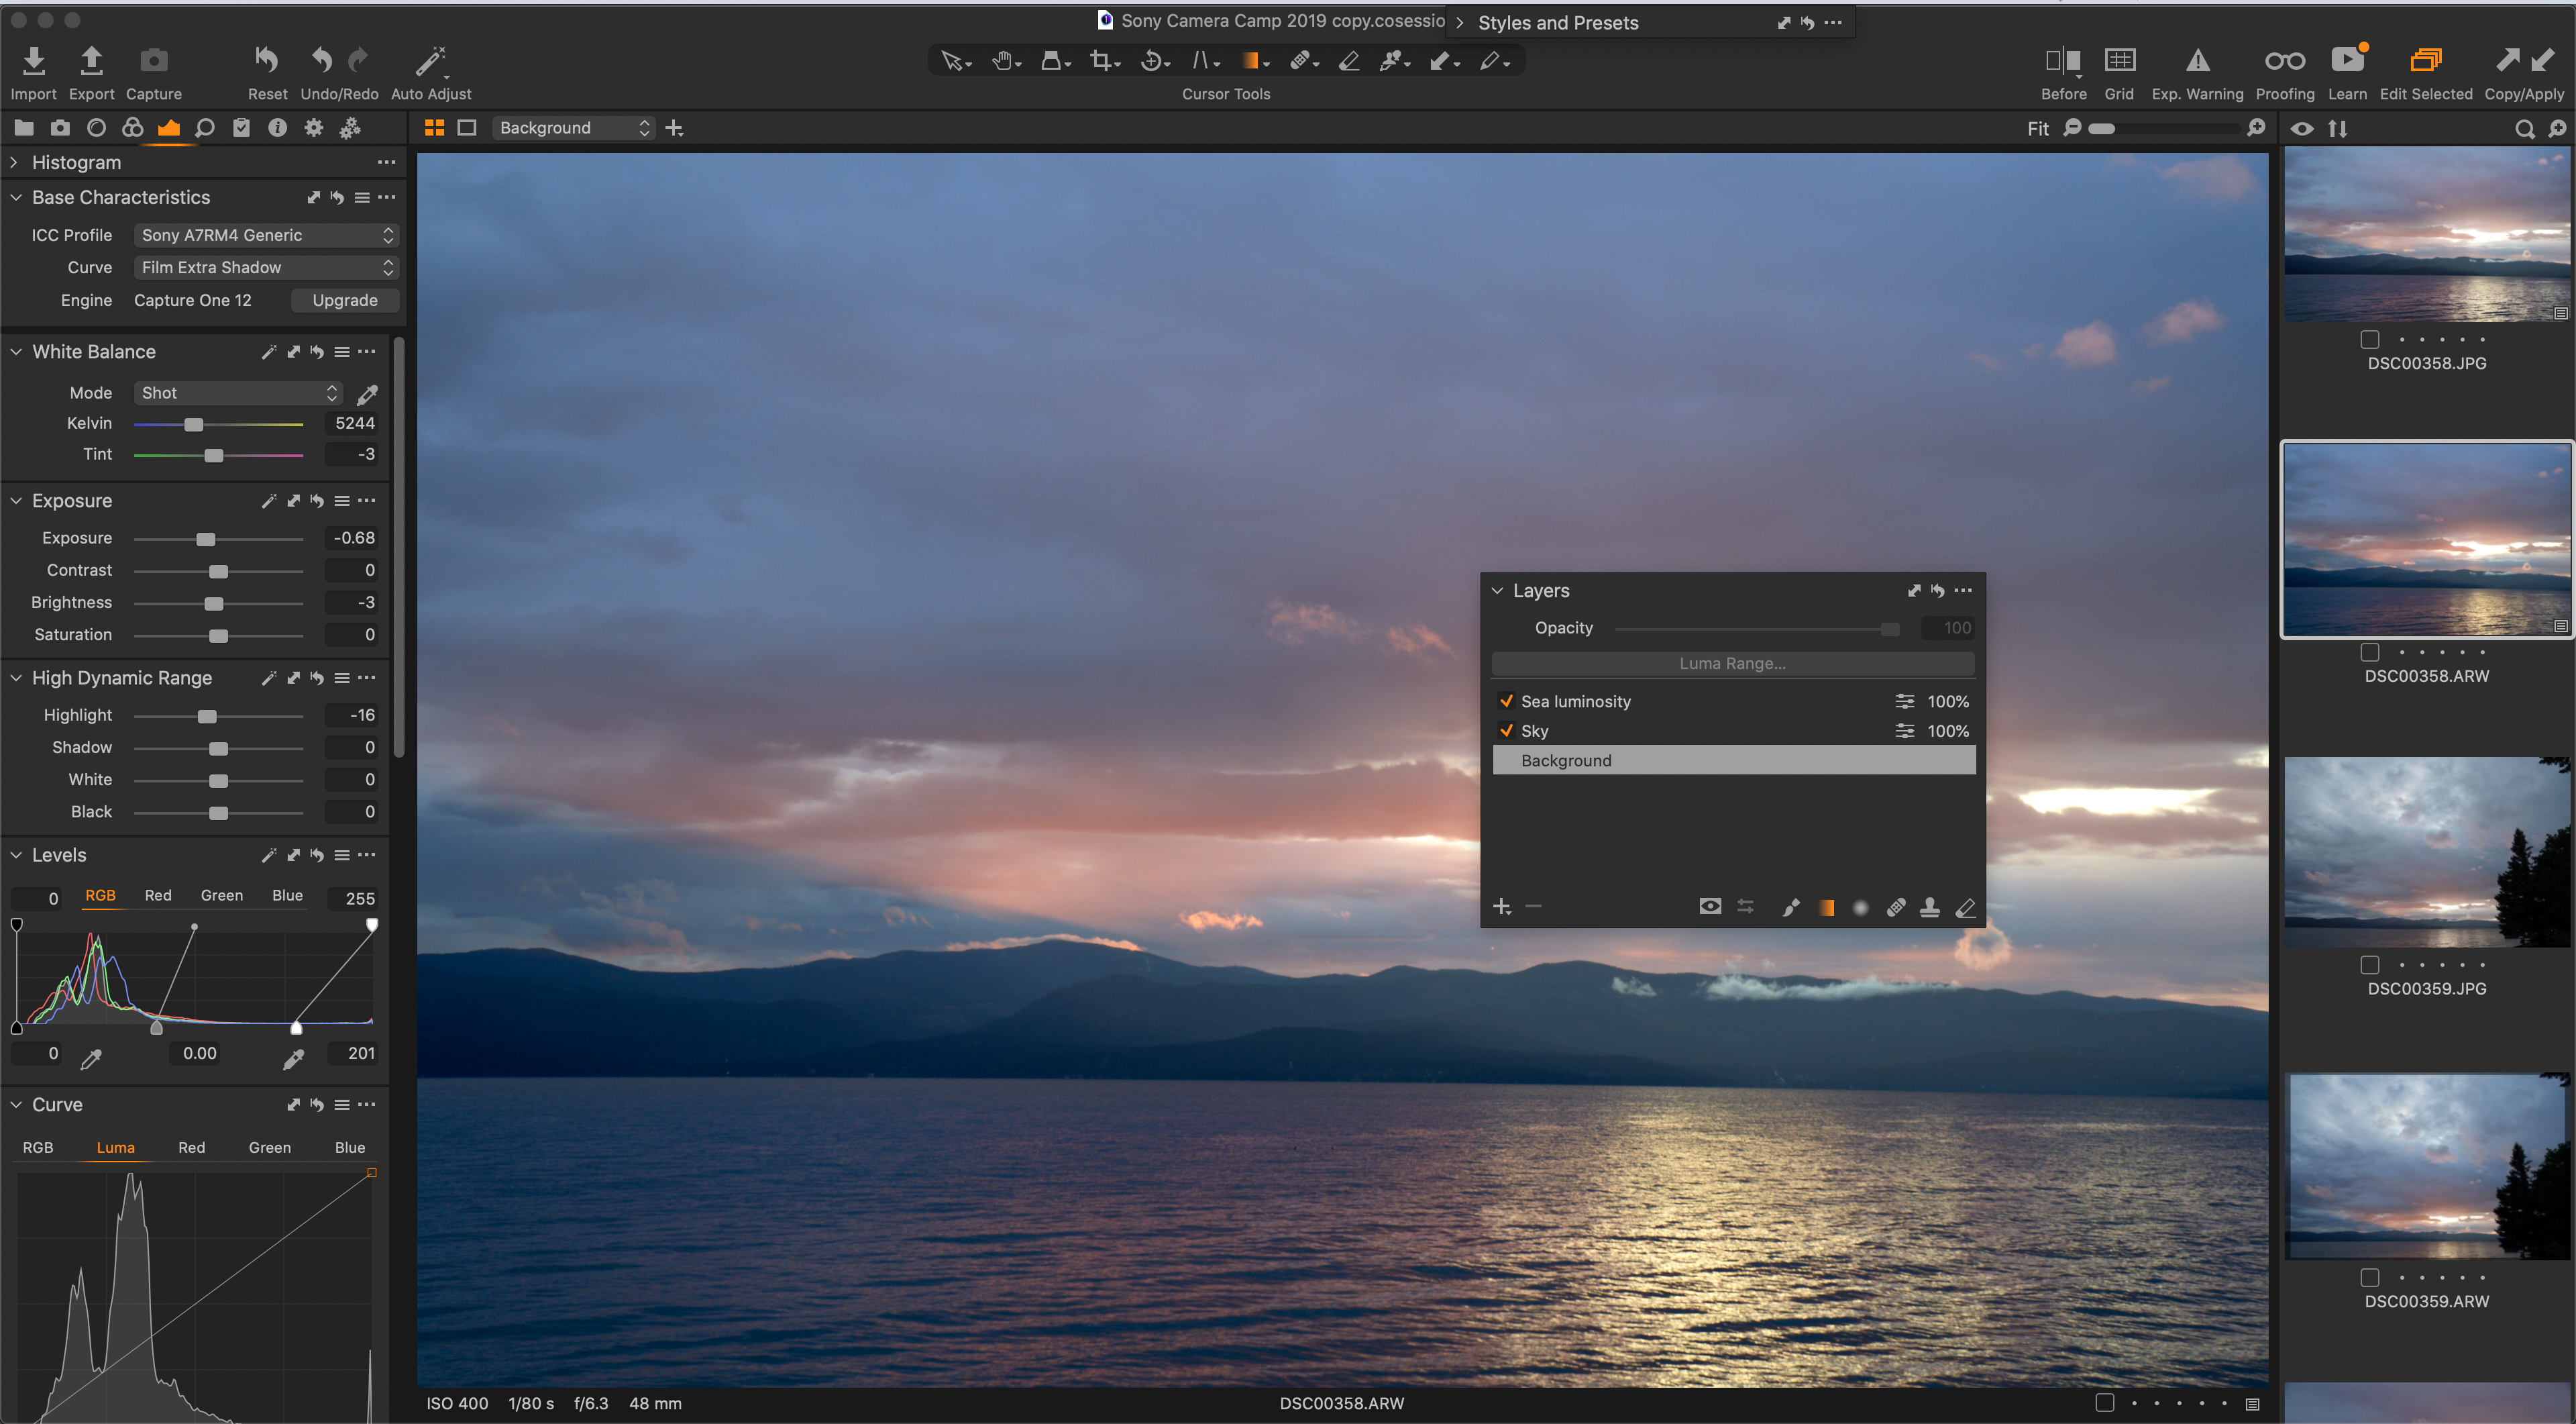
Unlike Lightroom, Capture One has truly powerful layers that work with global and local adjustments, layer stacking, layer opacity control, healing and cloning, masking, and even proper dodging and burning. And it should be stated that dodging and burning in Capture One is doing so on a raw file, whereas in Photoshop you are not, so you really get the utter most out of your file in CO.
Skin Tone Tool
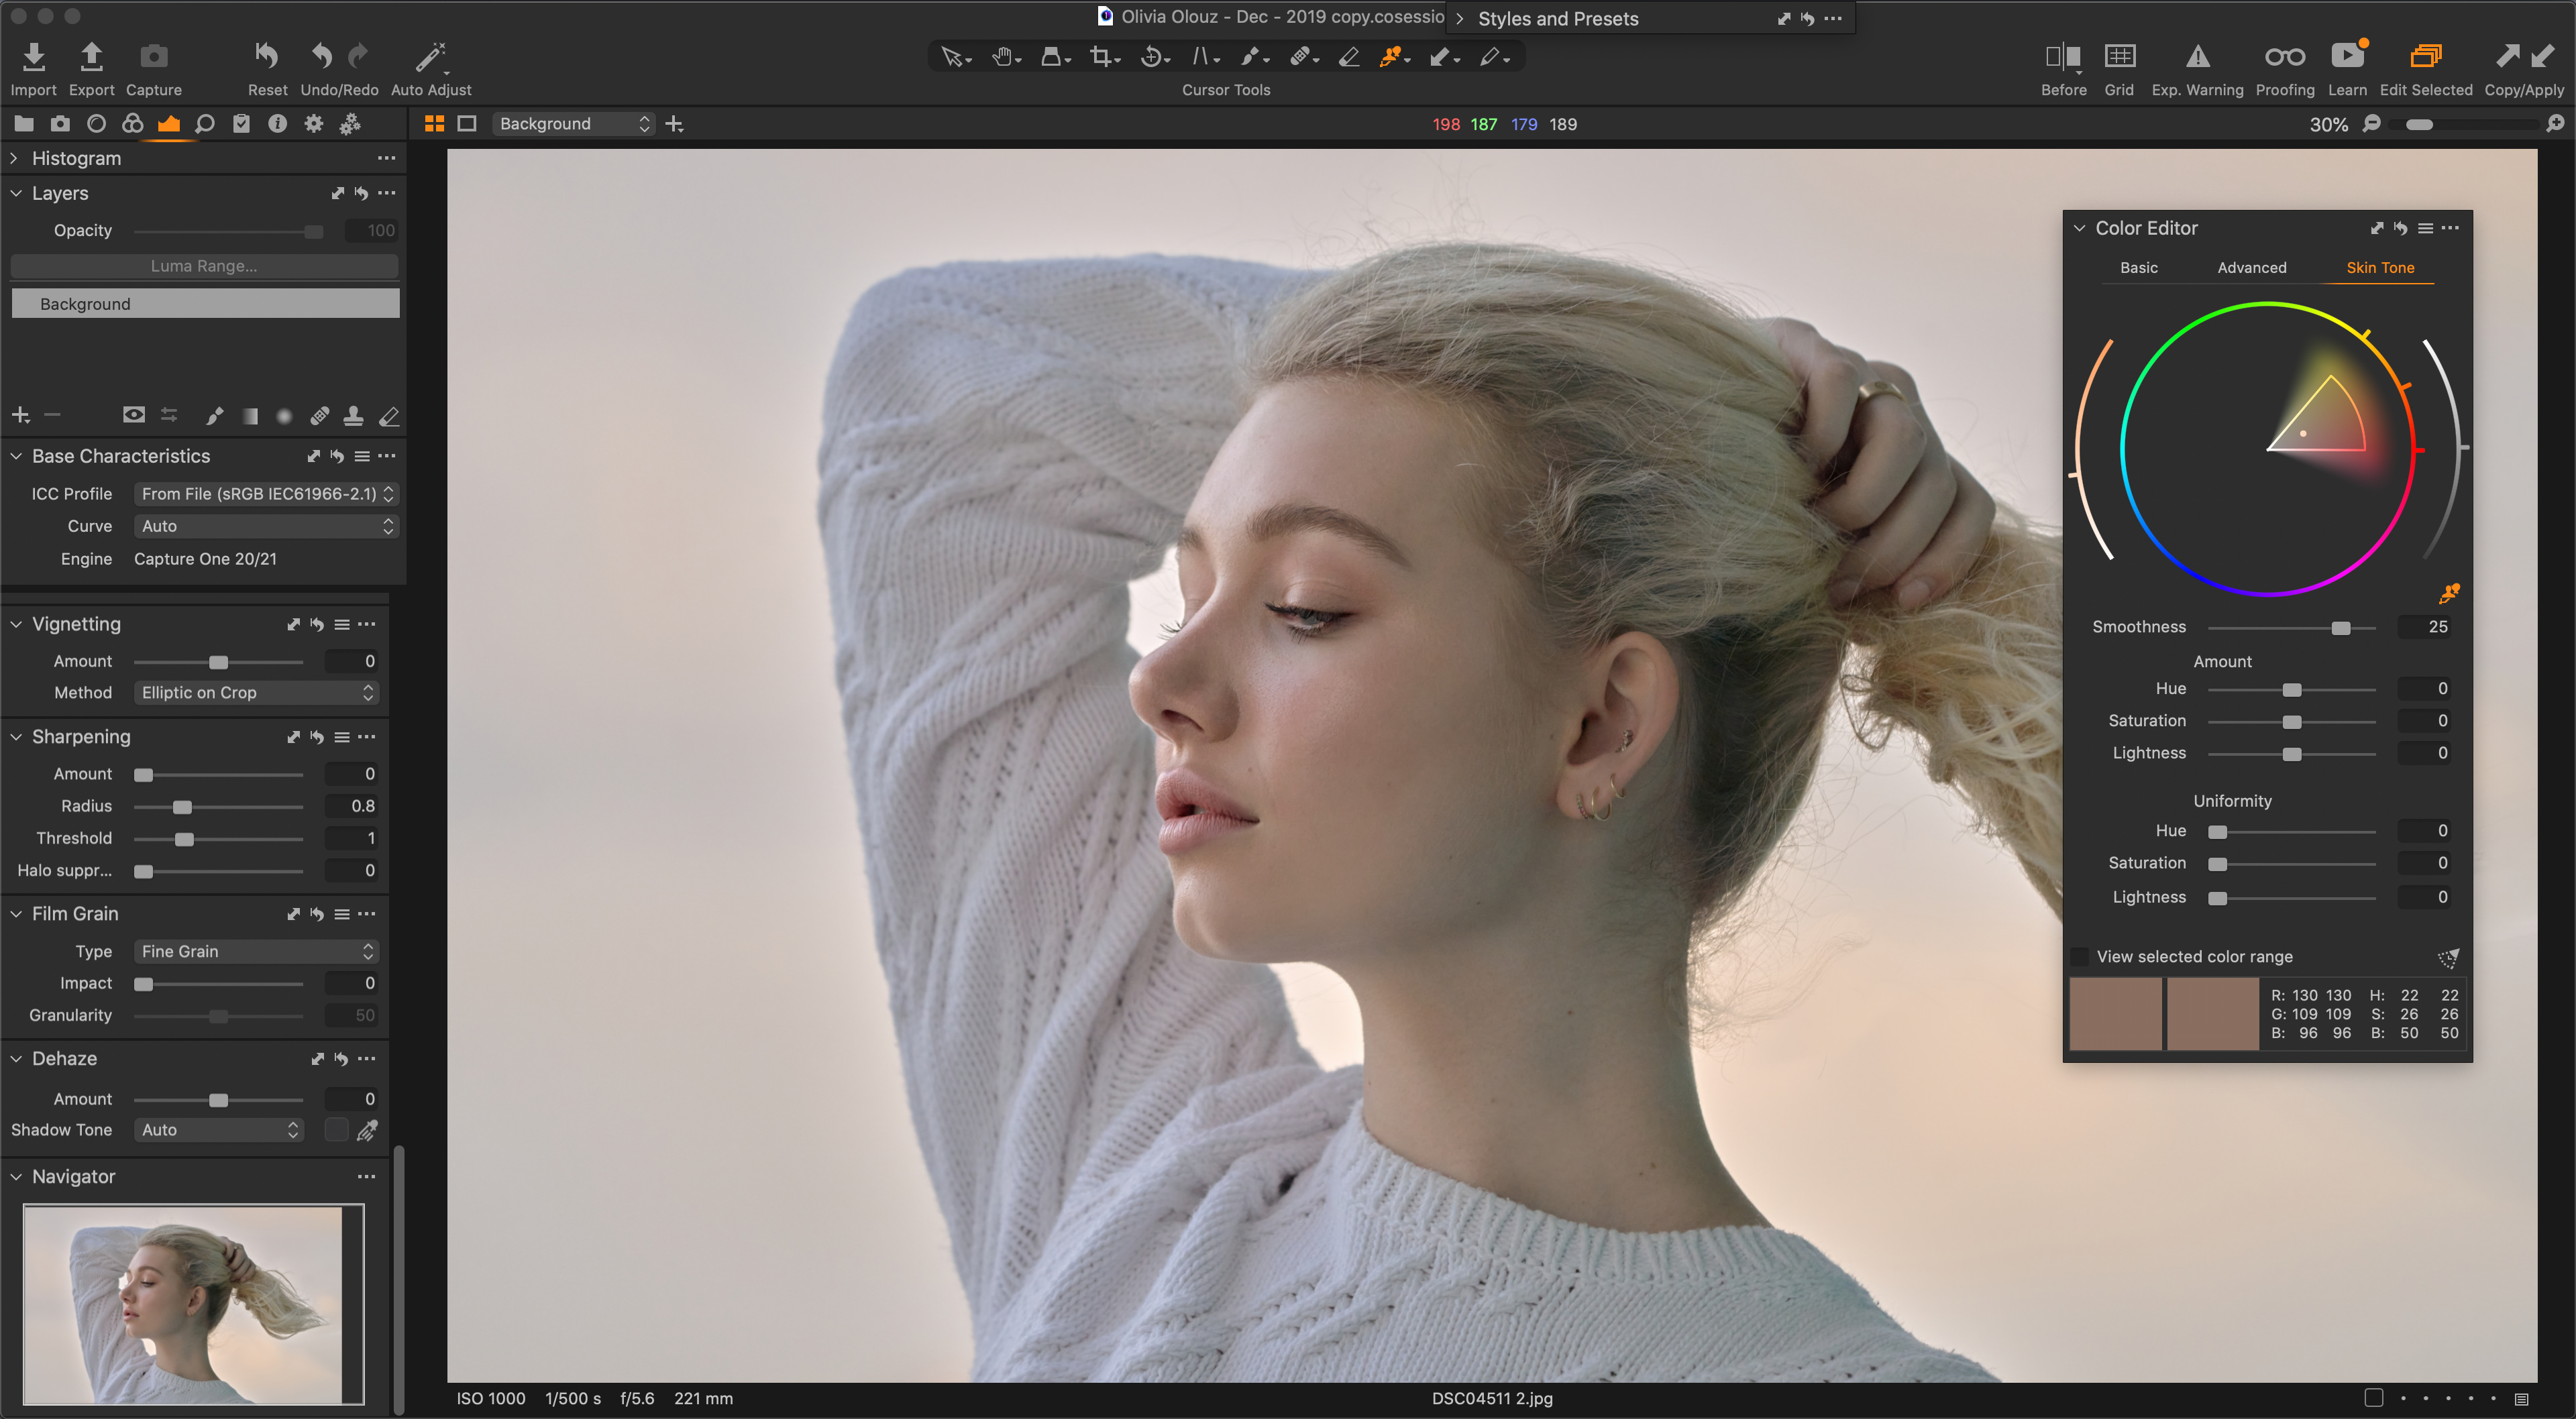
Anyone who photographs people understands the challenges inherent in managing skin tone. Evening out and giving uniformity to skin tone and hue is one of the most challenging aspects of photographing and editing people, because it’s so nuanced and in order to do it well skin texture must be retained, so isolating the tone and hue is critical. Capture One has a dedicated Skin Tone Tool
Historically this has been done in Photoshop largely because of the ability to use layers, see numerical RGB values on the fly, and refined brush and masking options, but Capture One also has layers, numerical RGB values on display, refined brush options and developed masking features. All of that combined with the Skin Tone Tool lets you easily and quickly bring uniformity to skin in a way not even Photoshop can do – and again, unlike Photoshop, in Capture One you’re working on a raw file with full image data.
Fuji Camera Support
If you shoot Fujifilm digital cameras your files will sing in Capture One. In a way they won’t elsewhere. Not only do you get tethering support and all the rest Capture One offers in capability, but the partnership means you get quick support and you can edit your files with the true Fujifilm film emulations you find in-camera. They have been faithfully reproduced in Capture One for a seamless flow.
Purchasing Options
When it comes to Capture One, users have choice. There are currently a number of Capture One variants, most available through subscription or perpetual license, spare the Express versions which are free for Sony and Fujifilm users respectively, and Capture One Enterprise.
And of course, Capture One Pro is free to try fo 30 days, and you can do so here.
This is a sponsored blog post from Capture One.