
The only thing better than programming MicroPython is programming MicroPython over Wi-Fi. So once you set up MicroPython on a microcontroller and have it on its own power source, you won't need to use a data cable to connect to it whenever you need to interact with it, program it, upload files, or grab data.
The MicroPython REPL interface is very simple, which makes it an attractive option for an ESP8266 or EP32 board, and the WebREPL interface is even more convenient. After setting everything up initially, you can connect and control the board over its Wi-Fi access point, then program or upload code from the handy web client.
What You'll Need
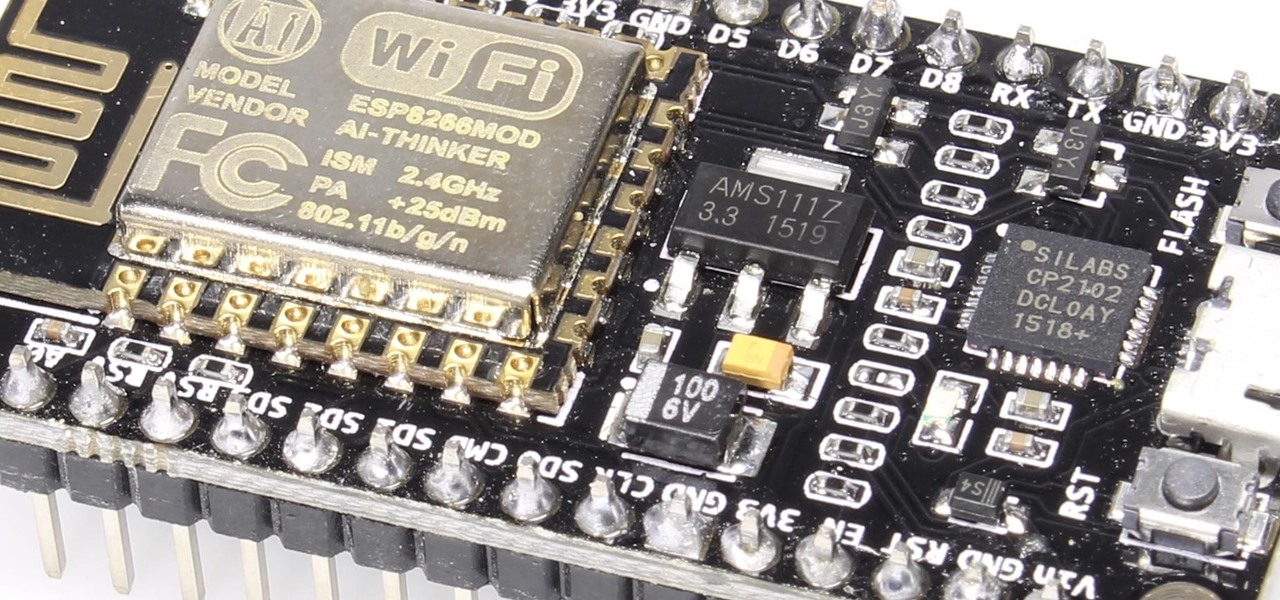
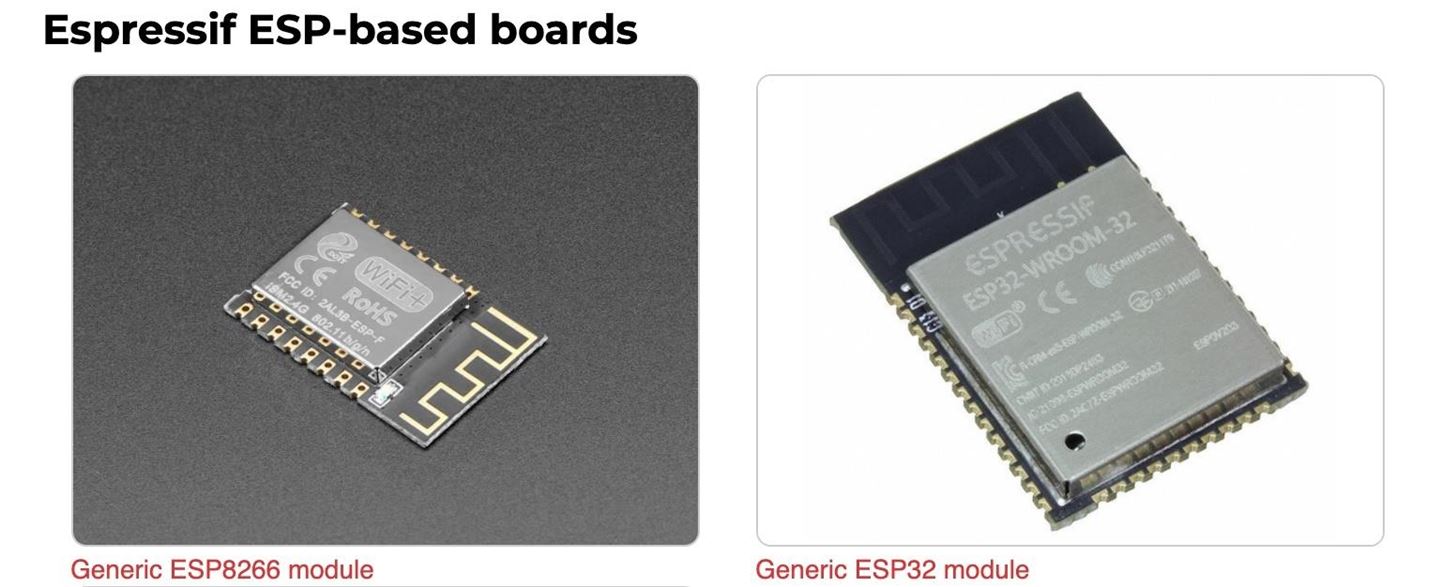
To get started with programming MicroPython on a microcontroller over Wi-Fi, you'll need an ESP8266 or ESP32 development board with Wi-Fi, such as one of these:
You'll also need a Micro-USB cable to connect your board to your Linux, macOS, or Windows computer. While we are going to be using the MCU over Wi-Fi, it will need to be set up first, so we need a cable to connect over the serial interface. Then, if you want your board powered up independently later, you can do so, and the easiest way is with a 5-volt adapter. And to protect your board's pins, you can get an optional breadboard.
- Micro-USB cable (to set everything up)
- 5 V power adapter (if powering via the Micro-USB port later)
- Solderless breadboard (to protect the board's pins)
Aside from the hardware, you'll also need the ESPtool installed on your system. If you followed our guide on getting started with MicroPython for microcontrollers, you should already have it. If not, see Step 1 there to get it installed.
- ESPtool (to erase and flash the board)
Step 1: Identify the Correct Serial Port
First, we need to find the serial address for the EPS8266, so plug your board into your computer, then run the command to see which serial port it's connected to.
On a Linux computer, like one using Kali, use the following to find the port of your connected ESP8266. From my results, it would be /dev/cu.wchusbserial14630.
~$ dmesg | grep tty

/dev/cu.Bluetooth-Incoming-Port
/dev/cu.SOC
/dev/cu.wchusbserial14630
/dev/cu.MALS
/dev/cu.usbserial-14630
On a Mac, use the following instead.
~% ls /dev/cu.*

/dev/cu.Bluetooth-Incoming-Port
/dev/cu.SOC
/dev/cu.wchusbserial14630
/dev/cu.MALS
/dev/cu.usbserial-14630
On Windows, you'll need to open your Device Manager to find the COM port under the "Ports (COM & LPT)" directory. We're not going to be showing any of the Windows steps below, so if you're using Windows and can't figure out the process, hit up the comments and we'll try and steer you in the right direction.
Now, again, the right serial address for me on Kali or macOS would be /dev/cu.wchusbserial14630, even though there is also /dev/cu.usbserial-14630 that's associated with the ESP8266. If you see two, always use the one with "wch" in it.
To know for sure if those are for your ESP8266, you can unplug the board and rerun the command to see the difference. If you plug the board back into another port, make sure to rerun the command to get the new address.
The address found will be the one we use when issuing commands.
Step 2: Download the Latest MicroPython Binary
To get MicroPython on your microcontroller, you'll first have to download the latest firmware based on the board you're using. Visit MicroPython's download page, find your board, and download the file. I'm using an ESP8266, so I'll use that one. But if you're using an ESP32, make sure to download that one instead. When you select your board, choose the .bin file for the latest stable release.
Step 3: Erase the Board & Flash MicroPython
To make sure there are no hiccups when flashing MicroPython to your MCU, erase the board first. Use the command below to do so, replacing my serial port with the serial port of your ESP.
~$ esptool.py --port /dev/cu.wchusbserial14630 erase_flash

esptool.py v2.8
Serial port /dev/cu.wchusbserial14140
Connecting....
Detecting chip type... ESP8266
Chip is ESP8266EX
Features: WiFi
Crystal is 26MHz
MAC: 2c:f4:32:4b:07:83
Uploading stub...
Running stub...
Stub running...
Erasing flash (this may take a while)...
Then, if you're using an ESP8266 microcontroller, run the following command to flash MicroPython over to it. Replace the .bin file at the end with the MicroPython binary you downloaded.
~$ esptool.py --port /dev/cu.wchusbserial14630 --baud 460800 write_flash --flash_size=detect 0 /Users/kali/Downloads/esp8266-20191220-v1.12.bin

esptool.py v2.8
Serial port /dev/cu.wchusbserial14630
Connecting....
Detecting chip type... ESP8266
Chip is ESP8266EX
Features: WiFi
Crystal is 26MHz
MAC: 2c:f4:32:4b:07:83
Uploading stub...
Running stub...
Stub running...
Changing baud rate to 460800
Changed.
Configuring flash size...
Auto-detected Flash size: 4MB
Flash params set to 0x0040
Compressed 617880 bytes to 402086...
Wrote 617880 bytes (402086 compressed) at 0x00000000 in 9.6 seconds (effective 514.5 kbit/s)...
Hash of data verified.

Leaving...
Hard resetting via RTS pin...
If you're using an ESP32, run the following command instead. Again, replace the .bin file at the end with the MicroPython binary you downloaded.
~$ esptool.py --chip esp32 --port /dev/cu.wchusbserial14630 write_flash -z 0x1000 /Users/kali/Downloads/esp32-idf3-20191220-v1.12.binOnce it's done flashing, you can confirm that it worked using the following command. If the output is similar, you're good. If you don't see anything, hit Enter a few more times to force it into action.
~$ screen /dev/cu.wchusbserial14630 115200

MicroPython v1.12 on 2019-12-20; ESP module with ESP8266
Type "help()" for more information.
>>>
Step 4: Download WebREPL
In our other guide, we showed how to use REPL (read, evaluate, print loop), the command-line interface for MicroPython on the board. That requires us to stay connected via cable, but there's also WebREPL, which requires no wires. You can download WebREPL via GitHub using the command below, or you can go to the live WebREPL version online.
~$ git clone https://github.com/micropython/webrepl.git

Cloning into 'webrepl'...
remote: Enumerating objects: 186, done.
remote: Total 186 (delta 0), reused 0 (delta 0), pack-reused 186
Receiving objects: 100% (186/186), 75.12 KiB | 1.06 MiB/s, done.
Resolving deltas: 100% (109/109), done.
Now, change into that directory and list its files. You should see the "webrepl.html" file. That's what you'll open to start communicating with your board. But don't open it yet — we have to set up WebREPL on the board first.
~$ cd webrepl
~/webrepl$ ls

FileSaver.js  README.md  webrepl_cli.py  websocket_helper.py
LICENSE term.js webrepl.htmlStep 5: Enable WebREPL in MicroPython
To make sure you can connect to your ESP8266 or ESP32 board, you'll need to configure WebREPL first. In a new terminal window, use screen again to connect to the board via the serial port. Again, replace the port with yours.
~$ screen /dev/cu.wchusbserial14630 115200

MicroPython v1.12 on 2019-12-20; ESP module with ESP8266
Type "help()" for more information.
>>>
Next, let's set up WebREPL using the following command. When asked, press E on your keyboard and hit Enter to enable it on boot.
>>> import webrepl_setup

WebREPL daemon auto-start status: disabled

Would you like to (E)nable or (D)isable it running on boot?
(Empty line to quit)
> e
Next, you need to set a password. I'll use the super-strong password "password" as an example (I hope you know I'm kidding), confirm the password, then type Y and Enter to reboot with WebREPL enabled.
- Don't Miss: How Hackers Create Strong Passwords
To enable WebREPL, you must set password for it
New password (4-9 chars): password
Confirm password: password
Changes will be activated after reboot
Would you like to reboot now? (y/n) y
...
Started webrepl in normal mode

MicroPython v1.12 on 2019-12-20; ESP module with ESP8266
Type "help()" for more information.
>>>
Step 6: Connect to MicroPython via WebREPL
On your computer, open up your Wi-Fi settings and connect to the MicroPython network. The password to connect is micropythoN (make sure to remember the capital N at the end).
Next, back in our /webrepl directory in the other terminal window, open that .html file you found earlier. In Kali, use:
~/webrepl$ xdg-open webrepl.htmlOn macOS, just use:
~/webrepl% open webrepl.htmlA browser window should open with the WebREPL client. You could also open the live WebREPL version from inside the browser, instead of via terminal. Once the client is open, click on "Connect" in the top left, then enter the password you set earlier, in my case, "password."
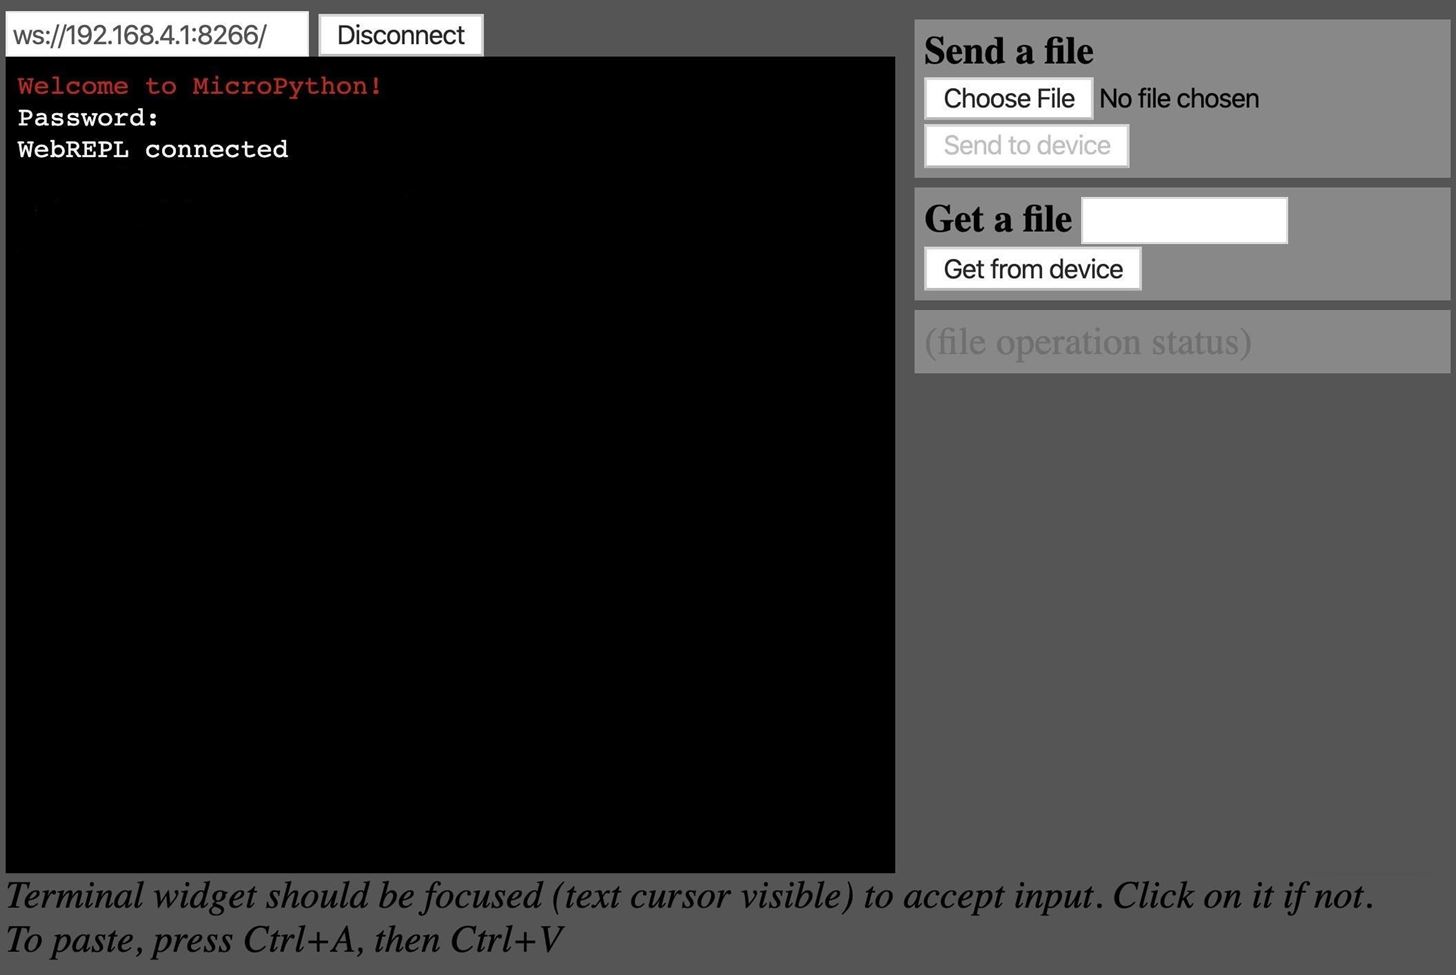
You should now be able to access the WebREPL interface for your board and upload or download code. On the right side, you can "Choose File" to pick a program, then hit "Send to device." To get a file from the board, use the "Get from device" option.
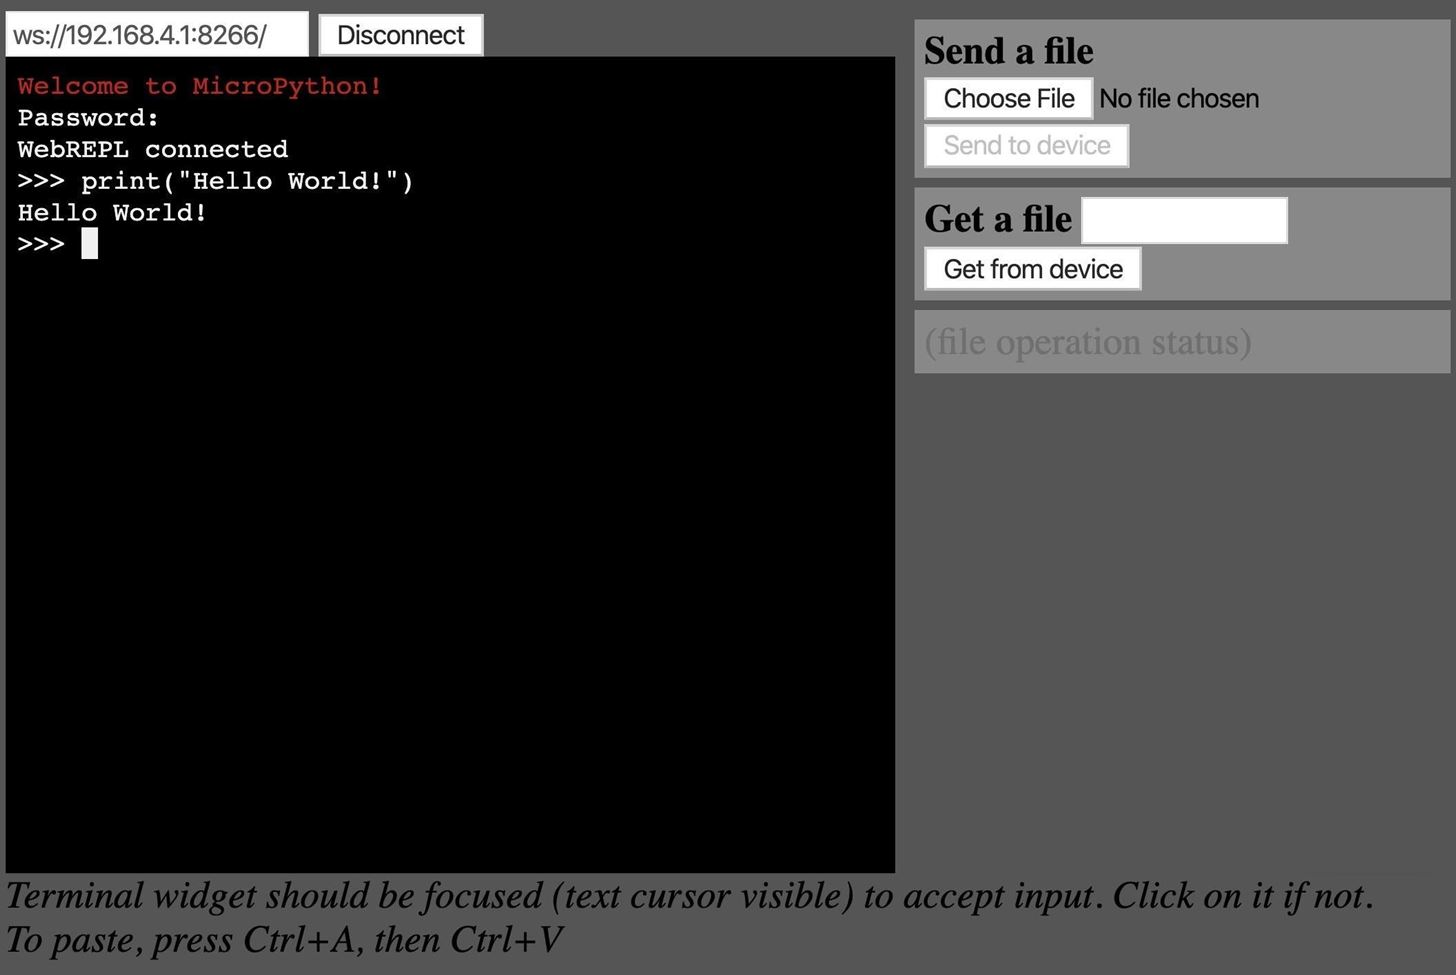
To prove that you have an active session, use the Hello World print out.
>>> print("Hello World!")

Hello World!
Great, now it's apparent that we can execute Python code from the command line on the microcontroller over Wi-Fi. Pretty cool, right? It's not encrypted or anything, but it's still an excellent way to both program and upload existing applications without any sort of cables connected.
Make Sure to Use a Strong Password
The web interface of MicroPython is an incredible way of interacting with a board that otherwise requires you to have a serial connection. However, best practices do apply when it comes to Wi-Fi security.
If you never change the default password and have MicroPython set up to be programmed that way, then somebody can take control of your board and embed all sorts of things in it. So make sure to change the default password as soon as you set it up. Otherwise, anybody can seize control of your MicroPython board.
Just updated your iPhone? You'll find new emoji, enhanced security, podcast transcripts, Apple Cash virtual numbers, and other useful features. There are even new additions hidden within Safari. Find out what's new and changed on your iPhone with the iOS 17.4 update.


Be the First to Comment
Share Your Thoughts