A Beginner’s Guide to Cleaning Your Camera Sensor
Yes, the beginning of this video was meant to be a funny, but shockingly extreme example of sensor dust. And it was removed very easily with the basic sensor cleaning technique described below.
Author’s Note: Your sensor is an expensive area of your camera. If you are unsure in any way or feel that you wouldn’t be able to clean it correctly, then do not clean your sensor and instead send your camera for professional sensor cleaning.
Sensor cleaning is not that hard and is something that every photographer may need to know how to do. For the best understanding, but sure to see the video as well which demonstrates the actual technique.
Dust that falls on your sensor generally appears in your photographs like this:
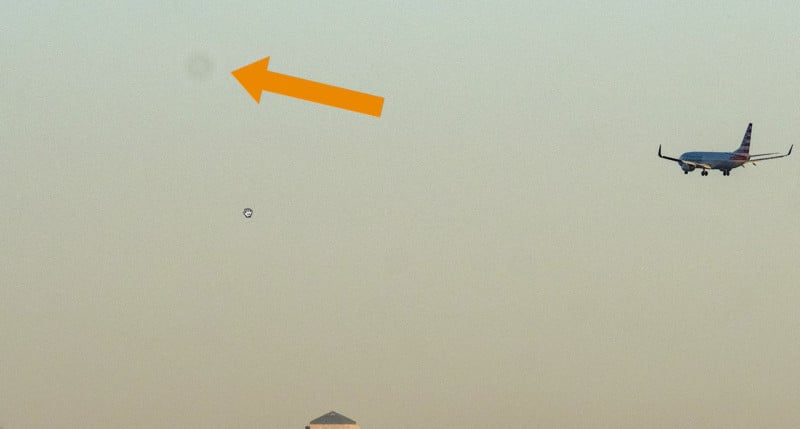
There is a simple test you can do to see if you have sensor dust problems already on your sensor:
- Point your camera at something bright white; you can even use your computer screen and a blank Google doc open. Or the cloudless sky if you prefer.
- Stop down your lens all the way as low as it can go to, say, f/11.
- Lower the ISO as much as possible.
- Take the photo and then open in Lightroom/Photoshop and have a look at it.
- If in Lightroom, click on the Spot Healing tool in the Develop module and then click the “Visualize Spots” checkbox at the bottom of the screen below your photo. Your sensor dust areas should appear white.
Tools Needed
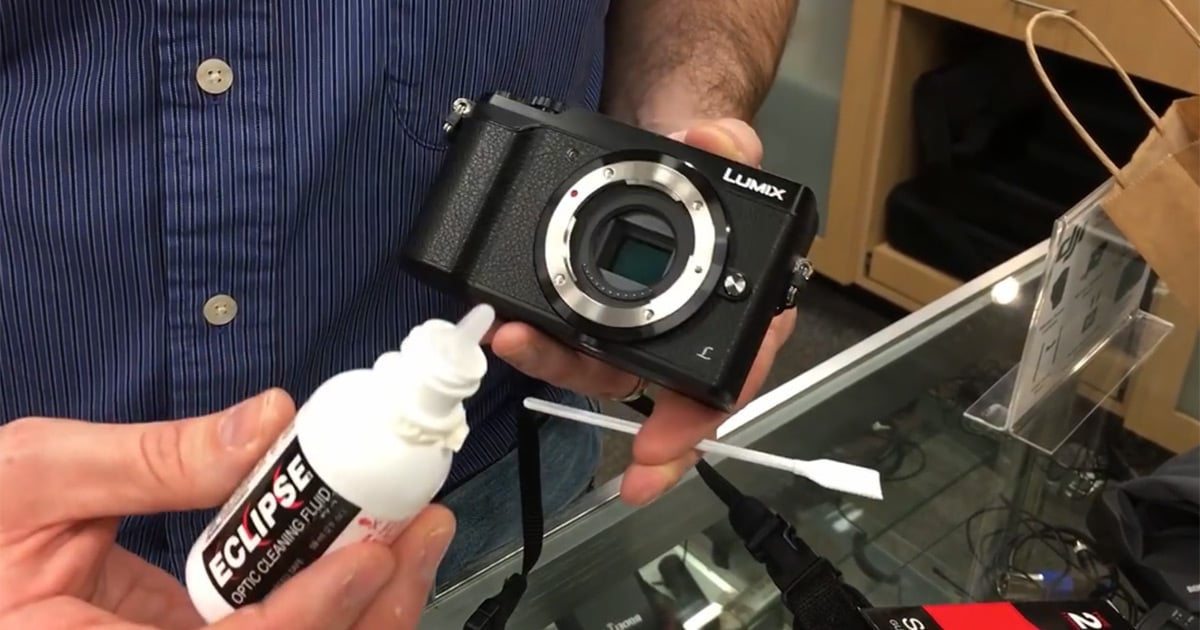
You will generally need three tools to clean your sensor:
- A professional air blower. A Giottos brand Rocket Air Blaster is great for this.
- A small bottle of special cleaning fluid. I use Eclipse optic cleaning fluid made by Photosol.
- Sensor swabs. These are important. The size you’ll need will depend on the type of camera you are cleaning. For Fujifilm cropped sensor mirrorless (as described in the video), you need Size #2. However, be sure to check with the sensor swab manufacturer website for the correct swab sizing for your particular brand of camera. As far as sensor swab brands, I use the Photosol brand and they work well for me.
You also want to find a dust-free area to clean. A kitchen or a brightly lit bathroom would be a better place to clean your sensor than, say, sitting on your couch.
You’re basically going to be using a swab and dragging it across your sensor in a straight motion. Don’t freak out about this. You’re never actually touching the sensor anyway – there is a piece of glass covering it.
If Your Camera Has IBIS
This one is important. If your camera has in-body image stabilization (IBIS), then you need to follow some additional steps, depending on the camera make/model. As a general rule, you want to prevent the IBIS mechanism from moving during the sensor clean.
Each camera brand has a different set of steps to turn off IBIS and ‘lock down’ the sensor during the cleaning. Some cameras may actually need to be left ON while the sensor is cleaned, while with others it should be turned OFF. Again, don’t skip this bit of research and extra steps that you should do before attempting to clean your IBIS camera sensor. If in doubt, then send it out for a professional cleaning.
You also always want to be sure you don’t accidentally engage the shutter mechanism.
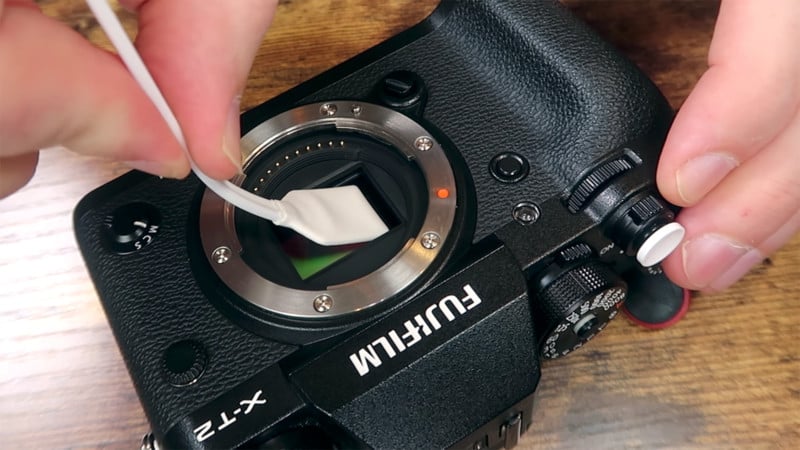
The Actual Cleaning
Before getting started, turn off your camera and remove the lens. Again, with IBIS cameras, you may need to leave your camera on — make sure you are following the correct instructions for your specific camera brand/model.
The video demonstrates the actual cleaning, but as a general guideline, after you remove your lens, you should first wipe your thumb around the lens mount. You don’t want any dust or junk there falling into your sensor, especially after you are done cleaning it. If your thumb is dirty after circling it around the mount, then mission accomplished with this step!
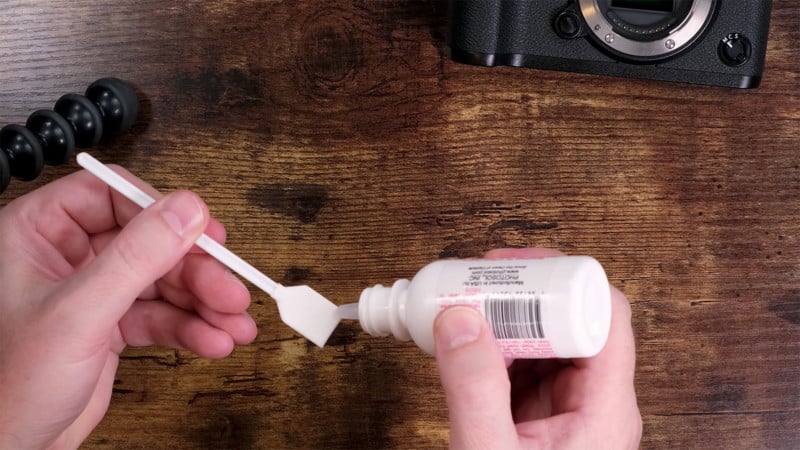
For the cleaning itself, you will be using the single-use swabs, and you should not use them more than one time. You want to add drops directly to the swab, NOT the sensor.
Don’t hold any of this over the camera as you may accidentally drip the fluid into the sensor! Instead, off to the side, put 1-2 drops onto the swab. I put one drop on one side, then flip the swab over and try to have the other one drop drag the edge of the swab. Avoid using more than 2 drops.
As soon as you’ve added the drops, immediately clean your sensor. The cleaning fluid evaporates very quickly. As mentioned before, you will be dragging your sensor swab across the sensor — first in one direction, then flipping it the other over and returning back to the side you started on.
Finally, you lift the swab directly up. If you are cleaning an IBIS camera, then you’ll generally want to use less pressure than you would with a non-IBIS camera. Please see the video for a demonstration of this technique.
Once finished, blow your sensor again with the professional blower and immediately put the lens or cap back on the camera. You’re all done! Now, you might want to take another photo, bring it back into Lightroom, and compare it with the first one you took before the cleaning to see how you did.
Worst case, you may need to perform a second cleaning. Don’t forget to throw away the swab; don’t reuse. If you need to do a second cleaning, then use another new swab.
At this point, you should be done. So give yourself a huge pat on the back and congratulations. It wasn’t as hard as you thought! And of course, never, EVER touch your sensor as I did in the video. Leave that sort of thing to crazy photography YouTubers.
As mentioned before, if any of this makes you squeamish, then you certainly have the option to send your camera in for a professional sensor cleaning. However, I think you got this! Good luck, and may your sensors always be sparkling bright and the odds be ever in your favor.
About the author: Chris Lee is a corporate photographer, technical trainer, video editor located in the Atlanta area who created the pal2tech YouTube channel last year. He recently woke up one morning and realized that he loves teaching photography even more than actually taking photos. We know… he still finds that hard to believe also.