Hello friends! I hope you have liked my previous article. Today am back with yet another interesting tutorial for handmade patchwork bags. Keep reading and let me know your thoughts.
You can use scraps from old fabric or any other bags.
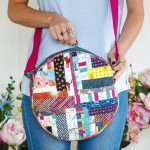
The finished tote will be around 10 ½ inch tall and 14 inches wide – without the handles.
You can add a zipper pocket inside if you want but that’s absolutely optional.
Now let’s get into sewing!

You will need:
- 32 squares of fabric, each strip of 5 inches or 64 fabric strips each 1 ½ inch x 5 inch and 32 fabric strips each of 2-inch x 5 inch
- 1/2 yd of fabric lining
- 1/3 yd of fabric for handle
- 2 pieces of quilt batting of around 15-inch x 15 inch
- 1/4 yd of fleece interfacing for the bag’s handles
- quilt basting spray
- if you want a fancy bag, you may buy interfacing for the lining
- Depending on your choice, you may buy zippers
Cut fabric strips:
Start with cutting 32 squares 5-inch x 5 inches from your fabric strips
Now cut each square to get:
- 2 strips of 1 ½ inch x 5 inch
- 1 strip of 2-inch x 5 inch
Pro tip: you may cut piles of 5 or 6 squares at a time to quicken up the process.
If you are using small scraps, you may cut 5 inches x 5 inches. Keep on cutting the strips until you have 32 strips each of 2-inch x 5 inches and 64 strips each of 1 ½ inch x 5 inches.
Sewing time:
- Sew all the 2-inch x 5-inch strips to make a 1 ½ inch x 5-inch strip. You can use the chain piecing sewing technique to do the process faster. And don’t worry, a little randomness won’t matter when the whole bag is ready.
After completion, you will find 32 sewn pieces along with 32 of 1 ½ inch x 5-inch leftover strips.
Press the seams to make them flat.
- Now sew the remaining 1 ½ inch x 5-inch strips.
Once again, you have every freedom to be random. Sometimes you may sew it to the wider strip and sometimes sew it to the narrower strip. Do as you desire.
Once the sewing process is complete, you’ll have 32 patchwork pieces. Now press the new seams just like the last time.
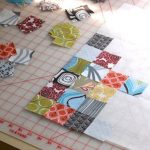
- Layer each side of the bag on top of a 15-inch x 15-inch piece of batting. Here I recommend you to use safety pins or quilt basting spray to keep the layers attached together.
- Quilt the layers together just as you want. There’s no hard and fast rule about it. I quilted a straight line with a walking foot but it’s your call.
If you don’t prefer quilting your bag sides, you can always use fusible fleece replacing the batting.
Let me know your thoughts on my tutorial. Happy quilting!