Whether you're a hobbyist or a professional photographer, you'll have to familiarize yourself eventually with using flash. After all, photography is literally a compound word combining the Greek words "light" and "drawing/writing", so there's no better way to master it than by gaining complete control of all light sources.
Flash photography isn't just using your camera's built-in flash—rather, you could use one or more flash units. You could also place them in different locations to achieve different effects.
Another way you can level up your flash photography is through lighting modifiers. So, what lighting modifiers should you use? And what effects do they have on your photos?
1. Bounce Card
As it says in the name, a bounce card is typically a white card that you use to reflect light from your flash toward your subject. This is the most basic light modifier, and most mid-range off-camera flashes and up, like the Canon Speedlite 430EX III-RT, have a built-in bounce card.
When taking a flash photograph, you usually point your main flash upward to avoid harsh light on your subject. Doing this will light up your subject with soft, ambient-like light. However, it will also introduce shadows on your subject's face.
This is where the bounce card comes in—it will redirect some upward light toward your subject to fill in the shadows. This removes shadows, usually found under the eyes, to deliver an evenly lit subject.

If your flash doesn't have a built-in bounce card, it's easy to make one yourself. A DIY bounce card is one of the easiest and most common digital camera hacks that won't break the bank.
2. Reflectors and Diffusers
Reflectors and diffusers are versatile tools that let you bounce and diffuse light from different sources. The most common reflector/diffuser combo is the 5-in-1 reflector, which is a diffusing screen that folds up like a fan. It also has a cover with white, black, silver, and gold sides.
These different materials (white, black, silver, gold, and diffused) allow you to light up your subject differently. For example, suppose you're shooting under the noontime sun. By placing the diffusion screen above your model, you instantly get soft light on them.
Shooting during the golden hour will give you dramatic lighting but also harsh shadows. You can use the silver reflector to add some fill light by reflecting some of the sunlight toward your subject.

This tool has so many uses that you need to know why every photographer needs a 5-in-1 reflector to know it all. The only downside is that you need an assistant (or a stand) to use it effectively.
3. Strobe Reflectors
If you're investing in serious studio photography gear, you've probably encountered the strobe light. This large powered light source delivers a lot of light, and most studio photographers use a strobe light to shoot better photos.
However, strobe lights usually light up an entire scene without any direction. You'd need a strobe reflector to control the light coming from it. Strobe reflectors also come in different shapes and sizes, depending on the effect you want to achieve.
These are the two most common types of strobe reflectors you can find in a professional studio:
- Standard Reflector: This is the most common reflector and usually comes included with strobe lights. It has a silver interior finish reflecting light effectively across your set. You can also attach several light modifiers to standard reflectors.
- Beauty Dish: This reflector is typically wider and shallower than standard reflectors. It also has a matte white interior and a dome over the strobe light's flash bulb. It's mainly used for beauty portraits because of the soft glow it throws to the subject.

You can find several other strobe reflectors, but they mainly vary by how much light they throw on your focus area.
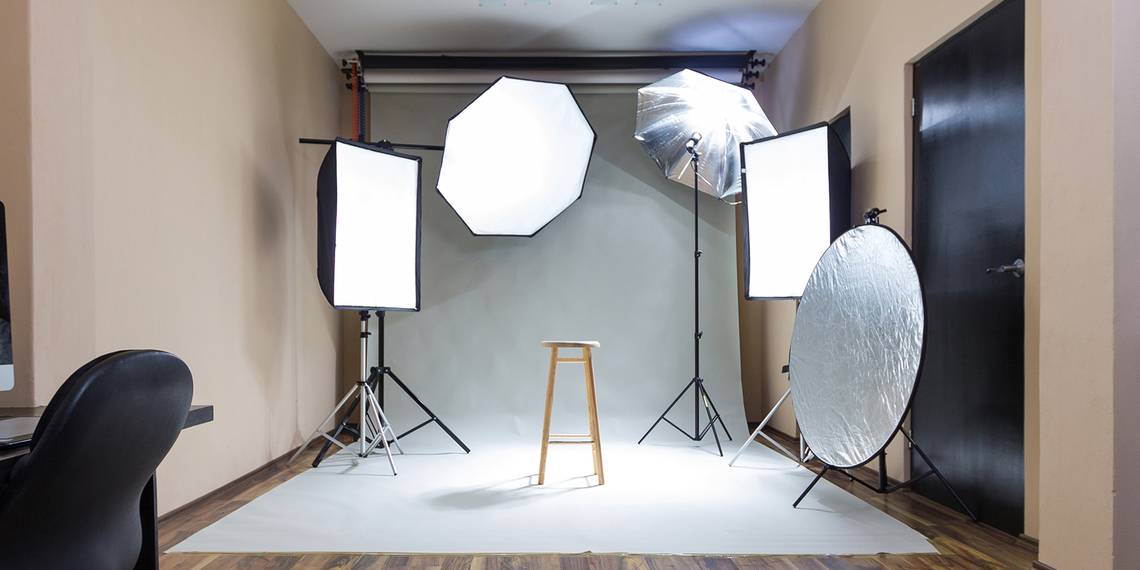
4. Softboxes
Most photographers say soft, natural ambient light is an excellent light source. However, you can't always get it because this usually requires a large window with no direct sunlight and a bright sunny day.
So, if you need a giant, soft light source from your strobe light, you should install a softbox. This emulates the large window light source, giving your subject a soft light that lights them evenly without producing harsh shadows.
Softboxes also come in different shapes and sizes. The most common one is the four-cornered softbox, which is shaped like a box. But you can also find eight-sided softboxes. This provides a larger area and a rounder shape, best for evenly lighting large scenes and setups.

But because of the many options, you should choose the suitable softbox for your photography setup. That way, you ensure you get the desired result in every scene you take.
5. Umbrellas
Umbrellas try to achieve the same effect as a softbox—deliver a soft and diffused natural light. However, softboxes give you more control over the light's direction, akin to a window. On the other hand, umbrellas throw light over a large area, emulating outdoor lighting.
If you watch the video above, you can see that the photographer used two umbrellas to light up the entire scene—one umbrella above the model to serve as the key background light and another as a fill light.

Another advantage of an umbrella is its affordability. It's one of the most affordable light modifiers. And if you're a little bit of a DIY-er, you can quickly build one by buying a white umbrella from your nearest department store.
6. Barn Doors
A more advanced way of controlling light is through barn doors. A barn door light modifier has four doors and attaches to your strobe light. You can then close the doors as needed, allowing you to control accurately where the light falls.

That means you can light a specific part of your scene or subject with no fall-off. Barn doors give you fine control of your light, letting you shoot dramatic portraits in your studio.
7. Snoots
A snoot is a cone-shaped light modifier that reduces the coverage of your light source and gives it a spotlight effect. It's similar to a barn door in that it lets you control where the light falls. However, it has a round shape, and you cannot control its size.

Because it limits the coverage of your strobe light, you can use the snoot as a rim light or hair light without fearing it will introduce unwanted shadows or reflections on your studio setup.
8. Grids
A grid isn't strictly a light modifier—instead, it's a modifier for your light modifier. As the name suggests, a grid is an attachment with a grid in front of it. You then attach it to your light modifier, like a snoot or softbox, to reduce the area it lights up.
Here's an example of what a grid does:

On the left side, the two flash units leak a lot of light into the background and even cause some lens flares. But by adding grids to the flash units, the photographer could limit the light's range, ensuring that it only lands on the model's hair.
Master Your Lighting for Better Photos
These light modifiers allow you to unleash your creativity. By controlling and mastering light, you can execute your vision exactly as you see it. Whether you're a serious hobbyist or are planning to go pro, these eight modifiers are must-haves in your photo studio.