How To Remove A Background In Photoshop: A Step-By-Step Guide
Photoshop is loaded with tools to aid with just about any kind of image adjustment you can imagine, from simple contrast sliders to entirely replacing the sky in a photo. So of course you can also use it to take the background out of an image, too.
Whether it's to swap in an entirely new backdrop or to isolate a specific visual element to use in a different project entirely, the process is relatively straightforward. But it does also sit somewhere in between the complexity of advanced photo editing techniques and retouching basics. Or at least it did until Adobe rolled out an automated background removal feature.
Before you get started, though, take a look at the image and assess it. Is there an adequate color distinction between the elements you want to separate? Are the edges of your subject clearly defined, or do they blend into the background a bit? If you have more than one image to work with, try to find one that suits your needs, but also makes Photoshop's job a little simpler — that way you may not have to spend as much time making small adjustments once the background has been taken out.
Removing the background from your image
The thing about Photoshop is that there are often multiple ways to perform any given task, and this is far from the only method you can use to remove an image's background. It is, however, the quickest and simplest approach.
- Locate and open the image you want to remove the background from. If the file has more than one layer, take care to select the image layer itself.
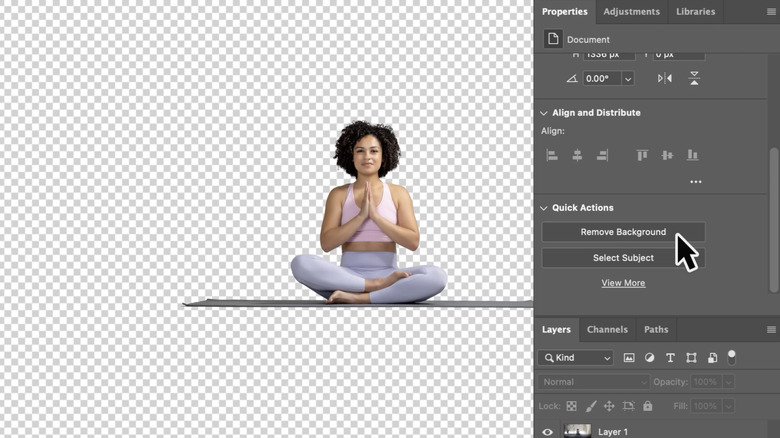
- Find the Properties panel on the right-hand side of the screen (it shares a pane with Adjustments and Libraries, so select the tab if necessary).
- Select Remove Background under the Quick Actions sub-menu.
- Note: If Remove Background doesn't appear in the Quick Actions menu, the image layer might be locked. Check the Layers tab and look for a padlock icon on the layer with the photo — and if you do see a padlock, click it to unlock the layer and check Quick Actions again.
- Once Photoshop finishes removing the image background (the process will take longer with larger files), select the Brush or Erase tool and manually clean up the edges around the subject.
- If you also want to add your own background image, drag and drop the new background into the canvas for your image with the removed background, then adjust the Layers so that the new background sits below the subject.
- If you plan to keep the background transparent, be sure to export your image to a format that supports transparencies (i.e. PNG and the like).
And that's all there is to it! Though because this process relies on automated background removal, it's possible that you may run into problems if there isn't enough visual distinction between it and your subject.
Another way to access the Remove Background tool
Using the Properties panel isn't required to use the Remove Background function, however, so if for any reason you don't see it (or prefer not to leave it up and stick with your own personal setup of panels you use more frequently), you can also use what Adobe calls the "Discover panel" which is a sort of enhanced search tool.
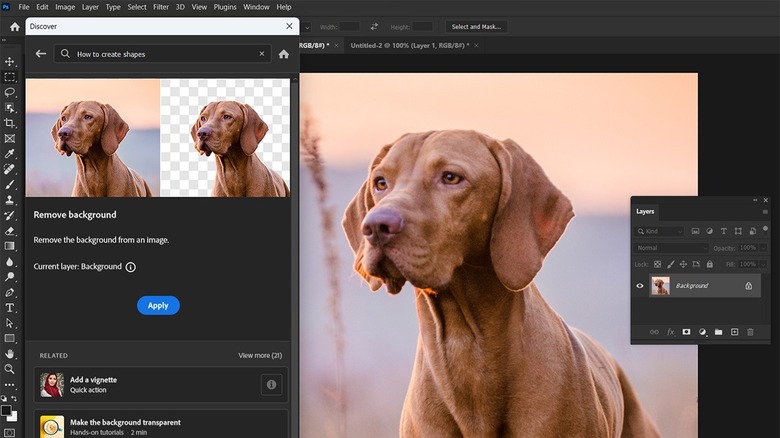
- Open the Discover panel by selecting the Search icon in the top-right corner of the screen.
- Note: You can also open the Discover panel by pressing Ctrl + F (Command + F on a Mac), or by selecting Help, Photoshop, then Help again from the top menu.
- From the Discover panel, select Browse followed by Quick Actions.
- Under Quick Actions, choose Remove Background and then Apply to confirm.
As before, the Remove Background tool may not provide an entirely clean outline of your subject — in which case you'll need to use the Brush tool to clean up the edges.