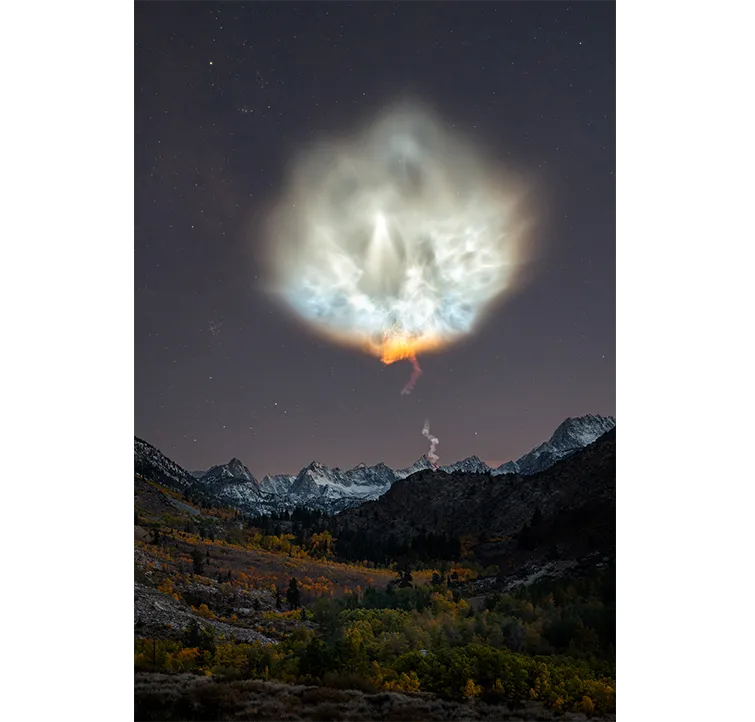
Having planned a trip to California’s Eastern Sierra region in autumn 2018, and after scouting around, I found some lovely aspen trees with autumnal colours near the mountain town of Bishop. The gorgeous snow-capped Sierra Nevada mountains provided a great backdrop for a skyscape photo and I knew it would look stunning in an image as the Milky Way became visible.
I was aware of a planned SpaceX rocket launch that evening, but I wasn’t sure of the direction, or if it would even be visible from up in the mountains.As the Sun set, I set my foreground exposure and left my camera in place.
More astrophotography tutorials:
- How to create an aurora panorama
- Create a mineral Moon astrophoto
- Beginner's guide to image processing
Towards the end of twilight, I was getting ready to capture the night sky when I suddenly saw a trail of light in my camera’s frame of view, rising up from the mountain and beginning to expand.
I quickly adjusted my settings and captured shots of the sky as the launch progressed. I couldn’t believe how lucky I was to witness the SpaceX launch in such a beautiful setting, in addition to having it happen directly in my camera’s view.
I was excited to return from the field to edit this amazing event using the techniques described here – in Adobe Lightroom and Photoshop – to combine my images.

3 tips for skyscape photography
- Make sure your tripod is stable so it doesn't move in between exposures.
- After using Photoshop’s Quick Selection Toolto mask your foreground layer, invert the mask in order to create your sky layer to save time.
- Ensure the transition from foreground to sky looks as realistic as possible to mimic a night shot.
For more tips, read our guide on how to photograph the stars.
Blend images to create your skyscape photo
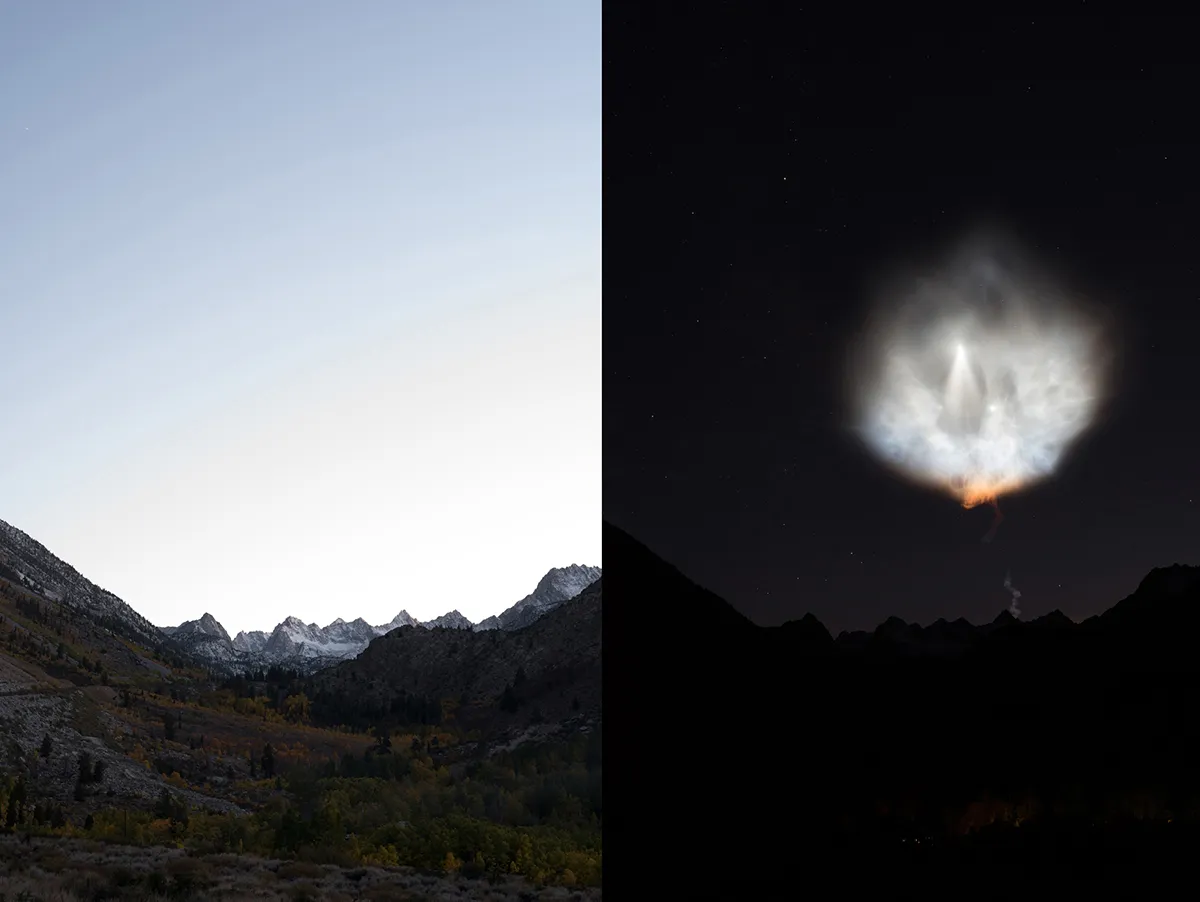
The first part of the process involves blending the two initial images (see below). To do this you select the foreground exposure captured at twilight, along with the night sky exposure for initial editing and load both images in Adobe Lightroom.
Here, you can make general changes to the overall Exposure, Contrast, Whites balance and Highlights and Shadows.

Since the foreground exposure is drastically brighter than the sky exposure, bring down the Exposure and Highlights for the foreground image to mimic what a night exposure would generally look like; and bring up the Exposure and Shadowsin the night sky shot to compensate for underexposure.
Once both images have been adjusted in Lightroom, they can be loaded in Adobe Photoshop for blending and final editing.
In this particular skyscape, the mountain range provides a hard line between the foreground and the sky, which makes it fairly simple to blend the two exposures.
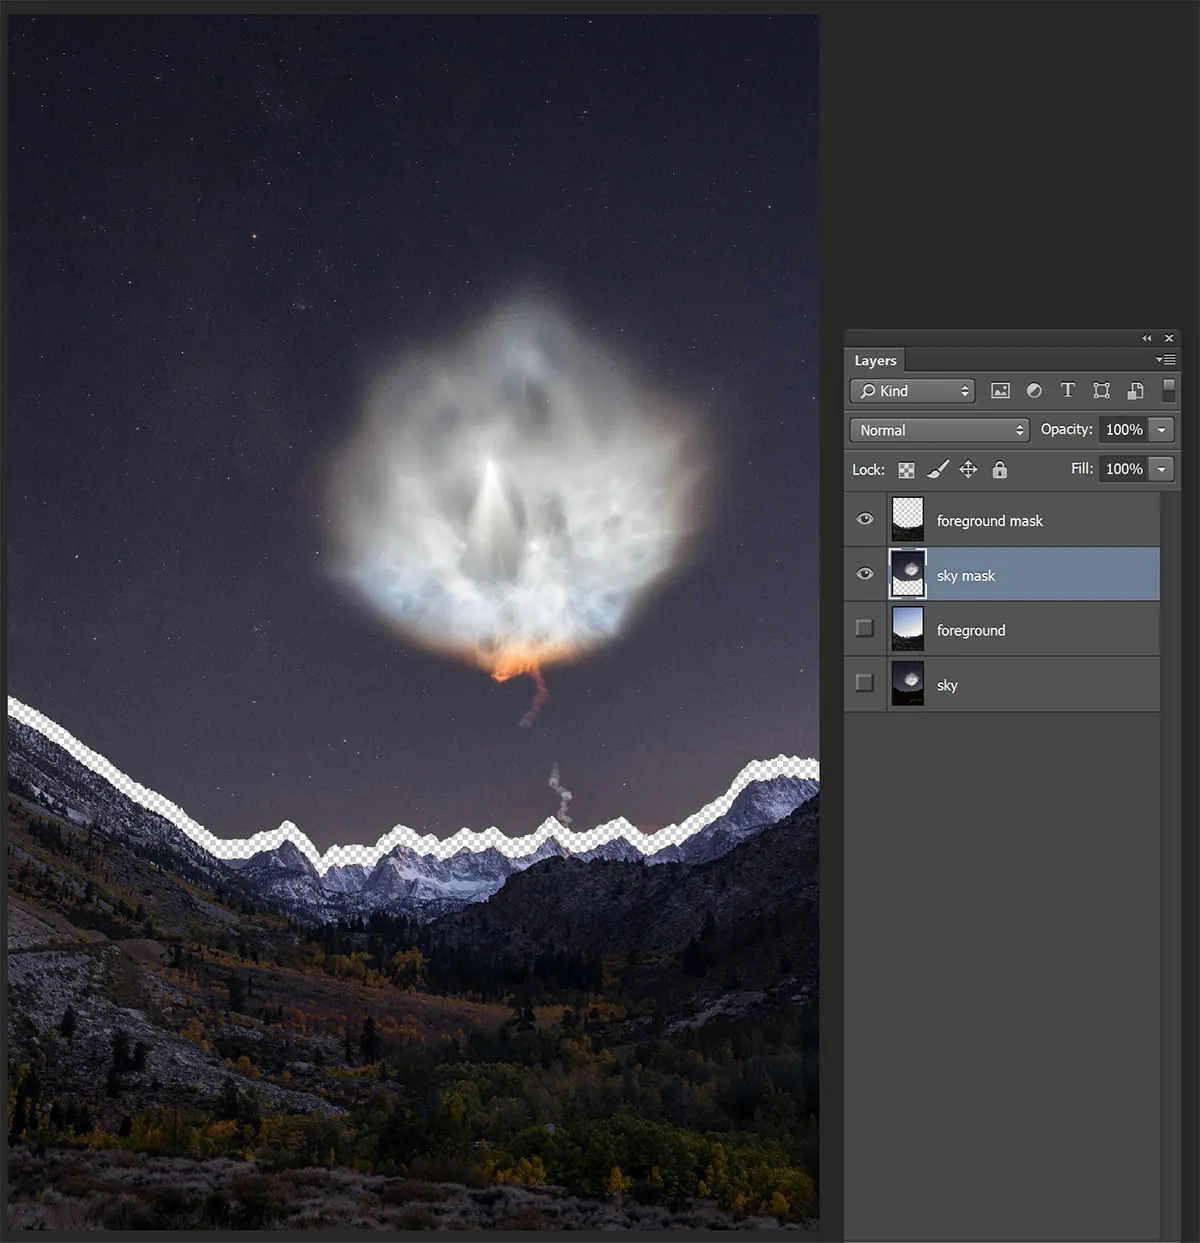
After layering both images, select the foreground exposure and use the Quick Selection Toolto outline the foreground below the mountain range.
Zoom in to 100% to make final tweaks to the ‘marching ants selection’– the area selected by a moving dotted line – to ensure a proper mask and to create a new layer for this selection.
Do the same with the sky layer by using the Quick Selection Toolto select the sky above the mountain range and create a new layer for this selection too.
Next, hide both the original layers leaving only the two new layers.

Use the Move Tool to line up both foreground and sky layers. If you did a careful job with the Quick Selection Toolboth layers will be seamless. If not, you might see a white gap between them.
At this point, you can go back and redo the layer masks or you can use the Clone Stamp Toolto carefully remove any white gaps.
To use the Clone Stamp Tool, zoom in to 100%, sample a portion of the sky close to the white gap and then brush over the gap, filling it in with the sky sample.
Once complete, your sky and foreground will be seamless. However, the exposure difference between both layers may still make the overall image look unnatural, so a little more processing may be required.
Make the finishing touches to your skyscape
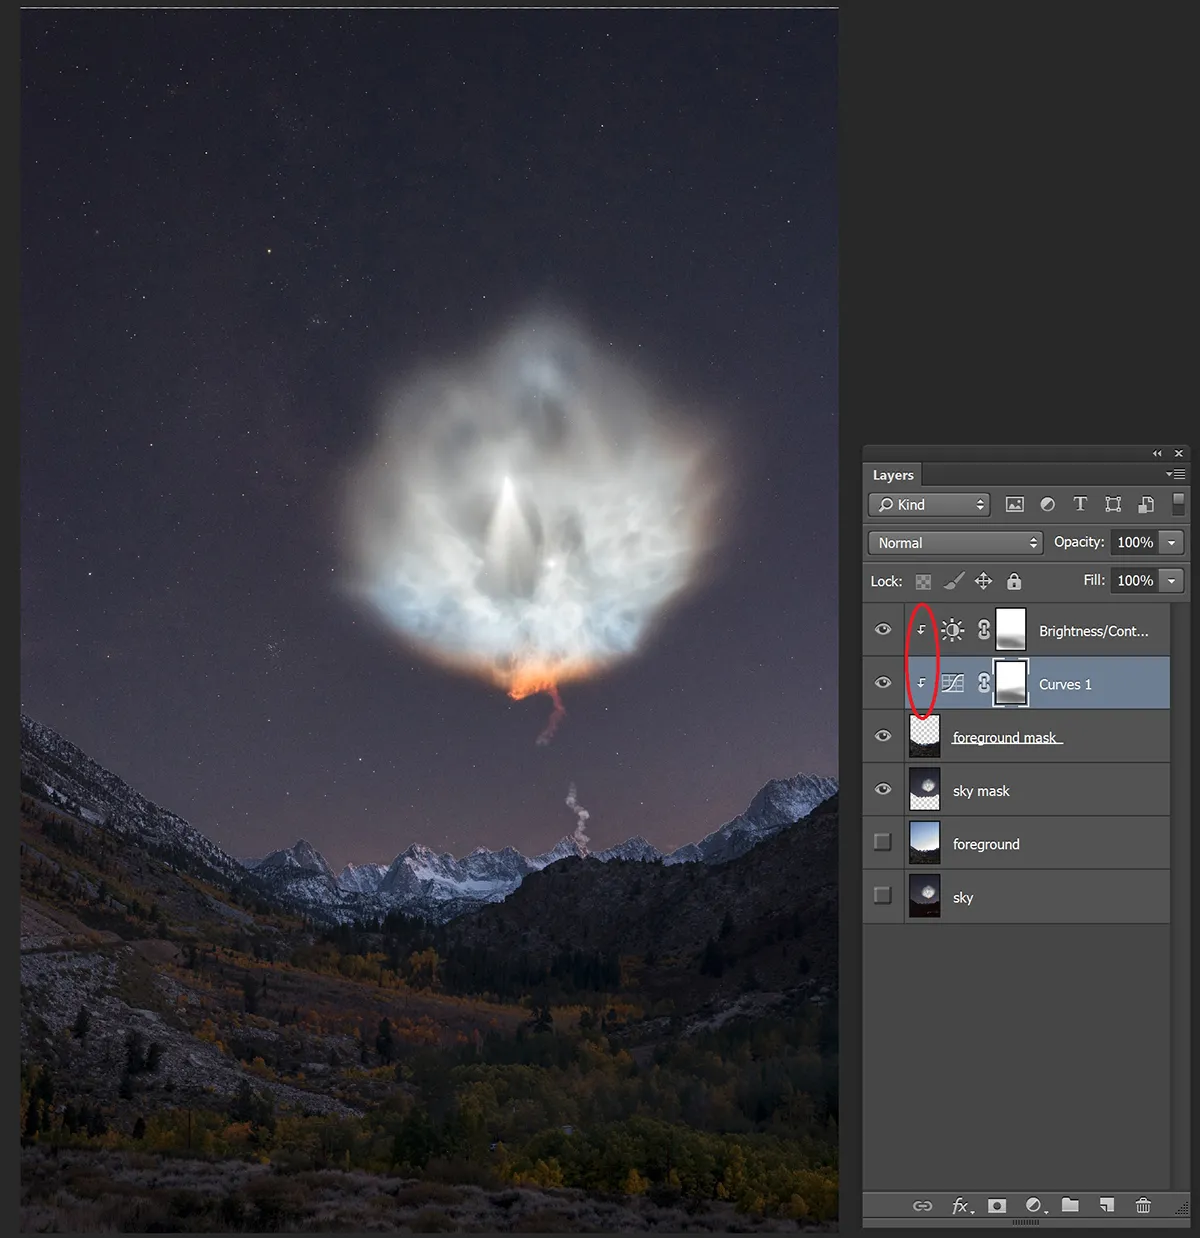
To adjust the foreground exposure, select your foreground layer and add both a Brightness and a Curves layer. Right click on each layer and select Create Clipping Mask, which will clip it to the foreground layer notated by the down arrow icon.
Decrease the Brightness and bring down the overall Curvesadjustment on each clipped layer until the overall exposure of your foreground matches the sky.
You may lose shadow detail by doing this, so create a layer mask for both the Brightness and Curves layers. Select the layer mask and use a black paintbrush to undo or paint back in the details until you are satisfied with how both combined exposures look.

From here, you are free to add final touches to your post-processing to suit your needs, which may consist of additional Contrast, using the Dodge and Burn tools to lighten and darken the image, noise removal (to remove unwanted artefacts), final sharpening, colour correction, Vibrance and Saturation, plus any final cleanup work such as removing hot pixels or sensor spots.
Have you managed to capture a stunning skyscape image? We'd love to see it! Find out how to send us your images or get in touch via Facebook, Twitter and Instagram.
Brandon Yoshizawa is a Los Angeles-based photographer who was highly commended in the Astronomy Photographer of the Year 2019 Skyscapescategory with ‘Flower Power’.
This guide originally appeared in the November 2020 issue of BBC Sky at Night Magazine.