In this video, we’re going to give a quick tutorial on how to use Photoshop’s Auto-Align and Auto-Blend features. We’ll be taking images captured in RAW from Nikon’s new D750 and a Rokinon 14mm f/2.8, processing them in Adobe Bridge CC using the SLR Lounge Preset system which just became available for Bridge / ACR, and then blending them quickly and effortlessly in Photoshop. The goal here is to create an extremely sharp image that includes detail at a very close distance (just a few inches from the lens), all the way to near-infinity. Watch the video below, or keep scrolling down for a brief written outline.
Focus Stacking For Maximum Depth of Field
The Original Raw Frames
As you can see in the 100% crops below, none of the images captured include perfect focus:

Even at f/13 on a 14mm lens, obtaining a sharp horizon / infinity and a sharp anemone at ~6-10″ away is not possible.
I could stop down to f/22, and maybe just barely pull it off, but the overall image would start to get a little softer anyway due to diffraction, thus making the point almost moot.

When focusing to get optimal sharpness on the closest subjects, the horizon gets too blurry.
Shooting Technique For Focus Stacking
By slowly racking focus from infinity to ~10″, I have a set of 4 images that offer me perfect sharpness throughout the entire image area.
The increments that you rack focus at can vary depending on your focal length, aperture, sensor size, and desired result. Sometimes you’ll need to create many more than just 3-4 images (especially if your lens is not as wide as 14mm!). I highly recommend performing your own tests with your own favorite landscape lenses!
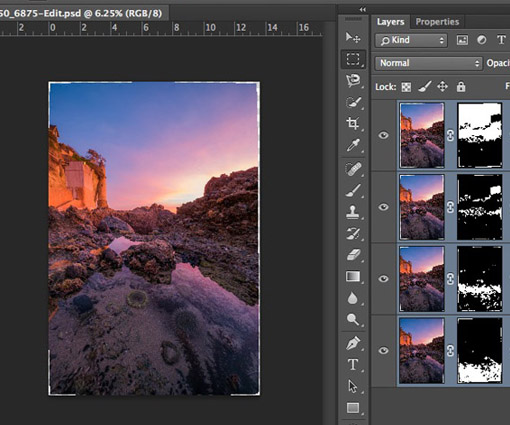
After preliminary post-production on the raw images in Adobe Bridge, we bring them into Photoshop, and layer them all together by simply cutting and pasting the last three images onto the first one. Next, don’t touch anything! Just go to Edit > Auto-Align Layers.
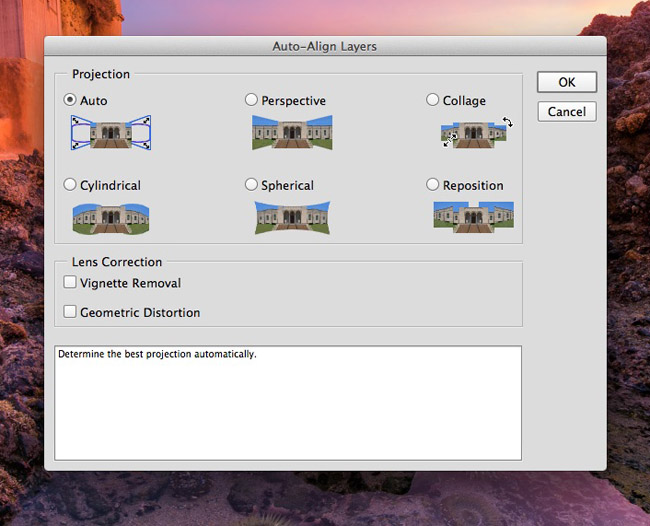
I usually leave it on “Automatic”, and sometimes I try it with Geometric Distortion turned on, sometimes off. I did it with it on in the tutorial video, but tried it again with it turned off and I liked the results better! Each scenario can be different, so when in doubt, see what both look like.
The next step is again to not touch anything, and just go to Edit > Auto-Blend Layers.
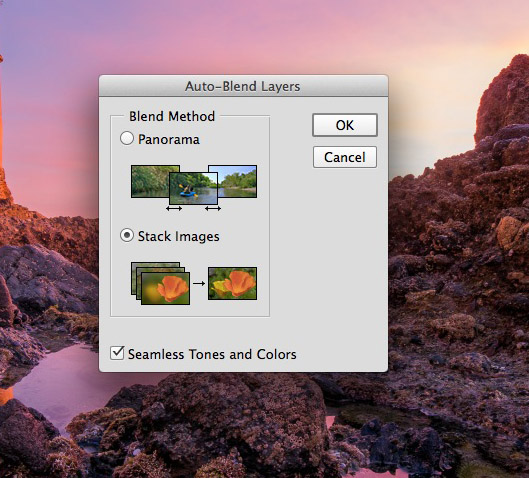
This process has really been perfected in the latest versions of Photoshop CC, and I’m continually impressed with how well it can work! Be sure to select “Seamless Tones and Colors” if it is un-checked.
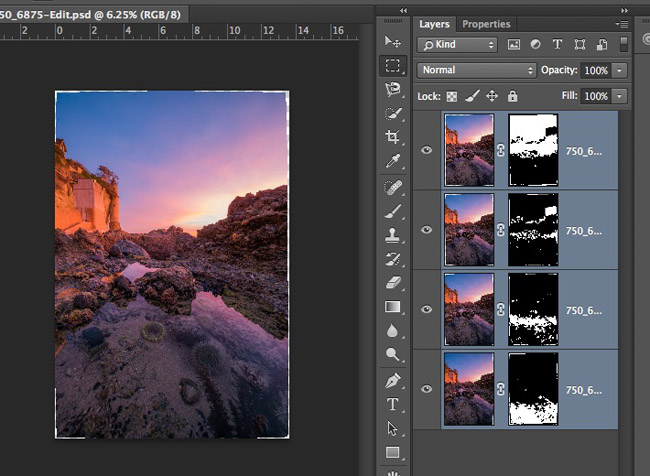
The results should look like this, with layer masks that reveal only the sharpest areas of the image, from the horizon to the foreground. Sometimes, areas of clear sky will get a little wonky, so zoom in and check those out for telltale errors in alignment. Ideally though, your tones should all match perfectly so there shouldn’t be any visible “seams” whatsoever.
Since the process is so easy and automated, once I check the layer masks for errors, (usually on hard edges), I’ll just flatten the image to save space on my computer, and save it as a LZW TIF file, or a PSD file. If you save your files as TIF, you’ll be able to re-edit them a little bit in Adobe Camera Raw, which comes in handy for me personally. (Anyone who uses Lightroom exclusively can save in either format, as LR is able to handle both).

Nikon D750, Rokinon 14mm f/2.8, FotoPro C5C Tripod
Dynamic Range: Single Exposure
Focus: Four-Image Focus Rack
Post-Production: Adobe Bridge CC / Camera Raw,
Vivid Base Foundation Preset & Dynamic Range +++
Minor Final Adjustments
The SLR Lounge Preset System – For Adobe Bridge and Adobe Lightroom
Our Lightroom Preset System V6 for Adobe Lightroom 5 has been met with incredibly positive response, and now it is finally available for Adobe Bridge and Camera Raw! Like the SLR Lounge Preset System v5.1, these new Camera Raw Presets are compatible with both Adobe Creative Cloud (CC) and CS6, but not CS5 or older.
[Click Here to Buy]
These presets are used in Adobe Bridge, and the Camera Raw interface of Adobe Photoshop.


Get Connected!