How to upgrade RAM in a Synology NAS
Your NAS will thank you.

The best Synology NAS enclosures make it straightforward to upgrade the RAM modules. Most NAS models released in the last three years feature upgradeable RAM, and if you're running into issues when multitasking on the NAS or need to use virtual machines, you can always increase the memory. And the best part is that it takes just five minutes to do so.
How to upgrade RAM in a Synology NAS
If you bought a NAS enclosure in the last three years, there's a good chance that it is running DDR4 memory. But just to be on the safe side, head to the product page of your Synology NAS to make sure whether the model you have is using DDR4 or the older DDR3 memory. Unfortunately, some models like the DiskStation DS220j don't let you upgrade the RAM, so make sure you have a NAS that has a memory slot available.
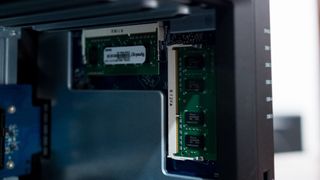
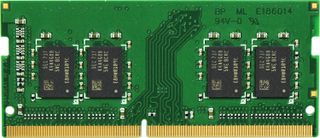
NAS enclosures have SO-DIMM (small outline dual in-line memory module) slots, and as the name suggests, these are smaller than the full-size memory slots that you usually find on desktops. Synology makes its own RAM module, but it is six times costlier than a similar module from another manufacturer. As such, there's no reason to pick up Synology's RAM module.
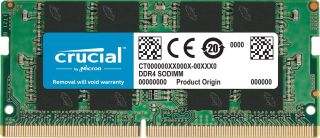
You can install any memory module in your NAS, and it will work just fine. My recommendation would be the Crucial 4GB SO-DIMM module; it delivers long-term reliability and goes up to 2400MHz — and you'll also find it in an 8GB version.
Now, the downside of using any other RAM module is that it isn't covered under warranty. So if you want to increase your NAS enclosure's memory and need to do it under warranty, you will have to get Synology's RAM modules.
You don't need a lot of RAM in your NAS, and most enclosures don't even utilize more than 6GB of memory. So if you are using a four-bay NAS or higher, you may want to go with an 8GB module. Otherwise, a 4GB RAM should be more than adequate. Here's how to upgrade the RAM in your Synology NAS:
- Power down the NAS.
- Take out the hard drive bays.
- Locate the RAM module slot. It's usually on the same side as the power button.
- If your NAS has a single RAM slot, remove the module already in that slot.
- Insert the new RAM module in the slot — make sure to line up the notch on the memory module to that on the slot.
- You'll hear a click, suggesting the module is now installed in the slot.
- Re-insert the Drive bays.
Once you power on the NAS, go to Control Panel -> Info Center to view the amount of RAM installed. The amount listed should reflect the size of the memory module you just installed.
Be an expert in 5 minutes
Get the latest news from Android Central, your trusted companion in the world of Android

Everything you need in a NAS
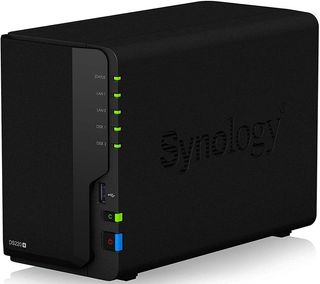
The DS220+ is the ideal home server. The 2-bay enclosure has great hardware backed by two Gigabit Ethernet ports, two USB 3.0 ports, and the ability to hold up to 32TB of storage. It should hold your entire media library, and you can easily stream files on all devices in your home via Plex.

A crucial component
Crucial makes some of the best memory modules available today, and this particular DDR4 RAM module is ideal for your NAS. It goes up to 2400MHz for the 4GB version and 2666MHz for the 8GB model, and the affordability combined with long-term reliability make it a great fit.

It's official
Synology's RAM module ensures you don't lose out on your NAS enclosure's warranty. So if you recently bought a NAS and need to increase the memory, the best way to do so is by going the official route. It is costlier than most RAM modules, but it's designed for use in a NAS, and you get to maintain the warranty of the enclosure.

Harish Jonnalagadda is a Senior Editor overseeing Asia at Android Central. He leads the site's coverage of Chinese phone brands, contributing to reviews, features, and buying guides. He also writes about storage servers, audio products, and the semiconductor industry. Contact him on Twitter at @chunkynerd.
